



Wheel studs
Note: This procedure is identical for both front and rear wheel studs.
Removal
1. Loosen the wheel nuts, raise the affected part of the vehicle and install reliable safety supports. Chock the wheels on the opposite side. Remove the wheel.
2. Remove the brake disc or drum (see chapter 9).
3. Partially screw the wheel mounting nut onto the stud being replaced. Press the stud out of the hub flange using a suitable tool (see Figure 21.3).
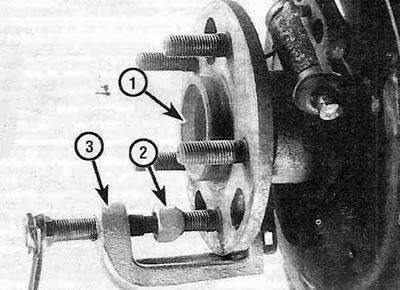
Figure 21.3. To press the stud out of the hub flange, use a suitable clamp:
1 - Hub flange;
2 - Nut screwed onto a stud;
3 - Clamp.
Installation
4. Insert a new stud into the hub flange from the back side and put a few flat washers on it, and tighten the nut on top (see figure 21.4).
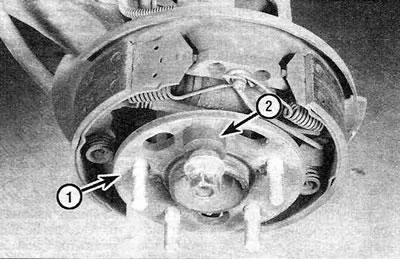
Figure 21.4. Install the spacer sleeve onto the stud and screw the nut on top, then tighten the nut until the stud is installed:
1 - Hub flange;
2 - Spacer sleeve.
5. Tighten the nut until the stud is properly seated on the hub flange.
6. Install the brake drum or disc. Install the wheel and tighten the nuts. Lower the vehicle and tighten the wheel nuts to the specified torque Specifications.