
Attention! The models covered in this manual are equipped with an assisted restraint system (SRS), known as «airbag system». To prevent accidental deployment of airbags, which could result in injury, be sure to deactivate the airbag system before working near its components (see chapter 12).
Removing
1. Turn the steering wheel so that the wheels are facing straight ahead. Turn the ignition key to the off position (OFF), then disconnect the ground wire from the battery (see paragraph 1 of chapter 5).
2. Pry and remove the small covers on each side of the steering wheel and loosen the Torx screws securing the airbag module to the steering wheel (pic. 16.2). Loosen each screw just enough to line up with the groove around the circumference of the hole.
Note. It is not necessary to unscrew the screws completely.
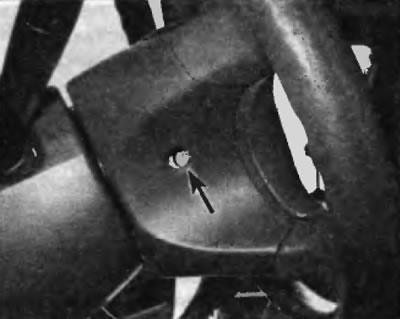
Pic. 16.2. Pry and remove the small covers on each side of the steering wheel and loosen the Torx screws securing the airbag module
3. Pull the airbag module out of the steering wheel and disconnect the module electrical connector (pic. 16.3).
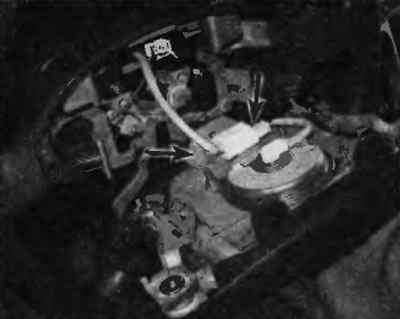
Pic. 16.3. Disconnect the electrical connector for the airbag modules
Attention! When carrying, hold the airbag module with the decorative cover facing away from you. Place the module in a safe, secure place with the decorative cover on top.
4. Remove the steering wheel nut, and then mark the position of the steering shaft relative to the hub (if the marking has not been previously applied or the previously made marks are not aligned), to simplify installation and maintain steering wheel alignment (pic. 16.4).
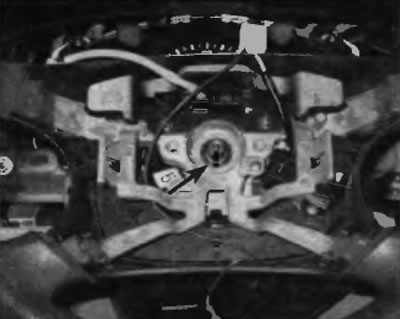
Pic. 16.6. Mark the steering wheel hub overlay on the steering shaft
5. Using a puller, disconnect the steering wheel from the steering shaft (pic. 16.5).
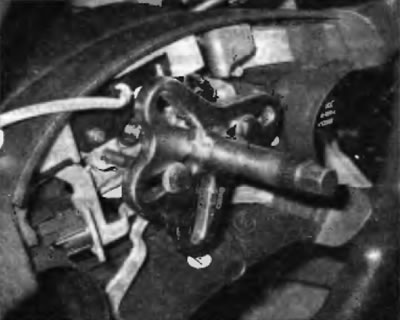
Pic. 16.5. Use a steering wheel puller
Warning. Do not knock on the shaft when removing the steering wheel.
If it is necessary to remove the coil spring, remove the steering column covers, disconnect the electrical connector and unhook the three hooks, and then remove the spring from the column.
Note. On 2003 and prior Lexus models, to remove the coil spring, remove the coil spring mounting hardware from the multifunction switch housing.
Installation
6. Point the front wheels straight ahead. Turn the coil spring counterclockwise by hand until you feel resistance. Turn the spring clockwise about two and a half turns and align the two arrows (pic. 16.6).
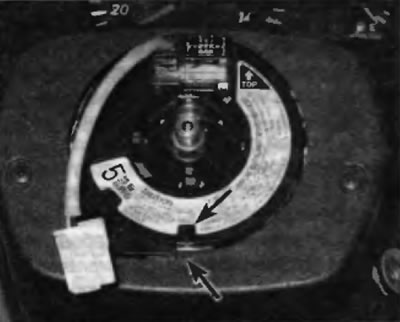
Pic. 16.6. To center the coil spring, turn it counterclockwise until you feel resistance. Turn the spring clockwise about two and a half turns and align the two small arrows (when properly centered, it should be possible to lengthen the rhino of the spring by approximately two and a half turns in each direction)
7. For installation of a wheel combine a mark on a nave of a steering wheel with a mark on a shaft and establish a wheel on a shaft. Screw on the nut and tighten it to the specified torque specified in Specifications at the beginning of this chapter.
8. Connect the electrical connectors of the airbag module and other electrical connectors. Make sure that the locking elements of the electrical connector are fixed on the module.
9. Install the airbag module and tighten the Torx screws to the specified torque as specified in Specifications at the beginning of this chapter.
10. Connect the mass wire to the battery (see paragraph 1 of chapter 5).