
Warning! Cars are equipped with security systems (SRS), including airbags and seat belt tensioners. Before carrying out work near the shock sensors, the instrument panel and the steering column, first disconnect the negative and then the positive terminals from the battery and wait 2 minutes. This will prevent unauthorized deployment of the airbags and deployment of the seat belt pretensioners, which could cause injury.
Remove the front bumper as follows:
Raise the car on a lift.
Remove the bottom mudguards.
On models prior to 2001, proceed as follows:
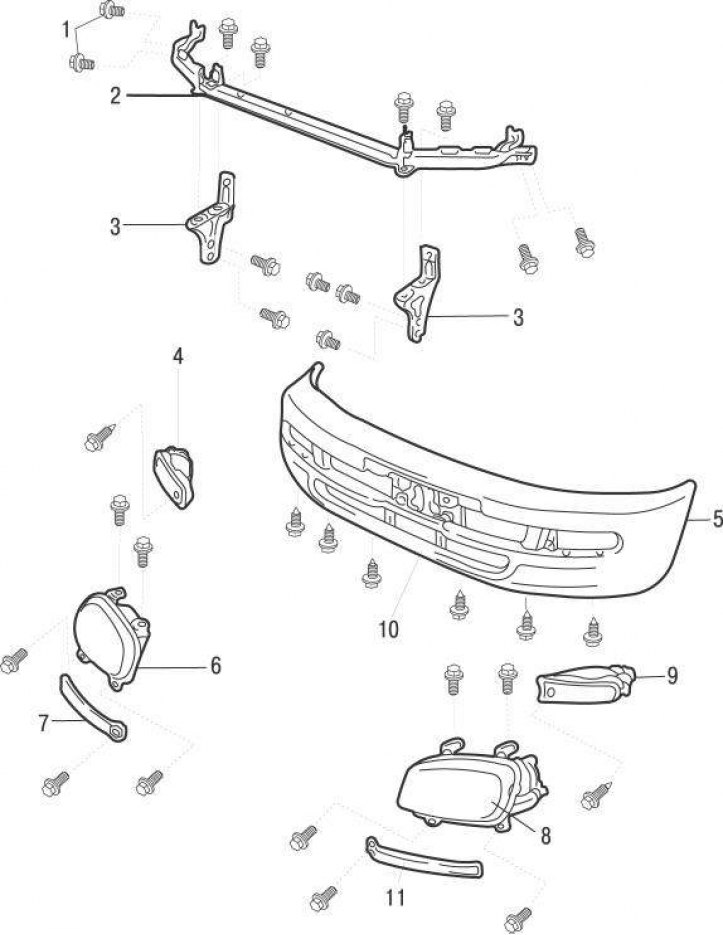
Pic. 14.5. Front bumper for 1996 and 1997 models: 1 - screws; 2 - front bumper amplifier; 3 - bracket; 4 – a lantern of the index of turn; 5 - decorative cover; 6 - headlight; 7 - decorative cover; 8 - headlight; 9 – a lantern of the index of turn; 10 - bumper; 11 - bracket
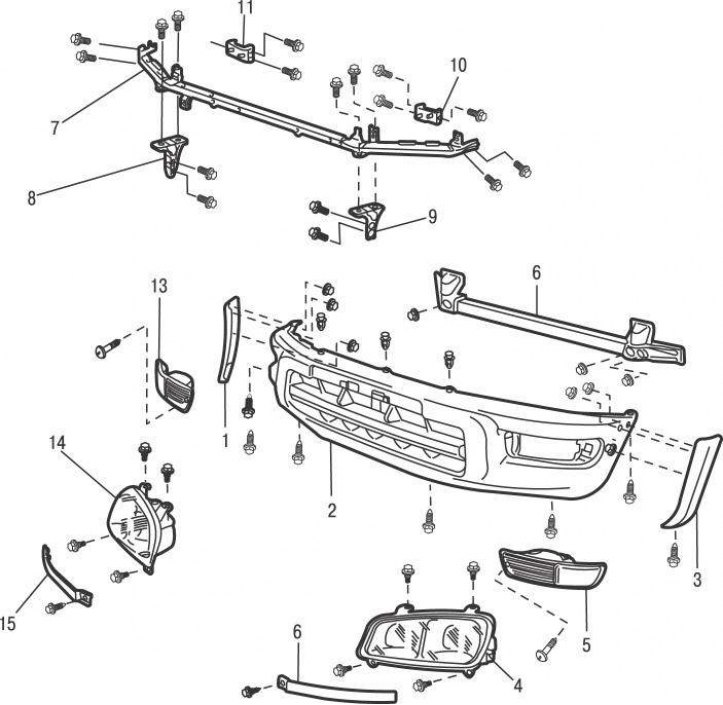
Pic. 14.6. Front bumper models from 1998 to 2001: 1 - decorative cover; 2 - bumper; 3 – a cover of a lateral extension of a bumper; 4 - headlight; 5 – a lantern of the index of turn; 6 - bottom bracket; 7 - front bumper amplifier; 8 - side bracket; 9 - side bracket; 10 - bottom bracket; 11 - the lower element of the stiffness of the bumper; 12 – a cover of a lateral extension of a bumper; 13 – a lantern of the index of turn; 14 - headlight; 15 - decorative cover
- remove the screws securing the top and sides of the bumper (pic. 14.5, 14.6);
- move the bumper forward, disconnect the electrical connectors from the direction indicators and remove the bumper from the car;
- if it is necessary to remove the front bumper reinforcement and brackets, first remove the headlights.
On models from 2001, proceed as follows:
- turn out screws of the top fastening of facing of a radiator;
- slightly tilt the lining forward and use a screwdriver to release the latches of the lower fastening of the radiator lining and remove it from the car;
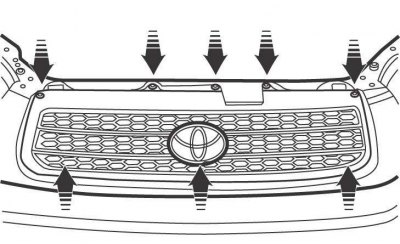
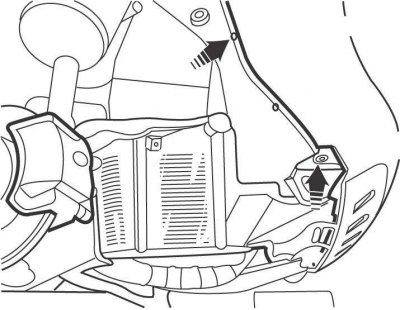
Pic. 14.17. Screw location (up) and clamps (at the bottom) radiator grille mountings on models from 2001
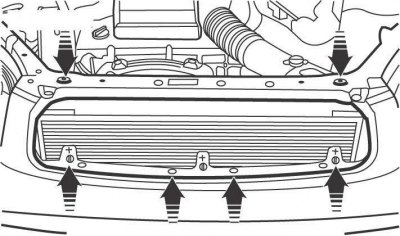
Pic. 14.7. An arrangement of screws of the top fastening and clamps of the bottom fastening of facing of headlights
- unscrew the top fixing screws (the top arrows in fig. 14.17), release the latches (bottom arrows in fig. 14.7) lower mounting and remove the headlight bezel panel;

Pic. 14.8. Releasing the side clips of the headlight trim panel
- pull the lining forward and use a screwdriver to press the side clips (pic. 14.8) and remove the headlight trim from the vehicle.
- unscrew the screws of the lower bumper mounting from under the car;
Pic. 14.9. An arrangement of screws of fastening of the bottom lateral parts of a forward bumper
- unscrew the screws securing the lower side parts of the bumper (pic. 14.9);
- unscrew the front part of the mudguards of the front wheel arches;
- unscrew the exposed screws securing the bumper to the front fenders and remove the bumper from the car.
Install in the reverse order of removal.