
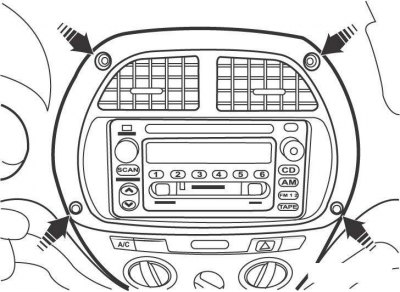
Pic. 14.51. The location of the screws for fastening the central lining of the instrument panel on models from 2001
On models since 2001, remove the screws and remove the center trim from the instrument panel (pic. 14.51).
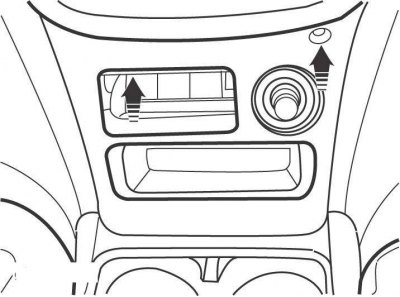
Pic. 14.52. The location of the screws for fastening the lower center trim of the instrument panel on models from 2001
To remove the lower center trim of the instrument panel on models from 2001, unscrew the screws and use a flat screwdriver blade to release the lower part of the trim from the instrument panel (pic. 14.52). In order not to scratch the instrument panel, wrap the screwdriver blade with adhesive tape or a rag.
On models prior to 2001, remove the instrument cluster visor and remove the control knobs from the heater/air conditioner control panel.
Also remove the screws securing the trim panel under the CD player or radio and remove the panel.
Using a flathead screwdriver, pry the bottom of the outer trim out of the instrument panel.
In order not to scratch the instrument panel, wrap the screwdriver blade with adhesive tape or a rag.
Disconnect the electrical connectors from the back of the outer trim and remove it from the vehicle.
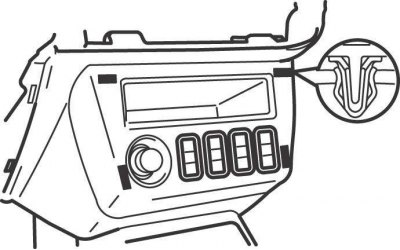
Pic. 14.53. An arrangement of fastening clamps of the bottom central overlay of the panel of devices on models till 2001
To remove the lower center instrument panel trim on models prior to 2001, remove the four clips and remove the trim (pic. 14.53).
Install the outer lining of the instrument panel in the reverse order of removal.