
Warning. Wear gloves when working inside doorways to avoid sharp metal edges.
Door latch
1. Raise the glass, then remove the door trim panel and waterproofing sheet (see paragraph 15).
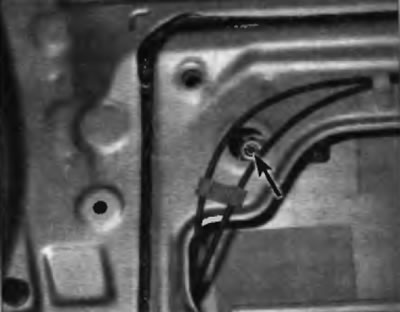
2. Working through the large access hole, unhook the links from the handle and lock cylinder (pic. 17.2). All lock rods are secured with plastic clips. The plastic clips can be removed by releasing the latch holding the link and then pulling the link out of its mounting hole.
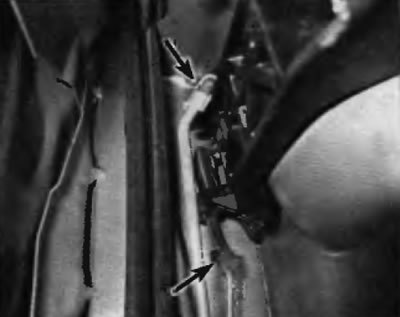
Pic. 17.2. Unhook the rods from the handle and lock cylinder
3. Disconnect the electrical connectors from the latch. Unhook the cables connecting the handle to the latch (see p.p. 11 and 12).
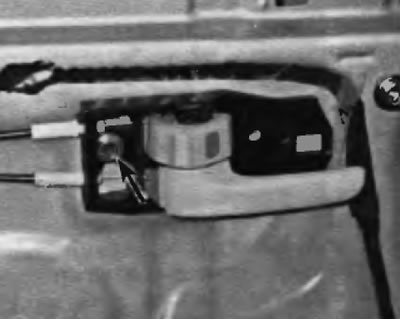
4. Remove the screws securing the latch to the door (pic. 17.4). Remove the latch assembly through the door opening.
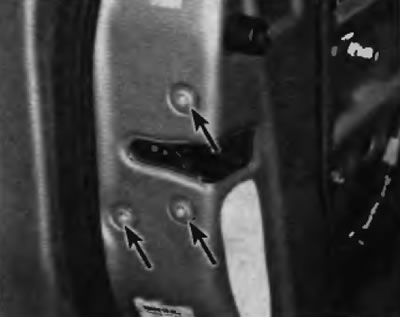
Pic. 17.4. Remove the screws securing the door latch
5. Installation is carried out in the reverse order of removal.
Outer handle and door lock cylinder
6. To remove the outer handle assembly with the lock cylinder, lift the glass and remove the door trim panel and waterproofing sheet (see paragraph 15).
Warning. Be careful not to scratch the paintwork on the outside of the door.
Putting a wide masking tape around the perimeter of the handle opening before starting the procedure can help avoid scratches.
7. Working through the technological hole, unhook the plastic clips of the rod connecting the outer door lock with the latch and the rod connecting the outer door handle with the latch (pic. 17.2).
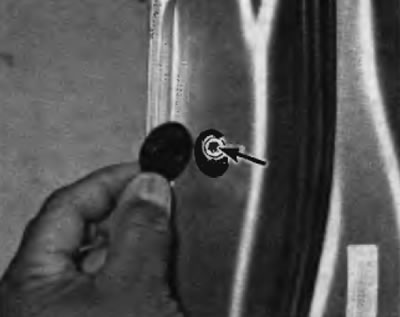
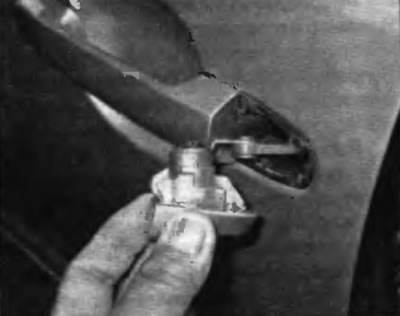
8. Remove the plug at the end of the door and unscrew the screw securing the lock cylinder. Remove the lock cylinder from the door and disconnect the electrical connector (in the presence of). Turn out bolts of fastening of the handle on the internal side of a door and remove the handle and a frame of the handle (pic. 17.8, a-c).
Pic. 17.8, a. To access the door lock cylinder bolt, remove the plug on the end of the door
Pic. 17.8, 6. Remove the lock cylinder
Pic. 17.8, c. Turn out a bolt of fastening of the handle of a door all parties of an internal aperture of a door
9. Installation is carried out in the reverse order of removal.
Interior door handle
10. Remove the door trim panel (see paragraph 15).
11. Remove the screw (s) fixing the handle and unhook the handle from the door (pic. 17.11).
Pic. 17.11. unscrew the screw securing the inner handle
12. Unhook the cables connecting the handle to the latch and remove the handle from the door (pic. 17.12).
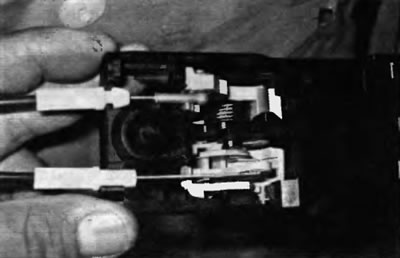
Pic. 17.12. Disconnect cables from inside handle
13. Installation is performed in the reverse order of removal.