
Highlander models and RX 300 models 1999-3003
2. Remove the center console trim panel (see chapter 11).
3. Remove the floor covering and the bottom section of the trim panel.
4. Disconnect the shift cable from the shift lever on the center console (see paragraph 3).
5. Disconnect the electrical connectors of the selector lever (pic. 4.5).
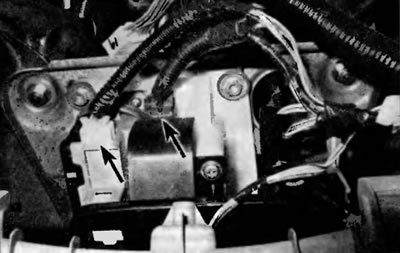
Pic. 4.5. Disconnect the electrical connectors at the selector lever assembly in the center console
6. Turn out bolts and separate the selector lever from the console (pic. 4.6).
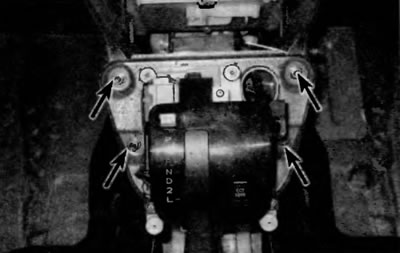
Pic. 4.6. Arrangement of bolts of fastening of the lever of the selector (2601 Highlander shown, similar for other models)
7. Installation is performed in the reverse order of removal.
RX 330 models 2004 and later
8. Remove the selector lever handle by turning it counterclockwise.
9. Remove the four clips, lift the console panel over the selector lever and remove it.
10. Remove the two clips and remove the trim panel from under the audio unit.
11. Remove the side door trim panels and sill trims from the right and left front door openings (see chapter 11).
12. Remove the center console trim panel (see chapter 11).
13. Remove the cover of the storage compartment («original source»).
14. Remove the floor carpet and trim panel bottom section (see chapter 11).
15. Disconnect the shift cable from the selector lever on the center console (see paragraph 3).
16. Disunite electric sockets of the selector lever.
17. Turn out bolts and separate the selector lever from the console.
18. Installation is performed in the reverse order of removal.