
Attention! Models covered in this manual are equipped with an assisted restraint system (SRS), better known as «airbag system». To prevent accidental deployment of airbags, which could result in injury, be sure to deactivate the airbag system before working near components of the airbag system (see chapter 12). Do not use an uninterruptible power supply to save PCM memory or audio system settings while working on or near airbag components.
Description
1. Shift lock system depending on the position of the brake pedal (BTSI) includes two electromagnetic devices. One of them is installed next to the ignition key lock cylinder, the other is located on the selector lever assembly under the center console. The solenoid mounted on the selector lever is also equipped with a shift lock module that receives information from the brake pedal switch sensor and the transmission range sensor (TR) for correct activation of the key removal lock solenoid (on the ignition lock cylinder), and the gearshift blocking module (on the selector lever console). The shift lock module locks the selector lever in the P position when the ignition key is in the lock position (LOCK). When the ignition key is in the working position (RUN), the blocking electromagnetic device is activated. When the system is working correctly, the only way to unlock the selector lever and move the lever out of position P is to depress the brake pedal. The BTSI system also prevents the ignition key from turning to the lock position if the selector lever is not fully in the park position (R).
Examination
2. Make sure that the key can only be removed from the ignition in position P.
3. When the selector lever is in position P, it should be possible to turn the ignition key from the off position (OFF) to the lock position (LOCK). But when the lever is in any position other than P (including neutral position), turning the ignition key to the LOCK position should not be possible.
4. When the ignition key is in the off position (OFF), it should be impossible to move the selector lever out of position P.
5. When the ignition key is in the run position (RUN) or start (START), it should be impossible to move the selector lever out of the P position, order not to depress the brake pedal.
6. When the ignition key is in the accessory position (ACC) or blocking (LOCK), it should be impossible to move the selector lever out of position P.
7. After switching on the gear, with the ignition key in the work position (RUN) it must be possible to move the selector lever between gears or put it into neutral without depressing the brake pedal.
6. If the BTSI system does not work as described, try adjusting it as described below.
Replacement
9. Disconnect the ground wire from the battery (see paragraph 1 of chapter 5).
Key removal lock solenoid
10. Remove the steering column covers.
11. Get to the ignition lock cylinder and disconnect the electrical connector of the key removal lock solenoid.
12. Turn out screws of fastening of an electromagnet of blocking of removal of a key (fig 5.12) and separate the solenoid from the ignition lock cylinder.
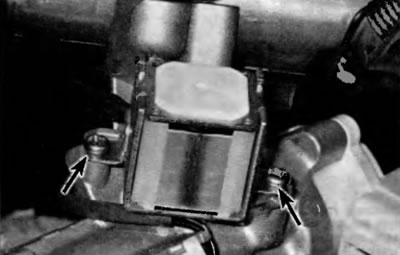
Pic. 5.12. The location of the screws for fastening the key extraction lock solenoid
13. Installation is carried out in the reverse order of removal.
Shift Interlock Module
Highlander and RX 300 models 1999-2003
14. Remove the selector lever assembly (see paragraph 4).
15. Disconnect the console backlight electrical connector (pic. 5.15).
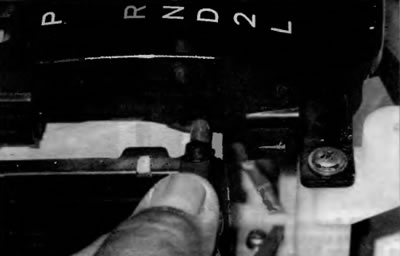
Pic. 5.15. Turn the console light connector counterclockwise and remove it from the side of the base of the range indicator
16. Separate the overdrive wiring harness pins from the main electrical connector (pic. 5.16).
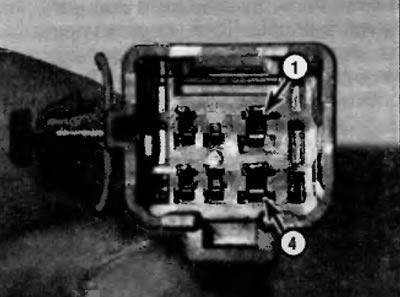
Pic. 5.16. Using a watch screwdriver, separate pins 1 and 4 from the back of the electrical connector and remove the two-wire wiring harness
17. Remove the two set screws. And remove the handle from the selector lever (pic. 5.17).
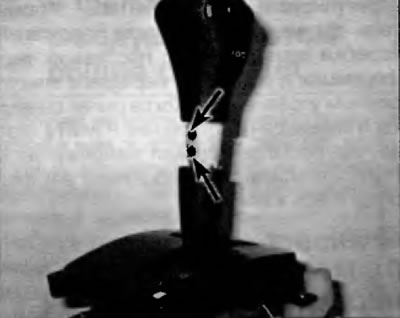
Pic. 5.17. Remove the two set screws and remove the handle from the selector lever
18. Turn out screws of fastening of the basis of a cover of the index of the chosen range (pic. 5.18).
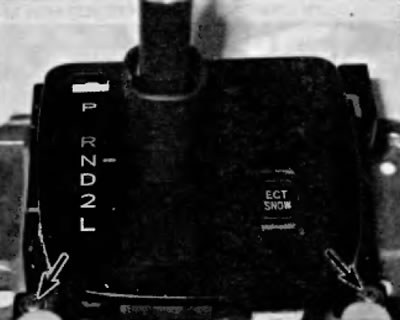
Pic. 5.18. Align the screws securing the base of the indicator covers of the selected range
19. Turn out screws of fastening of the module of blocking of a gear change (pic. 5.19) and separate the module from the node.
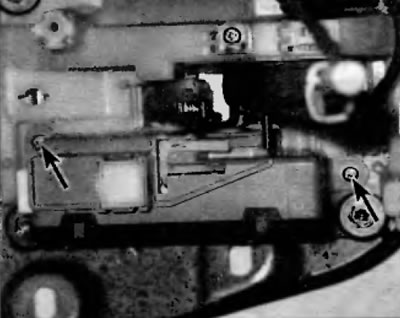
Pic. 5.19. Location of screws securing the shift lock module (2001 Highlander model shown, similar for other models)
20. Installation is carried out in the reverse order of removal.
RX 330 models 2004 and later
21. Remove the selector lever assembly (see paragraph 4).
22. Remove the console backlight connector.
23. Remove the selected range indicator cover.
24. Remove the bottom section of the selected range indicator housing.
25. For a multi-mode selector lever, separate the wiring harness pins from the main electrical connector (pic. 5.25).
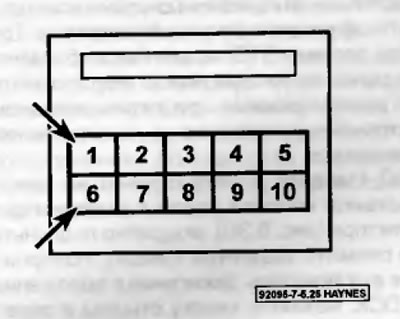
Pic. 5.25. Using a watch screwdriver, separate pins 1 and 6 from the reverse side of the connectors and remove the wiring harness
26. Turn out screws of fastening of the module of blocking of a gear shift and separate the module from knot.
27. Installation is carried out in the reverse order of removal.
Transmission range sensor (TR)
28. The transmission range sensor has a built-in park gear detection function (R) /neutral position (N), as well as a reversing light switch and a source of information for the PCM about the range selected in the gearbox. The park gear/neutral position detection function prevents the engine from starting in any range other than P or N. If the engine starts when the selector lever is in a position other than P or N, adjust the switch. In addition, the transmission position switch is the information provider for the electronically controlled transmission. When the selector lever is moved to the P or N position, this sensor sends a voltage signal to the PCM. For a description of the replacement procedure, see chapter 6.
Shift lock cancel function
29. In the event that the gearshift lock system, depending on the position of the brake pedal (BTSI) fails and the selector lever cannot be removed from the gear position, the system is equipped with a lock-out function. The BTSI system can then be bypassed and the selector lever can be used in manual mode with the parking brake applied and the engine off.
30. Locate the cancel button on the center console next to the selector lever (pic. 5.30), gently pry and remove the protective cover, turn the ignition switch to the LOCK position, press the override button and move the selector lever to the neutral position.
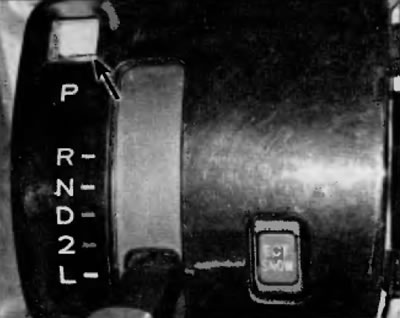
Pic. 5.30. Location of the shift lock override button on a 2001 Highlander; similar on other models