Company Honda Company Ford Company Skoda Company Kia Company Mazda Company Mercedes Company Renault
English Русский
Български
Беларускі
Український
Српски
Hrvatski
Română
Polski
Slovenský
Magyar
Bookmark Articles Sitemap Contacts
ToyotaMan.ru


Camry Corolla Corona Carina Land Cruiser Highlander 4Runner RAV4 Others
Highlander 1 (2000-2007, petrol)

Gear Shift Cable — Replacement and Adjustment [Toyota Highlander XU20]

  • Main
  • Highlander
  • XU20 (2000-2007)
  • Transmission
  • Automatic gearbox
  • Gear Shift Cable — Replacement and Adjustment
0
Contents: Replacement ↓ Adjustment ↓
Caution: On Lexus models, access to the shift cable for replacement requires removal of the fascia and heater/air conditioning control panel (see chapters 11 and 3).


Replacement


1. Disconnect the ground cable from the battery (see paragraph 1 of chapter 5).

2. Remove the center console trim panel (see chapter 11).

3. Remove the floor carpet and center lower section of the fascia trim (see chapter 11).

4. Remove the battery and battery tray (see chapter 5).

5. Remove the air filter housing and air intake ducts (see chapter 4).

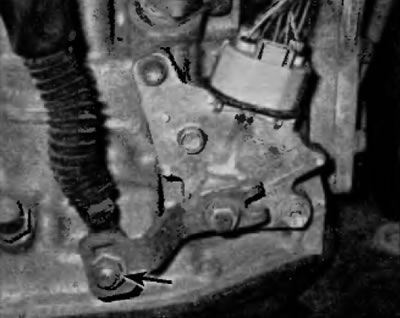
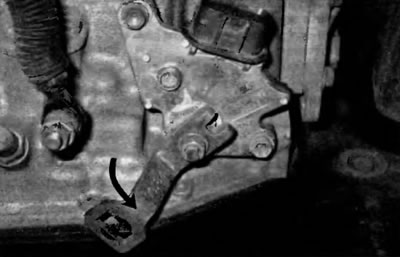
6. Disconnect the gear shift cable from the manual lever on the gearbox (Fig. 3.6).


Fig. 3.6. Loosen the nut and disconnect the gear shift cable from the hand lever on the side of the gearbox


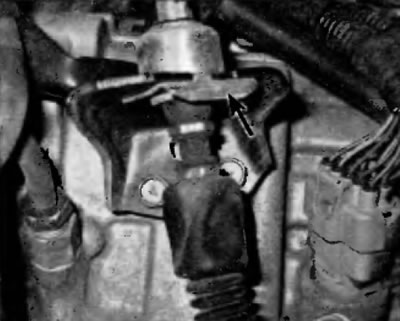
7. Remove the large C-shaped cable clamp (Fig. 3.7) from the bracket located on the side of the transmission.


Fig. 3.7. Remove the large C-clamp cable from the bracket on the side of the transmission


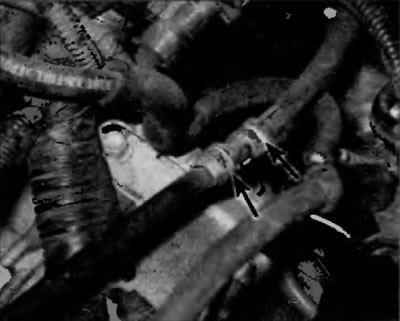
8. Remove the gear shift cable from the wire support (Fig. 3.7).


Fig. 3.8. Remove the gear shift cable from the wire support located on top of the gearbox


9. On Lexus models, remove the air conditioning unit (see chapter 3).

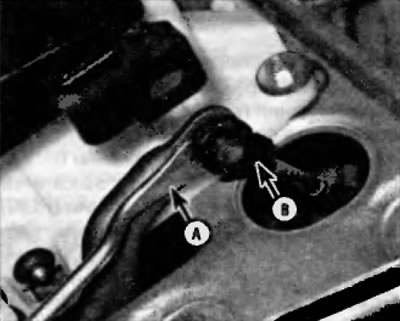
10. Disconnect the gear shift cable from the gear shift lever on the center console (Fig. 3.10).


Fig. 3.10. Use trim remover (A) to separate the shift cable from the gearshift lever (B) on the center console


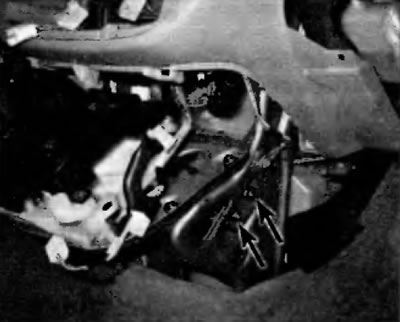
11. On Highlander models, remove the two bolts on the side of the center console (Fig. 3.11).


Fig. 3.11. Unscrew the two nuts on the center console


Note: Lexus models are equipped with a special retaining cap that secures the cable to the shift lever assembly. Turn this cap counterclockwise, remove it and remove the cable from the shift lever bracket.


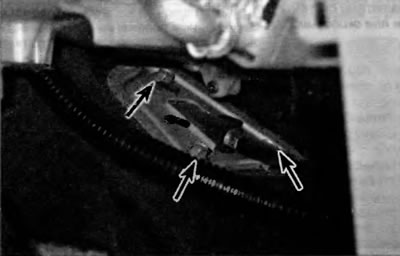
12. Remove the bolts from the gear shift cable bracket located on the bulkhead (Fig. 3.12).


Fig. 3.12. Remove the bolts securing the gear shift cable bracket to the bulkhead


13. Pull the rope across the floor.

14. Installation is performed in the reverse order of removal.

15. Finally, adjust the cable (see paragraphs 16 - 21).

Adjustment


16. When the selector lever inside the vehicle is moved from the neutral position to other positions, it should move smoothly and accurately to each position, and the gear shift indicator should indicate the correct range. If the indicator does not indicate the correct range, adjust the gear shift cable as described below.

17. Remove the battery and battery tray (see chapter 5).

18. Disconnect the gear shift cable from the manual lever on the gearbox.

19. Move the manual gear lever down to position P (all the way down), and then return it two notches to position N (Fig. 3.19).


Fig. 3.19. To adjust the gear shift cable, push the manual de-stop lever down and back two clicks, which corresponds to the neutral position. Then move the selector lever into the car's interior to neutral overlay. Tighten the nut


20. While holding the hand lever in the N position, tighten the gear shift cable adjusting bolt.

21. Check the operation of the gearbox in each position of the selector lever (try to start the engine in each range; the starter should only operate in park gear and neutral position).
This article is available at: russian, bulgarian, belarusian, ukrainian, serbian, croatian, romanian, polish, slovak, hungarian
The article material has been checked: Kondratyeva Ulyana
Share information:
◀ Previous
Highlander 1: Automatic gearbox
Next ▶

Diagnostics — General Information
General information about automatic transmission
Automatic transmission specifications
On-board Diagnostic System (OBD)fault codes reading
Selector lever — replacement
Brake pedal Position-dependent Gearshift Locking System (BTSI)
Axle shaft seals — replacement
Transmission Fluid Heat Exchanger — Removal and Installation
Transfer case — removal and installation
Similar articles on other Toyota models

➥ Gear Shift Lever Cable — Adjustment and Replacement Toyota Camry XV20 (1996-2001)
➥ Adjusting the gear shift cable Toyota Corolla E80 (1983-1990)
➥ Gear shift lever and control cables Toyota Corona T190 (1992-1997)
➥ Gear shift lever device Toyota Carina T190 (1992-1996)
➥ Automatic transmission throttle cable — checking and… Toyota Cruiser 60/80 (1980-1997, petrol)
➥ Gear Shift Lever — Removal and Installation Toyota 4Runner N120 (1989-1995)
Link in different formats to this article
Comments and feedback from visitors
No comments yet


Add two numbers 21 + 34


Highlander 1 (2000-2007, petrol) 
  • General information
  • Introduction to the guide
  • Troubleshooting
  • Maintenance
  • Power unit
  • 4-cylinder engine
  • 6-cylinder engine
  • Overhaul of engines
  • Cooling and heating
  • Supply and exhaust system
  • Engine electrical equipment
  • Control system
  • Transmission
  • Automatic gearbox
  • Drive shafts and cardan
  • Chassis, running gear
  • Brake system
  • Car suspension
  • Steering
  • Body and interior
  • Exterior (external elements)
  • Interior (internal elements)
  • Doors, locks and windows
  • Electrical equipment
  • Equipment and devices
  • Electrical circuits
ToyotaMan.ru © 2018–2026 • Mobile version • Interesting about Toyota • Administration • Sitemap: EN BG BY UA RS HR RO PL SK HU • Search system • Bookmark
Camry Vista-V40 • Camry XV10 • Camry XV20 • Camry XV30 • Corolla Verso-AR10 • Corolla E80 • Corona T190 • Carina T170 • Carina T190 • Land Cruiser J70 (diesel) • Land Cruiser J60 (petrol) • Land Cruiser J100 • Highlander XU20 (petrol) • 4Runner N120 • RAV4 XA10 • RAV4 XA20 • Duet M100 • Dyna Y50 •
We require cookies to enable some interactive features. Is that ok with you?