



Fuel tank
Caution! Gasoline is extremely flammable, so exercise extreme caution when working around the fuel system (see paragraph 2).
Removal
1. Relieve the pressure in the fuel system (see paragraph 2).
2. Unscrew the fuel tank filler cap to relieve the pressure inside the fuel tank.
3. Disconnect the ground cable from the negative battery terminal.
4. If there is gasoline left in the fuel tank, remove it from the tank and drain it into a suitable container using a special kit (it is sold in auto supply stores).
Caution! Do not pump gasoline by mouth.
5. Raise the car with a jack and place it on safety supports.
6. Remove the entire exhaust system components, starting from the center downpipe toward the rear of the vehicle.
7. On all-wheel drive (4WD) models, remove the driveshaft (see chapter 8).
8. Disconnect the fuel line fittings, the inlet and return lines of the fuel vapor recovery system (carbon adsorber) from the fuel tank.
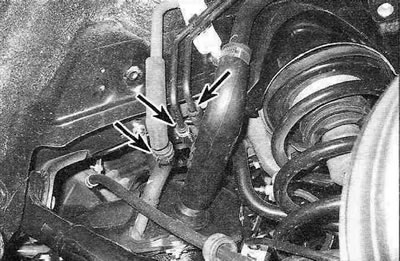
Figure 8.8. Location of fuel vapor recovery system pipes and fuel system return fuel pipe.
Note: Be sure to plug any holes that may have formed to prevent fuel leaks and dirt from entering the system.
9. Support the tank with a jack, first placing a piece of board between the tank and the jack head to avoid crushing the fuel tank.
[The original publication can be found on the website: ToyotaMAN]
10. Loosen the fuel tank bandage mounting bolts (see figure 8.10, a, b).
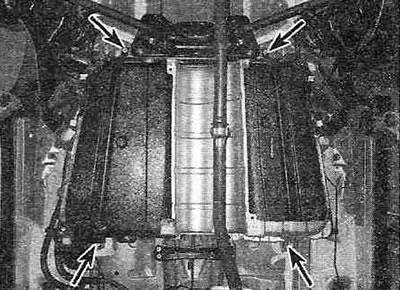
Figure 8.10,a. Loosen the fuel tank bandage mounting bolts (shown by arrows).
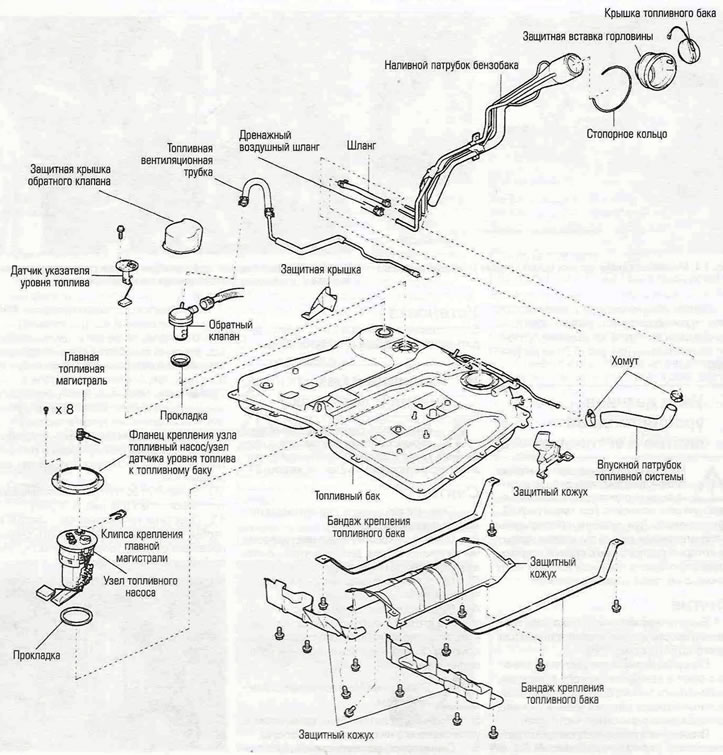
Figure 8.10,b. Fuel tank - models produced since 2001.
11. Lower the fuel tank enough to allow the wiring connector to be disconnected from the fuel pump/fuel level sensor assembly.
Caution! If the fuel tank is removed from the vehicle, it should be stored in a location away from sparks or open flames, which could ignite fuel vapors in the tank, causing an explosion. Be especially careful in a garage that is heated by various stoves with a torch ignition.
Installation
12. Installation is carried out in the reverse order of removal.