
Fuel tank for FJ60, FJ62 series
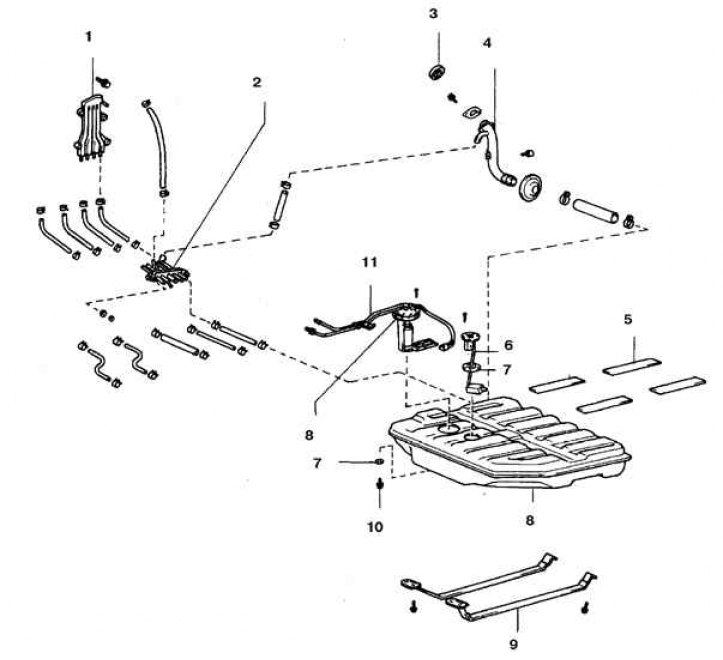
1. Vapor separator; 2. Tube connector; 3. Cork; 4. Filler neck; 5. Buffer; 6. Fuel level sensor; 7. Gasket; 8. Buck; 9. Coupling tapes; 10. Drain plug; 11. Fuel pump
Fuel tank of FJ80 series
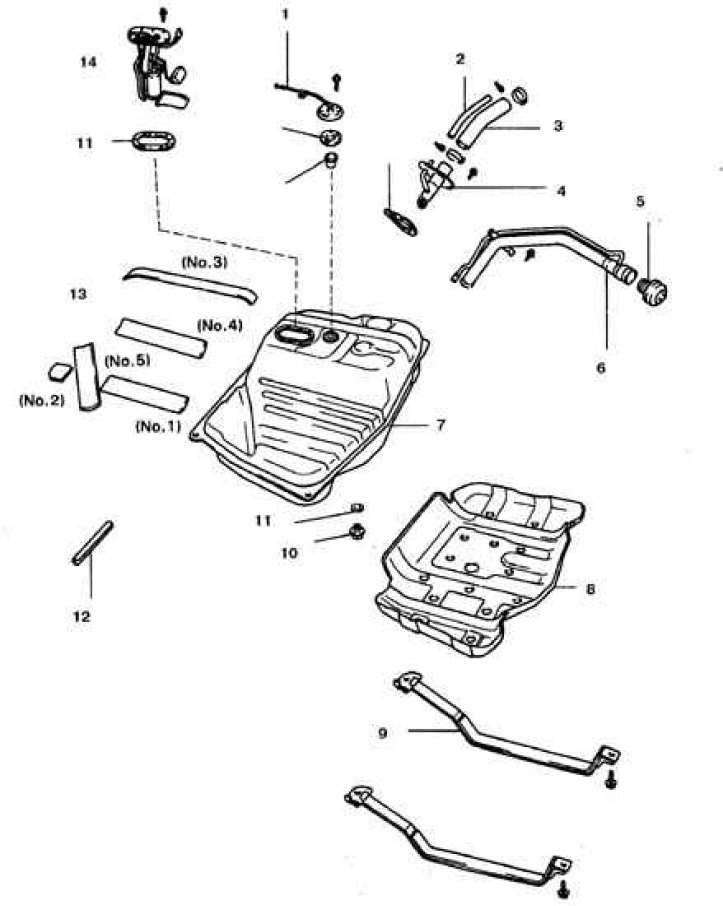
1. Ventilation tube; 2. Hose; 3. Inlet hose; 4. Throat pipe; 5. Cork; 6.Inlet pipe neck; 7. Buck; 8. Tank shield; 9. Coupling tapes; 10. Drain plug; 11. Gasket; 12. Overlay; 13. Buffer; 14. Pump and fuel level sensor
Removal and installation
Attention! When performing work, observe fire safety regulations.
Attention! The fuel tank should be removed after it is completely empty. Some vehicles have a drain plug in the tank. If there is no drain plug, empty the tank by driving and then idling the engine, or drain the gasoline through a hose with a rubber hand pump (available for sale).
1. Loosen the filler cap of the tank to relieve residual pressure.
2. Disconnect the battery from the ground.
3. Drain the gasoline.
4. Raise the car and put it on stands.
5. Disconnect from the tank and plug the hoses and tubes.
6. Loosen the clamp and disconnect the neck from the tank.
7. Loosen the nuts and remove the tank shield.
8. Place a brace under the tank.
9. Disconnect the straps and set aside.
10. Lower the tank slightly and disconnect the connectors and ground wire.
11. Remove the tank.
12. On some cars, an additional tank is provided, which is removed in exactly the same order.
13. Installation is carried out in the reverse order.
Fuel tank cleaning and repair
Any repairs to the fuel tank or tank filler must be carried out by qualified personnel experienced in organizing and carrying out such work.
If the tank is removed from the vehicle, it should not be placed in places where sparks or open flames could ignite the vapors coming out of the tank.