
Front bumper
1. Apply the parking brake. Raise the vehicle and place secure supports under it.
2. Remove the lower engine protection.
3. Remove lockers (pic. 11.3).
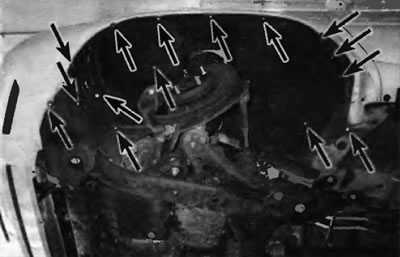
Pic. 11.3. Detach the main poker section secured with bolts, screws and plastic clips
4. Disconnect the fastening elements of the upper grille (pic. 13.1 and 13.2).
5. Disconnect fastening elements of sidewalls and the basis of facing of a bumper. Pull the trim outward slightly and disconnect the fog lamp electrical connectors (in the presence of). Remove the lining from the car (pic. 11.5, a, b).
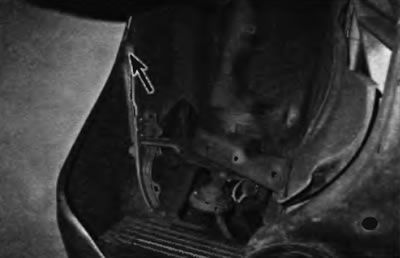
Pic. 11.5 a. In the wheel arch, unscrew the screw securing the bumper lining to the wing
Pic. 11.5b. Remove the fastening elements of the lower part of the bumper trim
6. Installation is carried out in the reverse order of removal. Before installing bolts and screws, make sure that the retainers are (in the presence of) on the rear side of the bumper lining entered the corresponding clips on the body. This procedure is easier to perform with two people.
Rear bumper
7. Working in a back wheel arch, disconnect plastic clamps and turn out the top bolt of fastening of a cut of facing a bumper.
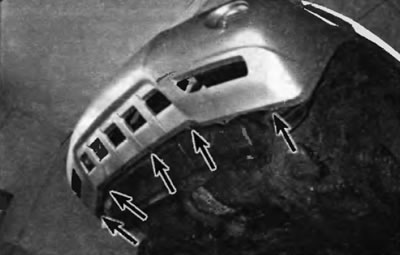
8. Release the fastening elements of the lower part of the bumper lining (pic. 11.8).
Pic. 11.8. Remove the fastening elements of the lower part of the bumper cladding
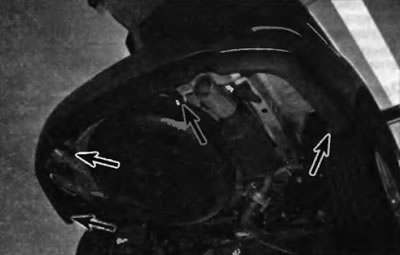
9. Open the tailgate and remove the fastening elements of the inner cut of the bumper lining (pic. 11.9). Pull the trim out and remove it from the vehicle.
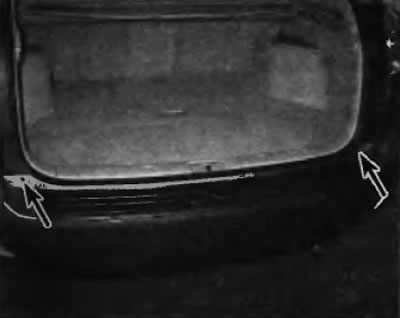
Pic. 11.9. Open the tailgate and remove the two upper bumper trim fasteners
10. Installation is carried out in the reverse order of removal.
11. Turn out the top bolts of fastening of a wing (pic. 12.9).
12. Remove the fender. Have an assistant support the fender as it is removed from the vehicle to prevent damage to adjacent body panels.
13. Installation is carried out in the reverse order of removal. Before finally tightening the wing mounting bolts, check the position of the wing relative to the hood and front edge of the door.