
1.3L petrol engine
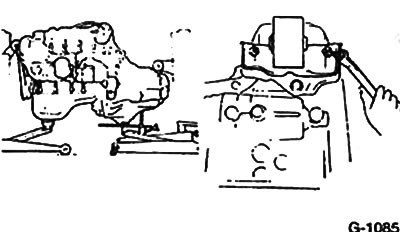
It is not possible to remove the engine separately from the gearbox. Both units are removed together and removed from the engine compartment down. Therefore, before removing the engines, you must familiarize yourself with the contents of the section "Removal and installation of a transmission". The suction pipe and exhaust manifold, as well as the carburetor and alternator, are not removed from the engine. To remove the engine, a car lift and two mobile auto-mobile hydraulic lifts are required.
Before installing the engine in the engine compartment, it is necessary to close the wings of the body with covers. It is recommended to mark all electrical wires and vacuum lines with adhesive tape before removing the engine to facilitate their subsequent assembly.
Depending on the year of manufacture and vehicle equipment, electrical wires, vacuum hoses and cooling system hoses can be routed differently in the engine compartment. Without considering the details of laying wires and hoses in each car model, it is recommended to mark them with adhesive tape before disconnecting. The following describes the removal and installation of a 1.3 liter petrol engine with a fuel injection system.
Removing
Disconnect the positive and negative cables from the battery.
Attention: When the battery is disconnected, the record in the memory of the on-board computer is erased, in particular, the record of malfunctions and the code of the radio receiver. Before disconnecting the battery, read the instructions in section "Removing and installing the battery".
Remove air filter.
Drain coolant.
Disconnect the gas supply.
Disconnect the following vacuum hoses, having previously marked them:
- hose to box with activated carbon;
- hose to the brake booster;
- hose to the fuel gauge at the right suspension strut;
- a hose to the vacuum sensor of the injection system at the bulkhead separating the engine compartment from the passenger compartment;
Disconnect the following electrical wires going to the engine, having previously marked them:
- combined oxygen sensor plug;
- combined ignition plug and ignition distributor;
- coolant temperature relay indicator plug;
- oil pressure plug;
- combined plug of the thermal relay of time;
- combined plug for coolant temperature sensor;
- combined reverse sensor plug;
- combined vacuum sensor plug;
- combined plug for injection valve and cold start valve;
- throttle potentiometer combo plug;
- vacuum sensor on the right above the engine support;
- cylinder head mass cable;
- plug and connectors on the rear wall of the generator;
- plug connection of the engine wiring harness at the rear of the right suspension strut;
Disconnect the wiring harness from the exhaust manifold and move it to the side so that it does not interfere with further work on removing the engine.
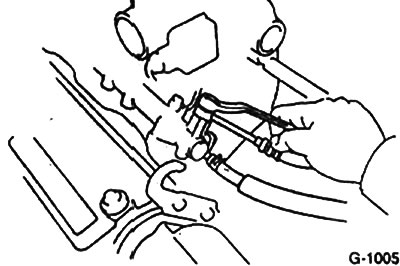
Loosen the bolt securing the fuel supply line to the fuel distributor, cover the connection with a rag and relieve pressure. After that, disconnect the pipeline completely and muffle it. Disconnect the fuel line at the drain pipe and plug it. Collect escaping fuel in a container.
If there is a power steering pump, remove it together with the hydraulic actuators.
Remove speedometer drive shaft.
Disconnect shift rod from gearbox.
Place the car on a lift.
Remove bottom engine compartment lining.
Remove exhaust pipe and additional muffler or catalytic converter.
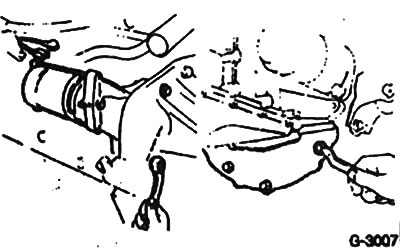
Remove starter.
Loosen screws and remove flywheel cover.
Remove front wheel drives.
Remove working clutch hydraulic cylinder.
Attention: Do not disconnect the hydraulic drive of the cylinder. Otherwise, after assembly, it is necessary to release air from the hydraulic system. After removing the hydraulic cylinder, do not press the clutch pedal.
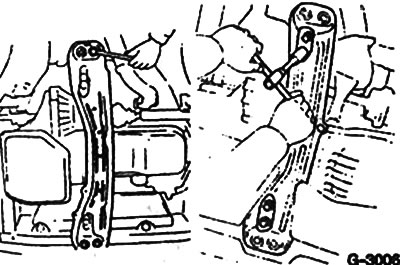
Loosen the mounting bolts and remove the front and rear engine mounts.
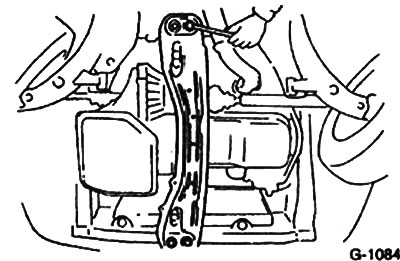
Unscrew the four bolts securing the lower engine mount and remove the mount.
Check that all hoses and wires from the engine to the body are disconnected. Remove the engine from the compartment.
Slightly raise the engine from below with two mobile car lifts. To prevent damage to the oil sump and gearbox, use wooden spacers.
Caution: Lower the engine carefully to prevent it from tipping over.
Loosen the left engine mount bolts.
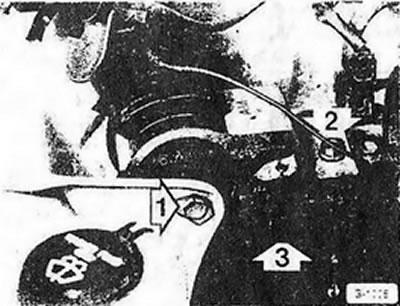
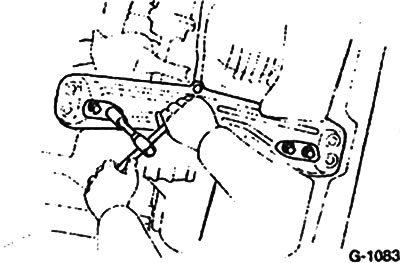
Unscrew securing bolt -2- on right engine mount and remove bracket.
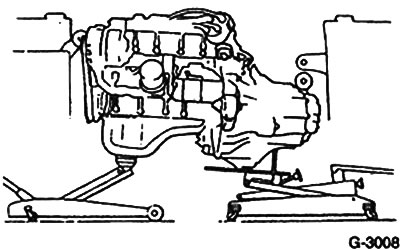
Carefully lower the engine using mobile jacks.
Attention: Lower the engine carefully, excluding its hitting the body.
Disconnect gearbox from engine.
Installation
Check engine mounts, fuel, oil and coolant hoses for cracks and pores. Replace hoses if necessary.
Check clutch release bearing and clutch release fork for ease of movement. Replace if necessary.
Check the thickness of the clutch disc linings and their condition. Replace pads or disc if necessary.
Clean and lubricate with a thin layer of MoS2 lubricant the splines of the input shaft of the gearbox.
Install gearbox to engine.
Rest mobile lifts from below on the engine.
Install the mounting bolts to the right and left engine mounts.
Install clutch cover and secure with screws.
Install and secure the starter.
Install drive shafts.
Install the lower engine support beam and tighten the bolts of its fastening with a force of 40 Nm.
Insert the bolts for the front and rear engine mounts and tighten them to 40 Nm.
Shaking the engine from side to side to find its correct position. After that, tighten the nuts and bolts of the right and left engine mounts with a force of 55Nm.
Install the downpipe and exhaust silencer and catalytic converter.
Install the engine compartment lower trim.
Take the car off the lift.
Install working clutch hydraulic cylinder.
Install and adjust gas draft.
Install the speedometer drive shaft.
Install clutch cable.
Connect and fix electrical wires and vacuum hoses according to the marking.
Put the fuel return hose on the distribution line and secure it with a clamp. Connect the fuel supply hose to the distribution pipe and tighten it to 30 Nm, installing a new seal.
Install radiator.
Check the oil level in the engine and gearbox. Add oil if necessary.
Check the concentration of antifreeze in coolant.
Install air filter.
Connect the positive and negative cables to the battery.
Check ignition timing if necessary adjust.
Check engine idling. If necessary adjust.
Start and warm up the engine. Check the coolant level and tight connections.
Check valve clearance.