
Latch
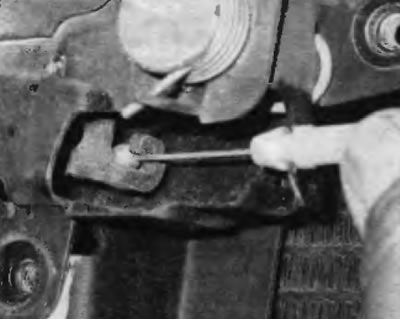
1. Outline the hood latch to make it easier to align its position during installation, and then remove the bolts securing the latch to the radiator support (pic. 9.9). Remove the latch.
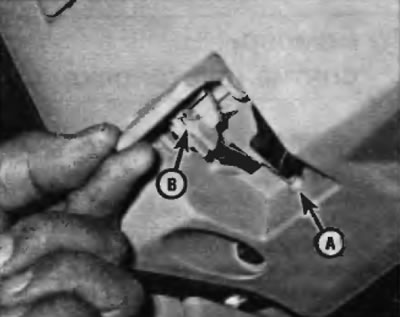
2. Disconnect the hood release cable by unhooking the cable from the latch (pic. 10.2).
Pic. 10.2. Pry the cable holder from the back of the hood latch and unhook the cable
3. Installation is carried out in the reverse order of removal.
Note. Adjust the position of the latch so that the hood is securely locked, with the hood stops slightly compressed.
Cable
4. While working inside the vehicle, lift the hood release handle, pull on the end of the cable sheath and unhook the cable from the hood release handle (pic. 10.4). If the handle is to be replaced, simply pull out on its locking element and press the handle to release it from the bezel.
Pic. 10.4. Raise the handle and pull out the tip of the cable sheath (A) from the base of the handle, and then disconnect the tip of the cable (IN) from the lever
5. Connect a piece of thin wire or fishing line to the end of the cable.
6. Go to the engine compartment, disconnect the hood release cable from the latch, as described in p.p. 1 and 2. Release all clamps securing the cable to the radiator support and the engine compartment inner mudguard.
7. Pull the cable forward into the engine compartment until the wire or line comes into view, then press the wire or line away from «old» rope and tie to a new rope.
8. After tying the new cable, pull the wire or line back through the partition so that the new cable reaches the handle.
9. Working in the cabin, fix the new cable in the hood release handle, making sure that the cable sheath fits snugly into the groove in the handle bracket.
Note. Pull the cable with your hand from the side of the passenger compartment, ensuring that the cable stop «sat down» into the sealing sleeve on the bulkhead.
10. The rest of the installation is carried out in the reverse order of removal.