
31. Apply putty to the prepared area with a spatula. Level the surface of the putty with a spatula to achieve the desired shape. When you reach a shape close to the correct one, stop. If you continue to level the putty for too long, it will become sticky and start sticking to the trowel. Continue applying thin coats of putty at twenty minute intervals until the putty is slightly raised above the adjacent body area.
32. After the putty has hardened, the excess can be removed with a metal scraper or file. Then sand the surface, gradually moving from coarse to finer paper. Start with 180 grit paper and finish with 600 grit waterproof paper. Wrap the sandpaper around a flat rubber, cork, or wood block. Otherwise, the putty surface will not be perfectly flat. When leveling the surface of the putty with waterproof unexpected paper, the latter should be periodically moistened with water. This will ensure a smooth surface in the final stage.
These photographs show the technology for straightening simple dents. They refer to paragraph «Minor body damage - repair» in this chapter and should not be used as the only guide to non-body repair of the vehicles presented in this book.
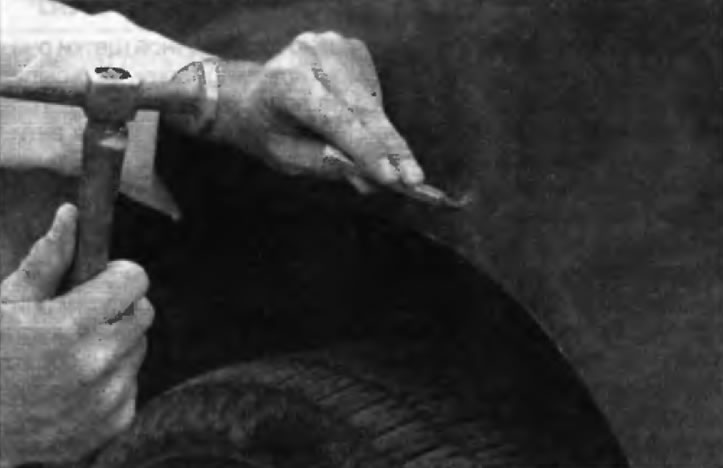
1. If you cannot get to the back of the denting panel with a hammer, use a dent puller, similar to a moving-faced hammer, to correct the dent. Drill or punch a hole at the deepest point of the dent, or several holes along the dent and spacing at least 25mm apart...
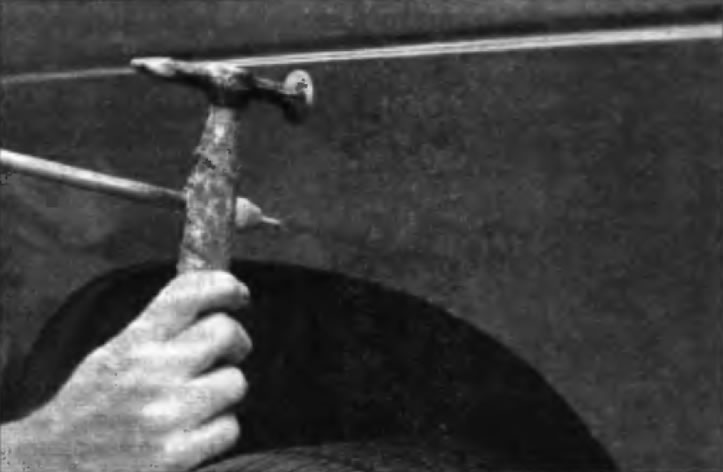
2...then screw the above tool into the hole and unscrew the dent dresser. Tap the edge of the dent with a hammer to help the metal return to its original shape. After turning on this procedure, the shape of the area to be repaired should approximate its original shape and the surface of the dent should be approximately 3 mm below the surface of the surrounding metal
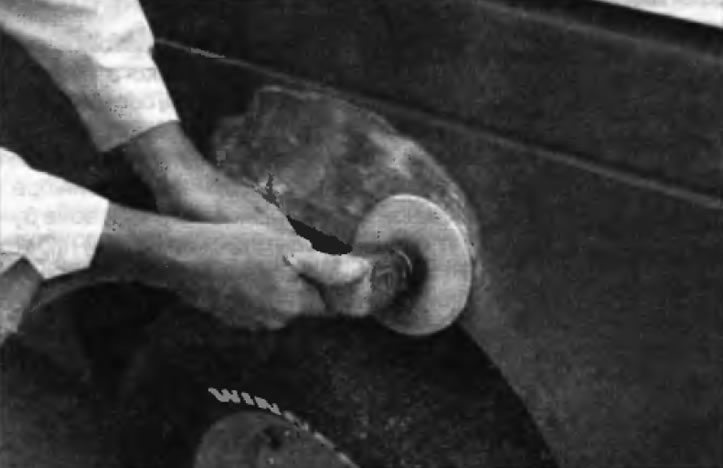
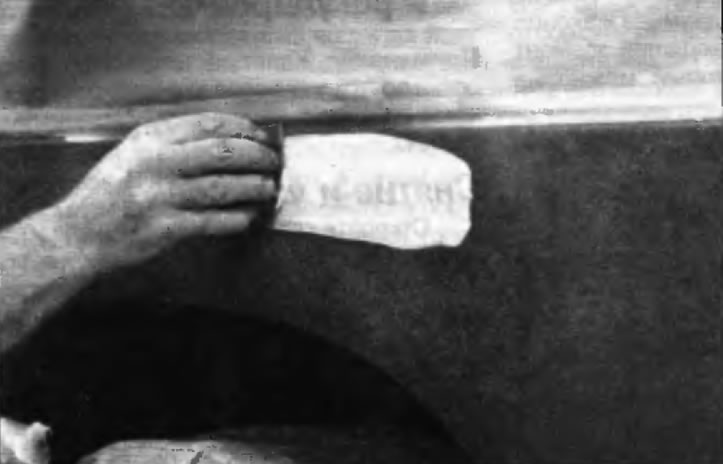
3. Using coarse sandpaper, remove the paintwork in the damaged area, achieving a metallic lure. Sandpaper is well suited for this, their emery wheel speeds up the work significantly. Using fine-grained (approximately No. 320) sandpaper, sand the paintwork at a distance of approximately 25 mm around the perimeter of the dent
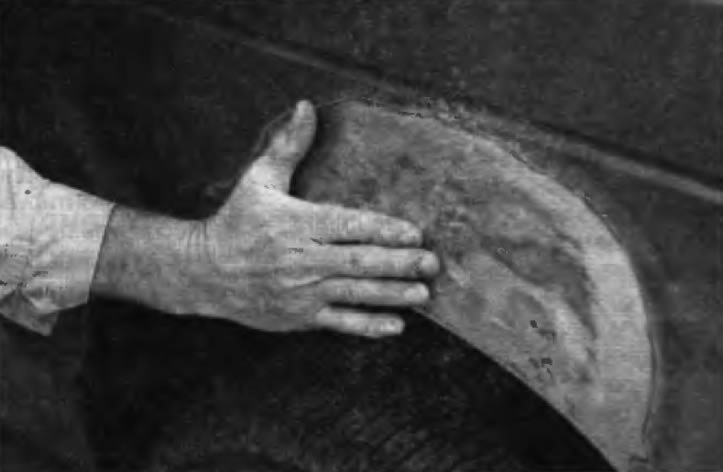
4. After removing the paintwork, determine the bumps in the body to the touch than by eye. If possible, work out the protruding bumps with a hammer or wipe off the understated areas. Clean the repair area with mastic remover.
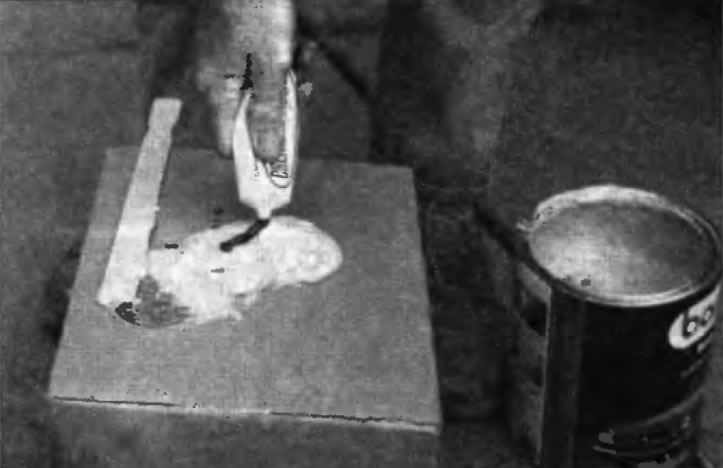
5. In accordance with the instructions for use, mix a portion of putty and hardener. The ratio of components is very important, and if you mix them in the right proportion, the putty will either not harden, if it hardens too quickly (and you will not have time to give the surface the desired shape)
6. Trying to work as fast as possible (but no quality loss), so that the putty does not have time to harden, apply the putty to the metal with a plastic spatula. Work until the repair is back to its original shape, but the putty should be slightly above the surrounding metal

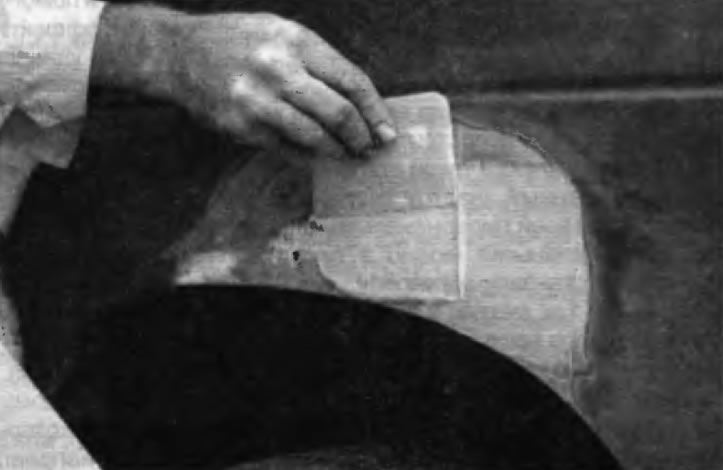
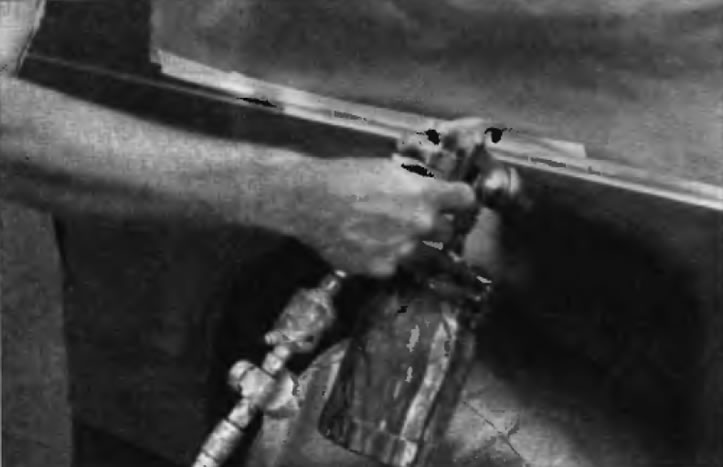
7. Allow the putty to harden so that when checking with a fingernail it can only be picked off a little. Using a special putty remover (shown here) or bodywork palettettes shape the putty into the desired shape
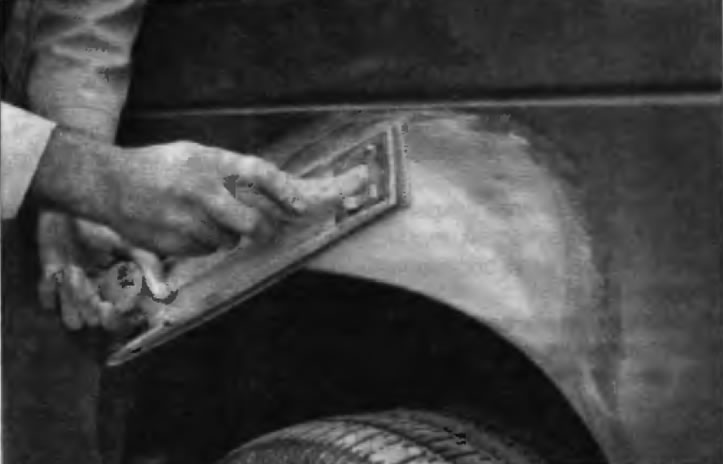
8. With a large sandpaper fixed on a sanding board, process the putty so that it takes the desired shape and becomes smooth. Process by changing the sanding paper down to the finest, 368 or 400 grit
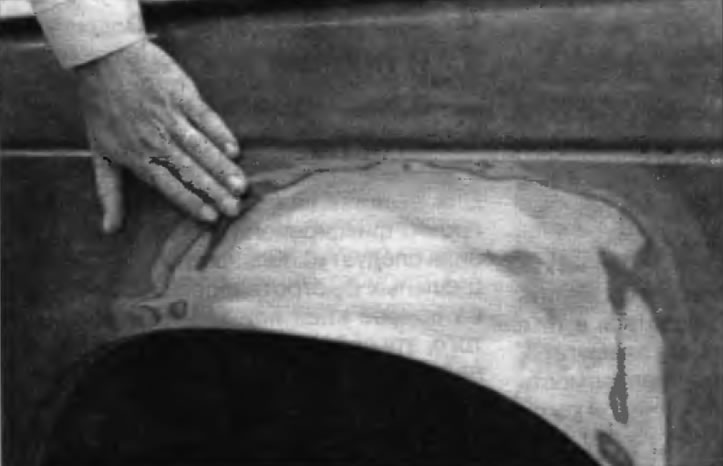
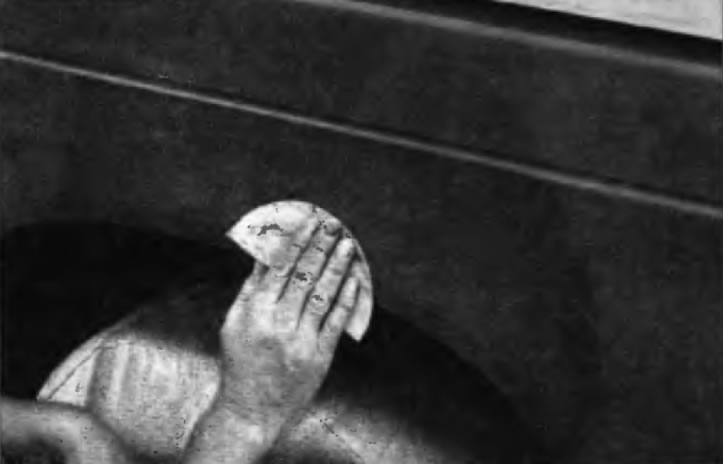
9. By running your hand, you should not feel any transition from putty to molded metal or from metal to old paintwork. As soon as the repaired area is smooth and uniform, remove dust and cover adjacent areas of the bodywork and decorative elements with a paint slab
10. Apply several coats of primer to the repair area. Don't apply a lot of primer all at once, as it will groan and screech, and apply the next slurry, just make sure the previous one is high. The photo shows a professional sprayer, but you can also use an inexpensive adult sprayer that can be purchased at an auto parts store
11. The applied primer will help to reveal scuffs and scratches. Seal them with putty. Follow the instructions and sand the repair bridges with 380-408 grit sandpaper to the desired smoothness. Check these operations until you get the perfect surface finish
12. Polish the primer layer with very fine sandpaper (grit 400 or 888) to remove soil drops. Wash the repair area with water and dry. Remove dust with a soft cloth, then apply a layer of enamel. Do not attempt to polish or apply mastic until the enamel is completely dry (for at least two weeks)
33. At this stage «dent» should be surrounded by a ring of bare metal, which in turn should be surrounded by a well-defined edge of good paintwork. Rinse the repair area with clean water until all sanding dust has doubled.
34. Apply a thin coat of primer from an aerosol can over the entire repair area. This will reveal all the defects on the surface of the putty. Eliminate defects with finishing putty (type «bodystopper») and again level the surface with sandpaper. Repeat the procedure for applying a thin layer of primer and finishing until you are satisfied with the quality of the surface of the putty and its interface with the undamaged paintwork. Rinse the repair area with clean water and dry thoroughly.
35. Now the repair area is ready for the final build-up of paintwork. Spray painting should be carried out in a warm, dry, windless, dust-free area. These conditions can be created artificially if you have access to a large enclosed work area. But if you are forced to work outdoors, you will need to choose your day very carefully. If you are working indoors, dampen the floor in the work area with water. This will cause dust to settle that would otherwise be present in the atmosphere. If the repair area is limited to one body panel, cover adjacent panels. This will help to minimize minor discrepancies in paint colors. Body elements (e.g. chrome trims, door handles, etc.) also needs to be closed. To close, you can use masking tape and several layers of newspapers.
36. Shake the aerosol can thoroughly before spraying and test the spray on a test surface (an old piece of tin or something similar will do). Practice the spray technique. Apply a thick layer of primer to the repair area. The required thickness is best achieved by applying several thin layers, rather than one thick one. Sand the primed surface with 600 grit waterproof sandpaper, dampening it occasionally with water, until a smooth surface is obtained. When doing this, the repair area should be completely moistened with water and also periodically moistened with water in the paper. Let the surface dry before applying the next coat.
37. Spray on the top coat, gaining thickness again by applying several thin coats of enamel. Start applying from the center of the repair area and, using single strokes from side to side, move outward until you have covered the entire repair area and approximately 50mm of the surrounding paintwork. Remove all protective material 10-15 minutes after applying the last coat of enamel. Allow new paintwork to cure at least two weeks. After that, using a refinisher or a very fine abrasive paste, make a smooth transition between the new enamel and the existing paintwork. Finally, apply polishing mastic.