
Company Honda Company Ford Company Skoda Company Kia Company Mazda Company Mercedes Company Renault
English Русский
Български
Беларускі
Український
Српски
Hrvatski
Română
Polski
Slovenský
Magyar
Bookmark Articles Sitemap Contacts
ToyotaMan.ru


Camry Corolla Corona Carina Land Cruiser Highlander 4Runner RAV4 Others
Highlander 1 (2000-2007, petrol)

Powertrain Mounts — Checking and Replacing [Toyota Highlander XU20]

  • Main
  • Highlander
  • XU20 (2000-2007)
  • Power unit
  • 6-cylinder engine
  • Powertrain Mounts — Checking and Replacing
0
Contact chapter 2A, but keep in mind that the V6 engine mounts are slightly different in design. But this does not significantly affect the inspection and replacement procedures (fig. 16.1, c-e).


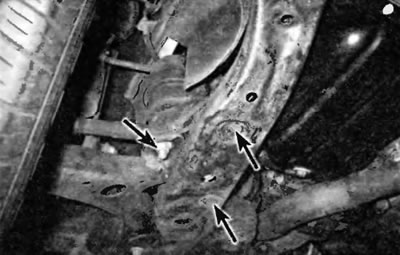
Fig. 16.1, a. First remove the plugs from the subframe, then unscrew the nuts on the lower engine mount
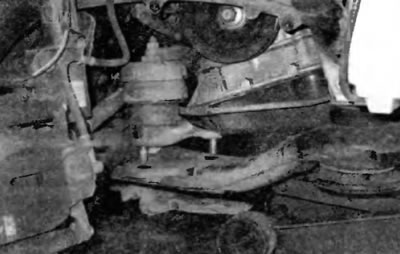


Fig. 16.1, b. Carefully lift the engine until the engine mount studs are free from the subframe, loosen the nut at the top of the mount and tilt the engine mount away from the car. To raise the engine for additional clearance, you will need to release the other mounts on the subframe
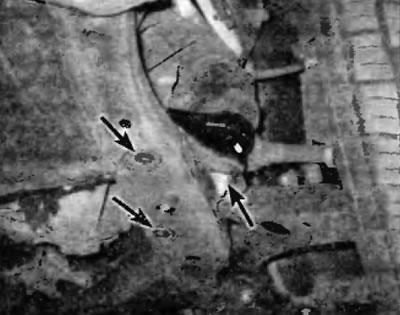


Fig. 16.1, c. Location of technological plugs on the driver's side and nuts for fastening the left support of the gearbox in the block with the drive axle
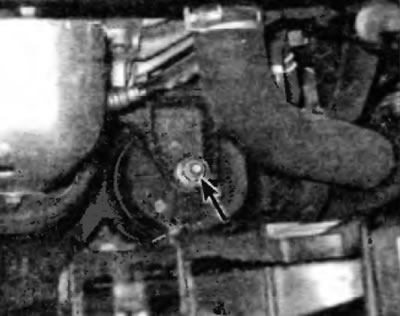


Fig. 16.1, d. On models equipped with active engine mounts, disconnect the electrical connectors on the front engine mount before unscrewing the nuts
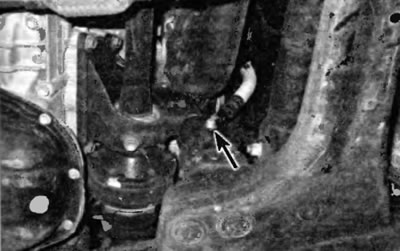


Fig. 16.1, d. Location of the rear engine support/axle support tie bolt
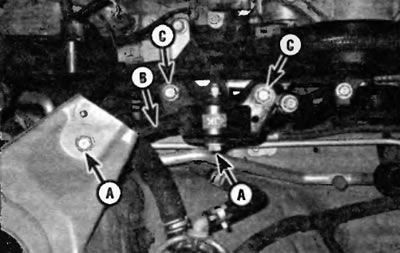


Fig. 16.1, e. Unscrew the bolts of the engine support reaction tag (A) and remove this reaction tag (B). Then unscrew the bolts (C) and remove the engine support tie rod
This article is available at: russian, bulgarian, belarusian, ukrainian, serbian, croatian, romanian, polish, slovak, hungarian
The article material has been checked: Kondratyeva Ulyana
Share information:
◀ Previous
Highlander 1: 6-cylinder engine
Next ▶

Rear Main Seal — Replacement
Faceplate — removal and installation
Oil pump — removal, inspection and installation
Oil pan — removal and installation
Cylinder heads — removal and installation
 
Similar articles on other Toyota models

➥ Engine Mounts — Checking and Replacing Toyota Camry XV20 (1996-2001)
➥ Checking the condition and replacing engine mounts Toyota Cruiser 100 (1998-2007)
➥ Checking and replacing the V-belt. Tensioning and replacing… Toyota Corolla E80 (1983-1990)
➥ Checking and replacing fuses Toyota Corona T190 (1992-1997)
➥ Checking and replacing fuses and fuse links Toyota Carina T190 (1992-1996)
➥ Windscreen wiper blades — checking and replacing Toyota 4Runner N120 (1989-1995)
Link in different formats to this article
Comments and feedback from visitors
No comments yet


Add two numbers 41 + 44


Highlander 1 (2000-2007, petrol) 
  • General information
  • Introduction to the guide
  • Troubleshooting
  • Maintenance
  • Power unit
  • 4-cylinder engine
  • 6-cylinder engine
  • Overhaul of engines
  • Cooling and heating
  • Supply and exhaust system
  • Engine electrical equipment
  • Control system
  • Transmission
  • Automatic gearbox
  • Drive shafts and cardan
  • Chassis, running gear
  • Brake system
  • Car suspension
  • Steering
  • Body and interior
  • Exterior (external elements)
  • Interior (internal elements)
  • Doors, locks and windows
  • Electrical equipment
  • Equipment and devices
  • Electrical circuits
ToyotaMan.ru © 2018–2026 • Mobile version • Interesting about Toyota • Administration • Sitemap: EN BG BY UA RS HR RO PL SK HU • Search system • Bookmark
Camry Vista-V40 • Camry XV10 • Camry XV20 • Camry XV30 • Corolla Verso-AR10 • Corolla E80 • Corona T190 • Carina T170 • Carina T190 • Land Cruiser J70 (diesel) • Land Cruiser J60 (petrol) • Land Cruiser J100 • Highlander XU20 (petrol) • 4Runner N120 • RAV4 XA10 • RAV4 XA20 • Duet M100 • Dyna Y50 •
We require cookies to enable some interactive features. Is that ok with you?