



Caution! Always lock the passive restraint system when working in the immediate vicinity of its components to prevent accidental deployment of the airbags (see paragraph 26).
1. Disconnect the cable from the negative battery terminal.
Radio
Removal
2. To remove the radio, you need to remove the adjacent components on the lower center panel.
- On pre-2000 models, remove the lower center panel trim (see Figure 12.2).
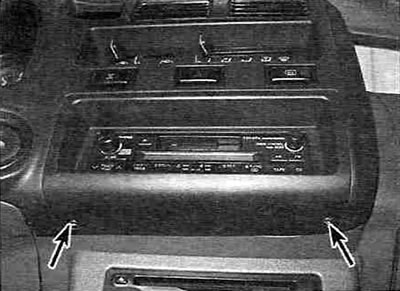
Figure 12.2. Loosen the screws securing the radio receiver unit (shown by arrows) — models produced before 2000.
- On models produced since 2001, remove the instrument panel frame (see chapter 11).
3. Loosen the screws securing the radio unit and pull it outward enough to allow the wiring connectors and antenna plug to be disconnected (see figure 12.3,a,b).
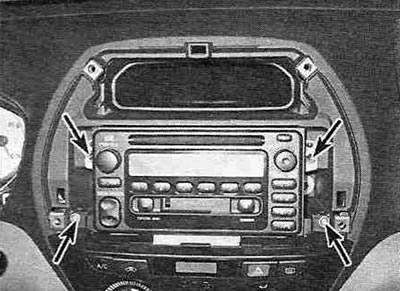
Figure 12.3,a. Loosen the screws securing the radio receiver unit (shown by arrows) — models produced since 2001.
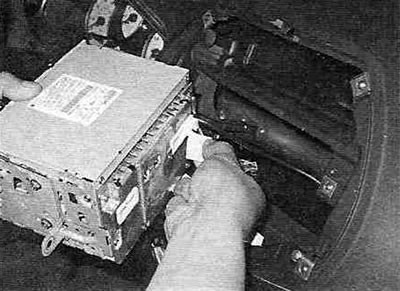
Figure 12.3,b. Loosen the screws securing the radio receiver unit and pull it out to disconnect the wiring connectors.
Installation
4. Install the radio in the reverse order of removal.
Speakers in the door panels
Removal
5. Remove the door trim panel (see chapter 11). All models covered in this manual have speakers in both the front and rear door panels. The speakers are mounted identically in both panels.
6. Drill out the rivets using a drill bit of the appropriate diameter. Disconnect the wiring connector and remove the speaker from the door.
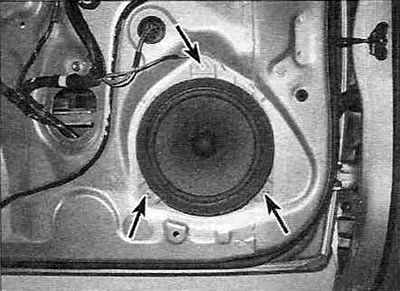
Figure 12.6. To remove the speaker from the door, drill out the rivets (shown by arrows) and disconnect the wiring connector.
Installation
7. Install the speaker in the reverse order of removal.
High-frequency loudspeaker
Removal
8. In addition to standard broadband speakers, some models are equipped with high-frequency "squeakers" to improve the sound quality (see Figure 12.8).
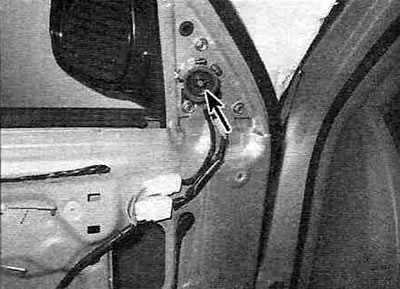
Figure 12.8. Location of the tweeter (shown by arrows).
They are installed on the front doors under the side mirror trim. To remove the "buzzer", you need to drill out the rivets. Pull the "buzzer" towards you and disconnect the wiring connector.
Installation
9. Install the speaker in the reverse order of removal.