



Warning! The models covered by this manual are equipped with a Supplemental Restraint System (SRS), commonly known as the air bag system. To prevent accidental air bag deployment, which could result in injury, be sure to disable the air bag system before working near air bag components (see paragraph 25).
Radio
1. Remove the center trim panel (see chapter 11).
2. Remove the bolts securing the radio and the heater/air conditioning control unit (fig. 10.4 in Chapter 3).
3. Remove the radio and heater/air conditioning control unit and disconnect the corresponding electrical connectors (fig. 10.5 in Chapter 3).
4. Disconnect the radio from the support bracket on which it is mounted together with the heater/air conditioner control unit (Fig. 11.4).
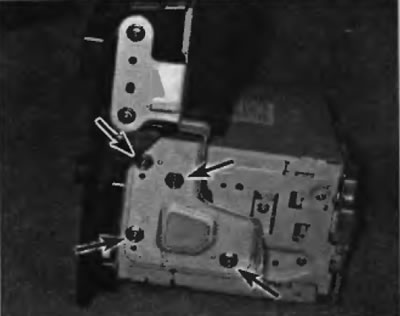
Fig. 11.4 To remove the radio from the support bracket, remove the bolts at each end (the right edge is shown, the left edge is similar)
5. Installation is performed in the reverse order of removal.
The official source is on the portal: Toyotaman.ru
Speakers
Door speakers
Note: All models have speakers in the front and rear doors. The accompanying photographs in this section show the front door speakers, but the procedure also applies to the rear door speakers, which are installed in the same way as the front door speakers.
6. Remove the door trim panel (see chapter 11).
7. Disconnect the speaker electrical connector, unscrew the corresponding screws (Fig. 11.7) and remove the speaker.
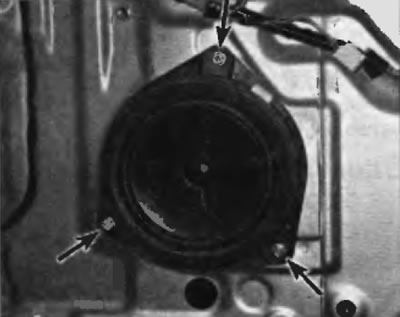
Fig. 11.7. To remove the door speaker, disconnect the electrical connector and unscrew the speaker mounting screws
8. Installation is performed in the reverse order of removal.
High frequency speakers
Note: The tweeters are located in the front doors.
9. Remove the door trim panel (see chapter 11).
10. Disconnect the electrical connector and remove the bolt (fig. 11.10) and remove the tweeter.
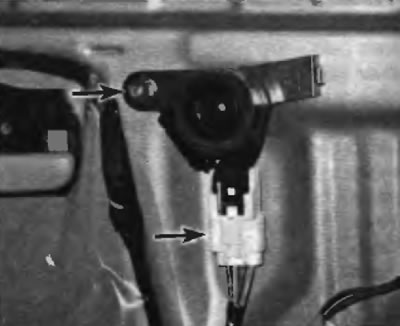
Fig. 11.10. To remove the tweeter, disconnect the electrical connector and unscrew the bolt
11. Installation is performed in the reverse order of removal.