
Company Honda Company Ford Company Skoda Company Kia Company Mazda Company Mercedes Company Renault
English Русский
Български
Беларускі
Український
Српски
Hrvatski
Română
Polski
Slovenský
Magyar
Bookmark Articles Sitemap Contacts
ToyotaMan.ru


Camry Corolla Corona Carina Land Cruiser Highlander 4Runner RAV4 Others
RAV 4 XA20 (2000-2005) RAV 4 XA10 (1994-2000)

Antenna — removal and installation [Toyota RAV4 XA20]

  • Main
  • RAV4
  • XA20 (2000-2005)
  • Electrical equipment
  • Equipment and devices
  • Antenna — removal and installation
0
Contents: Removal ↓ Installation ↓
Caution: Always lock the passive restraint system when working in the immediate vicinity of its components to prevent the possibility of accidental deployment of the airbags, which could result in serious injury (see paragraph 26).


Removal


Fixed antenna


1. Separate the antenna from the car body. To do this:
  • For models where the antenna is mounted on the roof, unscrew the support mounting screws (see Figure 13.1,a).
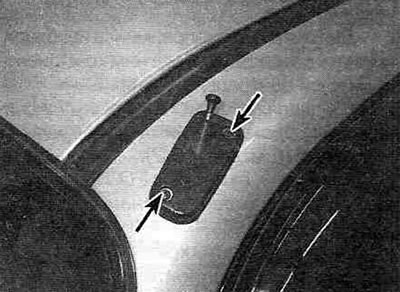


Figure 13.1,a. If the antenna is mounted on the roof, unscrew the mounting screws (shown by arrows) antennas to the roof.

  • On models where the antenna is mounted on the wing, unscrew the antenna pin (see Figure 13.1,b) and unscrew the antenna support mounting nut (see Figure 13.1,c).
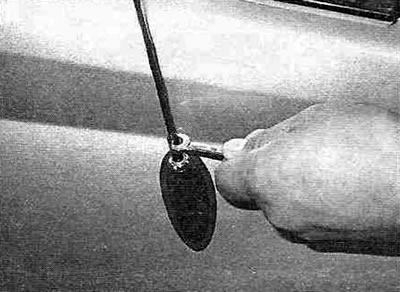


Figure 13.1,b. In models where the antenna is mounted on the wing, unscrew the antenna pin from the support.
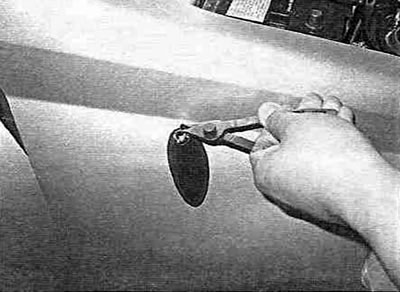


Figure 13.1, c. Unscrew the antenna support mounting nut.


Retractable antenna (with electric drive)


2. Turn the ignition key to the LOCK position and loosen the antenna support mounting nut.

3. Press the AM buttons on the radio and simultaneously turn the ignition key to the ACC position. The antenna pin should fully extend and release from the motor.

4. Remove the antenna pin from the antenna drive motor assembly.

All models


5. For models where the antenna is mounted on the fender, raise the vehicle and support it on safety stands.

6. On models where the antenna is mounted on the fender, remove the corresponding front wheel.

7. Remove the antenna assembly from the vehicle body. To do this:
  • On models with a roof-mounted antenna, remove the trim panel from the left door pillar to access the antenna cable.
  • On models where the antenna is mounted on the wing, unscrew the bolt securing the antenna support to the wheel arch (see Figure 13.7).
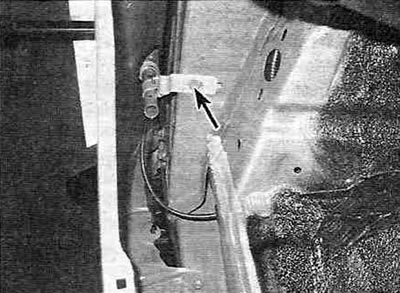


Figure 13.7. Loosen the antenna mounting bolt (shown by the arrow) to the wheel arch.


8. On models where the antenna is mounted on the wing, push the antenna support under the wing, releasing it from the seal.

9. Remove the radio and disconnect the antenna cable from it (see Figure 13.9).
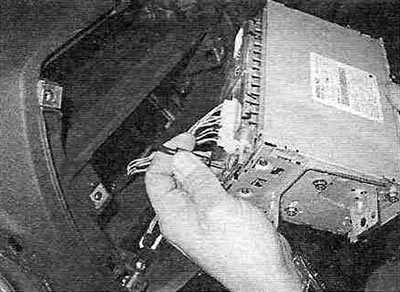


Figure 13.9. Disconnect the antenna cable from the radio receiver unit.


10. If the antenna is mounted on the fender, remove the glove box cover (see chapter 11) and pull the antenna cable out from behind the front panel (see Figure 13.10).
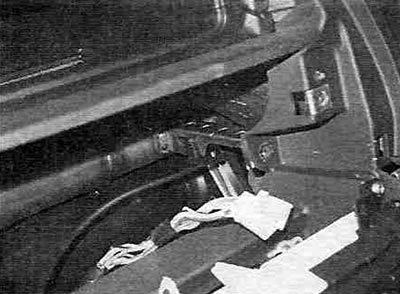


Figure 13.10. Working behind the glove box, pull the antenna cable through the faceplate.


11. For an antenna with a motor, disconnect the antenna cable from the motor.

Installation


Fixed antenna


12. If the antenna is mounted on the roof, install the antenna assembly on the vehicle body and tighten the mounting bolts.

13. On models where the antenna is mounted on the wing, tighten the bolt securing the antenna support to the wheel arch and tighten the nut securing the antenna support.

14. For models with a wing mounted antenna, screw in the antenna pin.

Retractable antenna (with electric drive)


15. Install the antenna assembly inside the wheel arch and tighten the mounting bolt.

16. Insert the antenna pin into the electric drive unit so that the teeth of the wire are directed forward in the direction of the vehicle.
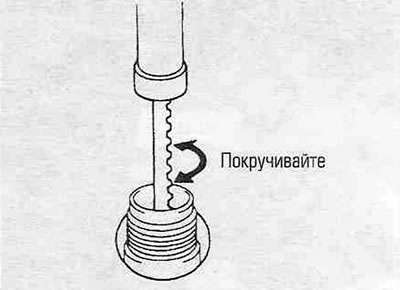


Figure 13.16. The toothed part of the wire should be directed forward in the direction of the vehicle.


17. Turn the ignition key to the LOCK position so that the antenna pin retracts inward.

18. Fit the antenna drive unit mounting nut and carefully tighten it until the pin is fully seated in the drive unit.

All models


19. Working under the dash, route the antenna cable behind the glove box to the radio.

20. Install the radio (see paragraph 12).

21. Install the glove compartment door (see chapter 11).

22. The rest of the procedure is performed in the reverse order of removal.
This article is available at: russian, bulgarian, belarusian, ukrainian, serbian, croatian, romanian, polish, slovak, hungarian
The article material has been checked: Kondratyeva Ulyana
Share information:
◀ Previous
RAV 4 XA20: Equipment and devices
Next ▶

Radio and loudspeakers — removal and installation
Windshield wiper motor — inspection, removal and installation
Instrument panel — removal and installation
Front Panel Switches — Removal and Installation
Ignition Switch and Ignition Lock Cylinder — Removal and Installation
Rear Window Defogger — Inspection and Repair
Headlight bulb replacement
Headlights — adjustment
Headlight housing — removal and installation
Horn — Checking, Removing and Installing
Similar articles on other Toyota models

➥ Receiver, Speakers and Antenna — Removal and Installation Toyota Camry XV20 (1996-2001)
➥ Removal and installation the antenna Toyota Corolla E80 (1983-1990)
➥ Antenna Drive — Check Toyota Corona T190 (1992-1997)
➥ Antenna — removal and installation Toyota Cruiser 60/80 (1980-1997, petrol)
➥ Antenna — replacement Toyota Highlander 1 (2000-2007, petrol)
➥ Radio Antenna — Removal and Installation Toyota 4Runner N120 (1989-1995)
Link in different formats to this article
Comments and feedback from visitors
No comments yet


Add two numbers 50 + 31


RAV 4 XA20 (2000-2005) 
  • General information
  • Introduction to manual
  • User manual
  • Daily care
  • Maintenance (petrol)
  • Maintenance (diesel)
  • Troubleshooting
  • Power unit
  • Gasoline engines (before 2000)
  • Petrol engines (since 2001)
  • Diesel engines
  • Engine overhaul
  • Cooling and heating
  • Fuel system (petrol)
  • Fuel system (diesel)
  • Engine electrical equipment
  • Control system (petrol)
  • Control system (diesel)
  • Transmission
  • Manual gearbox
  • Automatic gearbox
  • Clutch and drive shafts
  • Chassis, running gear
  • Brake system
  • Front suspension
  • Rear suspension
  • Steering system
  • Body and interior
  • Exterior (external elements)
  • Interior (internal elements)
  • Doors, locks and windows
  • Electrical equipment
  • Equipment and devices
  • Electrical circuits
RAV 4 XA10 (1994-2000) 
  • General information
  • User manual
  • Maintenance
  • Power unit
  • Petrol engine 3S-FE
  • Petrol engine 1AZ-FE
  • Engine overhaul
  • Cooling and air conditioning
  • Fuel and exhaust system
  • Ignition system
  • Toxicity reduction system
  • Transmission
  • Clutch
  • Mechanical gearbox
  • Automatic gearbox
  • Cardan and drive shafts
  • Chassis, running gear
  • Brake system
  • Car suspension
  • Steering
  • Body and interior
  • Exterior (external elements)
  • Interior (internal elements)
  • Doors, locks and windows
  • Electrical equipment
  • Equipment and devices
  • Power devices
  • Electrical circuits
ToyotaMan.ru © 2018–2026 • Mobile version • Interesting about Toyota • Administration • Sitemap: EN BG BY UA RS HR RO PL SK HU • Search system • Bookmark
Camry Vista-V40 • Camry XV10 • Camry XV20 • Camry XV30 • Corolla Verso-AR10 • Corolla E80 • Corona T190 • Carina T170 • Carina T190 • Land Cruiser J70 (diesel) • Land Cruiser J60 (petrol) • Land Cruiser J100 • Highlander XU20 (petrol) • 4Runner N120 • RAV4 XA10 • RAV4 XA20 • Duet M100 • Dyna Y50 •
We require cookies to enable some interactive features. Is that ok with you?