



1. Remove the refrigerant from the system in a specialized workshop.
2. On models produced since 20011, remove the front bumper (see chapter 11).
3. Disconnect the inlet and outlet refrigerant pipes (see Figure 14.3).
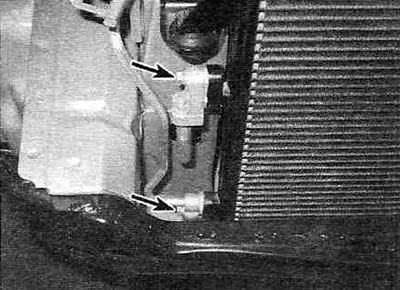
Figure 14.3. Disconnect the refrigerant lines (shown by arrows) from the capacitor - the model shown is from 2001 onwards.
Immediately plug any holes that form to prevent moisture and dirt from entering the system.
4. Loosen the mounting bolts and, lifting the condenser upwards, remove it from the vehicle (see Figure 14.4).
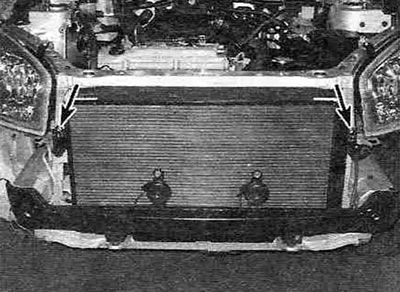
Figure 14.4. Condenser mounting bolts - model shown is from 2001 onwards.
5. Install the capacitor, brackets and tighten the mounting bolts, making sure that the rubber pads are on the support points.
6. Connect the refrigerant pipes, after replacing the sealing gaskets where necessary.
(The information was taken from a web portal: ToyotaMan)
7. Installation of the remaining components is carried out in the reverse order of their removal. Take your vehicle to the same workshop where the air conditioning system was discharged to have it recharged and checked for leaks.