



Heater radiator
Attention!
- Always lock the passive restraint system when you are going to work in the immediate vicinity of its components to prevent the possibility of accidental deployment of the airbags, which could result in serious injury (see chapter 12).
- Avoid contact of coolant with your skin or painted vehicle parts. Rinse off any spilled liquid immediately with plenty of water. Antifreeze is toxic, do not swallow it. Never leave the liquid in an open container: children and animals, attracted by the sweet smell of antifreeze, can be poisoned. Antifreeze is also flammable, so do not store it near an open flame. For information on the civilized method of disposing of antifreeze, please contact your local authorities. There should be special containers for this in the garage. Do not pour antifreeze on the ground or down the drain.
- The air conditioner refrigerant circuit is under high pressure. If there is a need to open the system (disconnecting any fittings or tubes), contact a specialized workshop or dealership service center: the refrigerant removal from the system must be performed by a specialist. Always wear safety glasses when disconnecting refrigerant pipes.
- Allow the engine to cool completely before performing this procedure.
Note: Removing the radiator is a fairly difficult procedure, especially for a non-professional, and involves removing the dashboard, center console, and disconnecting numerous connectors. If you decide to perform this procedure at home, label the main components, connections and connectors (additionally, you can draw up a plan for their location), when removing, place small parts in separate, labeled plastic bags to help you reassemble.
1. If your vehicle is equipped with air conditioning, have its refrigerant circuit discharged at a dealership service center.
2. Set the heater control to the HOT position. Drain the coolant (see chapter 1A or 1B). If the coolant is relatively fresh and clean (see paragraph 2), keep it for reuse.
3. Disconnect the ground wire from the negative battery terminal.
4. Loosen the clamps and disconnect the hoses from the radiator fittings on the engine shield (see Figure 10.4).
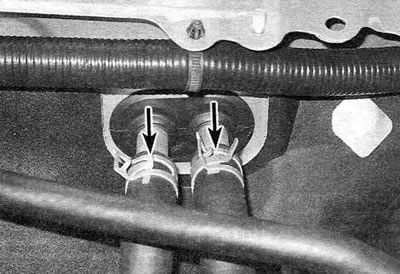
Figure 10.4. Release the clamps and disconnect the hoses (shown by arrows) from the radiator fittings on the engine shield.
Warning. If the heater hoses are stuck to the fittings and cannot be removed, it is better to cut them off the fittings than to remove them with pliers, risking damage to the hoses.
5. Remove the rubber seal of the heater radiator pipes from the engine shield.
6. Disconnect the refrigerant lines from the air conditioner evaporator and remove the rubber seal from the engine shield (if air conditioning is installed) (see Figure 10.6).
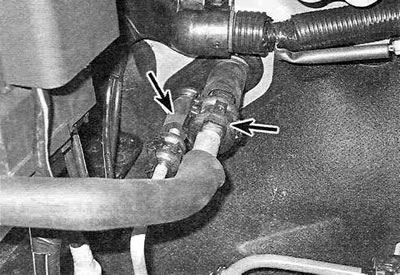
Figure 10.6. Disconnect the quick-connect fittings of the refrigerant lines (shown by arrows) from the evaporator fittings.
Warning. When opening the system or disconnecting any of its parts, wear a protective mask or glasses. If you do not plug the resulting holes after disconnecting any part, moisture will get into the dehumidifier receiver and it will have to be replaced.
Models produced before 2000
7. Remove the glove compartment door from the instrument panel (see chapter 11).
8. Remove the evaporator housing (see Figure 10.8).
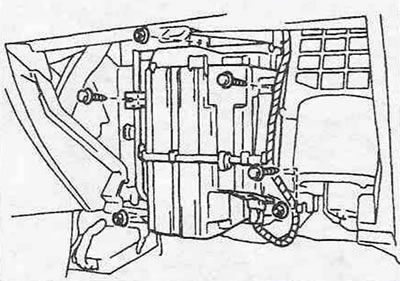
Figure 10.8. Evaporator housing mounting screws and nuts - models produced before 2000.
9. Disconnect the rear lower air duct from the heater housing.
10. Loosen the two mounting nuts and, sliding the heater unit to the right, remove it through the glove compartment opening (see figure 10.10).
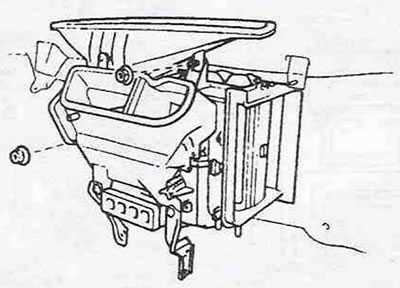
Figure 10.10. Heater radiator mounting nuts - models produced before 2000.
11. Loosen the screws securing the glass heating duct to the top of the heater unit, then remove the mounting clamp and remove the radiator from the housing.
12. The radiator is installed in the reverse order of its removal.
Models produced since 2001
13. Remove the entire instrument panel and its bracket (see chapter 11).
14. Disconnect the wiring connectors from the blower motor and blower motor resistor, then remove the blower assembly (see Figure 10.14).
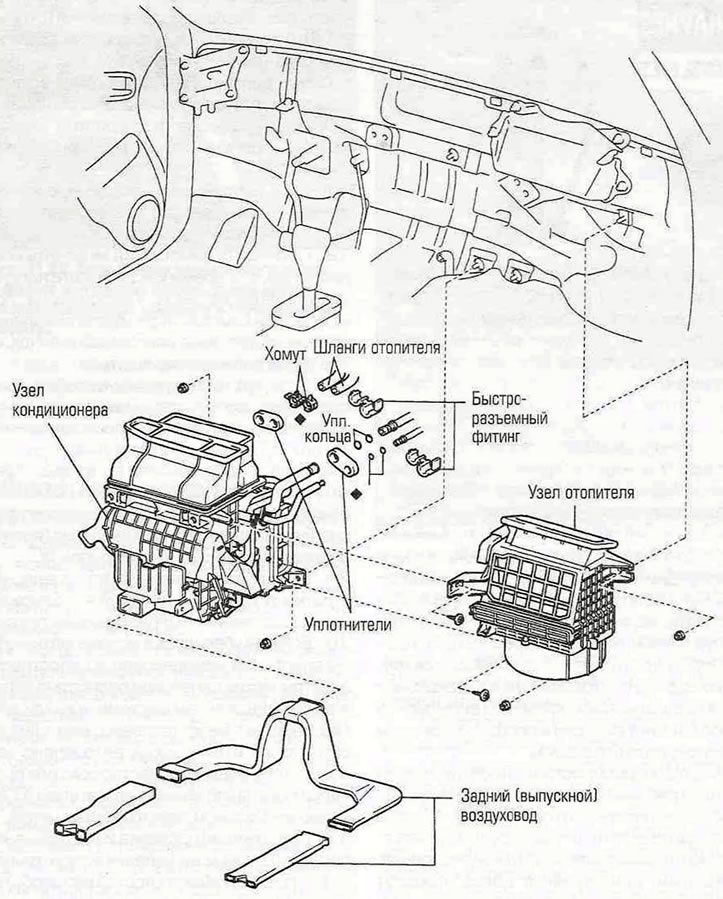
Figure 10.14. Heater/air conditioner unit mounting parts.
15. Remove the rear lower air duct.
16. Unscrew the two mounting nuts and remove the air conditioner unit.
17. Unfasten and remove the thermistor and disconnect the wiring harness from the air conditioner unit.
18. Remove the evaporator from the air conditioner unit (see Figure 10.18).
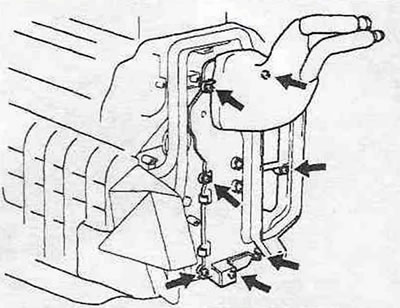
Figure 10.18. Evaporator housing mounting screws - models produced since 2001.
19. Loosen the mounting screws and remove the heater radiator from the air conditioning unit (see Figure 10.19).
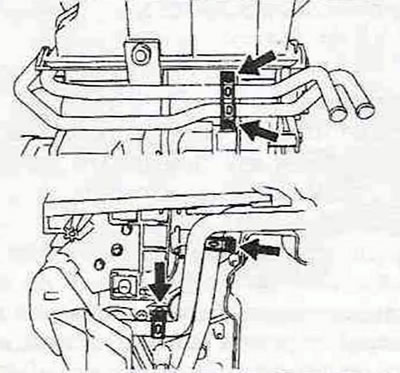
Figure 10.19. Heater radiator mounting screws - models produced since 2001.
20. Assemble and install the components in the reverse order of their removal. When installing the thermistor, make sure that its tip protrudes from the mount by the specified amount (see Figure 10.20).
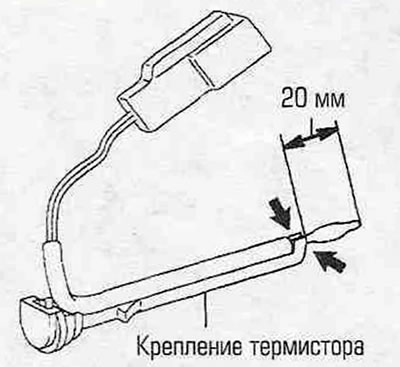
Figure 10.20. Install the thermistor into the mount so that its tip protrudes the specified amount.
21. Fill the cooling system (see chapter 1A or 1B), connect the ground wire to the battery and start the engine. Make sure there are no leaks and that the heating system is operating normally. If air conditioning is installed, charge the system with refrigerant as directed above.