



Fuel rail
Removal
1. Thoroughly clean the area around the high pressure lines and fittings to prevent dust and dirt from entering the fuel system.
2. Drain the cooling system as described in chapter 1B.
3. Remove the intercooler (see paragraph 14) and top engine covers.
4. Unscrew the union nuts and remove the injector feed tubes from the injector unions and the fuel rail. Wrap or plug any holes in the pipes, injectors and fuel rail with tape.
Note: Toyota recommends that when replacing the fuel rail and/or injectors, you also replace the high-pressure lines that feed the injectors.
5. Unscrew the bolt securing the inlet fuel line to the intake manifold housing, then unscrew the union nuts and disconnect the inlet fuel line from the fuel injection pump and fuel rail unions. Plug the resulting holes.
Note: Toyota recommends that when replacing the injection pump or fuel rail, you also replace the fuel inlet line (high pressure tube).
6. Loosen the mounting bolts and disconnect the outlet pipe from the left side of the cylinder head. Remove the old gasket.
7. If you are dealing with an early model, disconnect the wiring connector from the fuel pressure sensor wiring support bracket, if equipped.
8. Loosen the clamp and disconnect the return fuel hose from the fuel rail.
9. Loosen the mounting bolts and separate the fuel rail from the intake manifold. On later models, disconnect the connector from the fuel pressure sensor, if equipped.
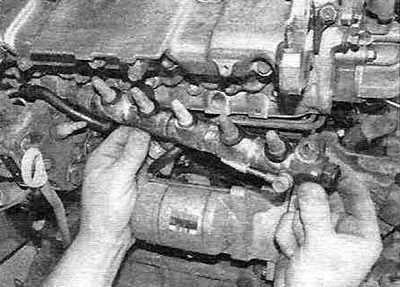
Figure 9.9,a. Remove the fuel rail from the intake manifold...
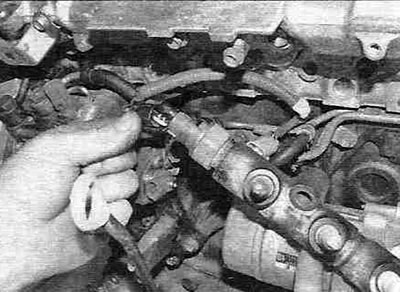
Figure 9.9,b....and disconnect the fuel pressure sensor connector - a late production model is shown.
Installation
10. The fuel rail installation procedure is performed in the reverse order to the procedure for its removal. Be sure to replace all gaskets and tighten the mounting bolts and nuts to the specified torque. Finally, fill the cooling system as described in chapter 1B.