
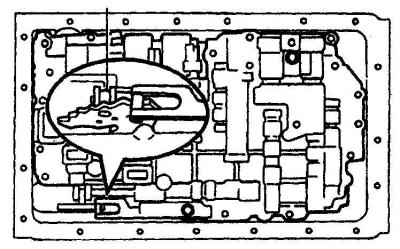
A43D transmission valve body bolts
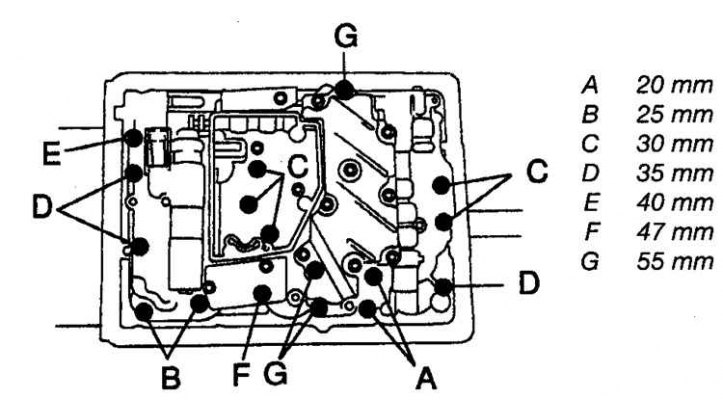
Transmission valve body bolts А34О

Check and adjustment
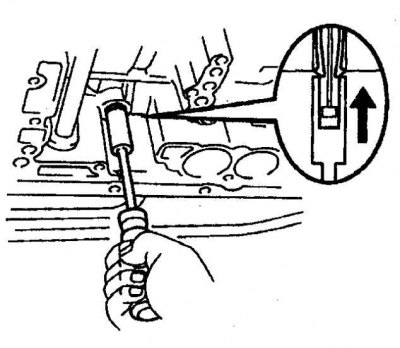
1. Make sure the throttle is fully closed when the pedal is released.
2. Check cable tension.
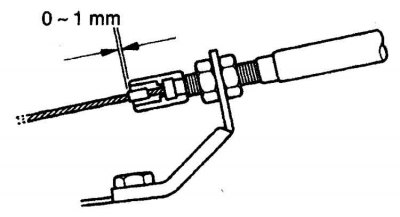
3. Check the distance between the sheath and the rope stop.
4. Adjust if necessary by turning the locknuts.
Replacement
1. Disconnect the cable from the pull (see subsection 5.9).
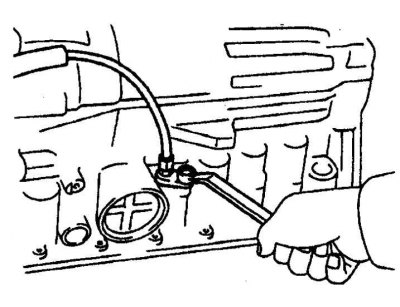
2. Release the cable from the clamps in the engine compartment.
3. Loosen the cable clamp bolt on the converter housing.
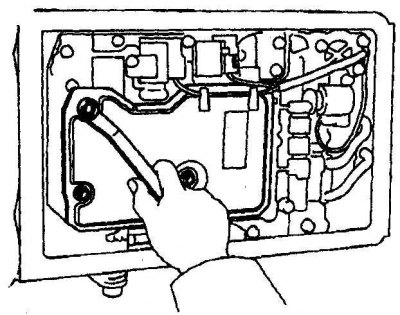
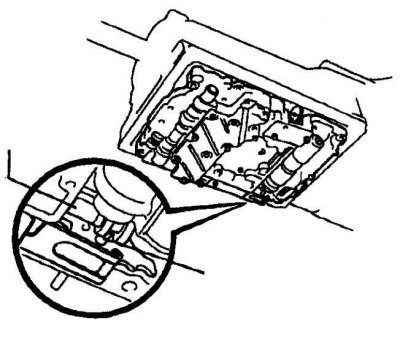
4. Remove the tray.
5. On A340F/A340E transmissions, remove 3 bolts and remove solenoid valves.
 |  |
6. Remove the tubes, on the A43 transmission they can be removed by prying with a screwdriver, after which it is necessary to unscrew the 5 screws of the coarse filter (drawing on the left). To remove the tubes on the A340E transmission, pry them with a screwdriver (drawing on the right).
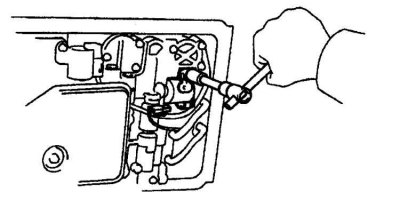
7. The A340F transmission has only 1 tube. To remove the tube, use a screwdriver.
8. Remove the transmission coarse filter (if provided).
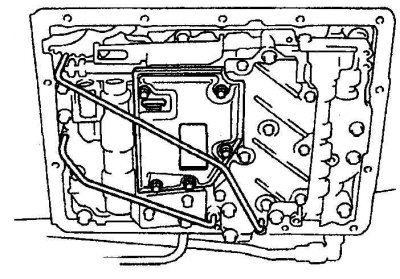
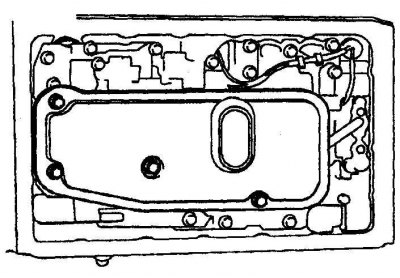
9. Remove 17 bolts and remove the valve body (see pic. A43D transmission valve body bolts and fig. Transmission valve body bolts А34О). When assembling the A43D transmission valve body, it is necessary to tighten the bolts, which have different lengths, in accordance with the diagram. When assembling the A430 transmission valve body, it is necessary to tighten the bolts in accordance with the diagram. Before unscrewing the last bolt, hold the housing with an assistant.
10. Lower the body and disconnect the cable from the cam.
 |  |
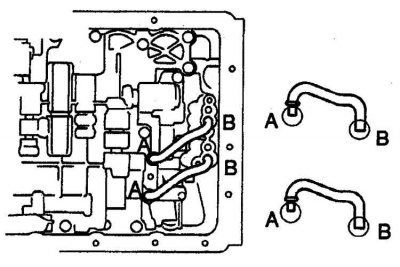
11. Remove cable from transmission. On the A43 transmission, push out the 10 mm cable - socket (drawing on the left). On the A340 transmission, unscrew the bolt and remove the cable (drawing on the right).
12. Pass a new cable. On the A340 transmission, tighten the bolt.
13. Attach cable to cam.
 |  |
14. Before installing the valve body, align the groove on the hand valve with the pin on the lever (the picture on the left shows the A43 transmission, the picture on the right shows the A340 transmission).
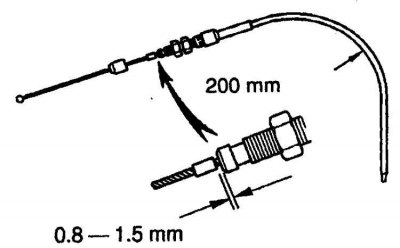
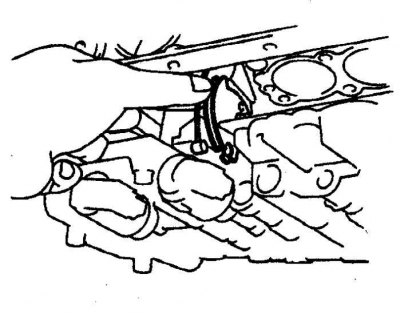
15. Bend the cable so that the radius of curvature is about 200 mm. Push the cable until you feel a slight resistance and rivet the limiter at a distance of 0.8–1.5 mm from the end of the cable sheath.
16. Further assembly is carried out in the reverse order. Adjust the cable if necessary.