
Checking Wiper Motor Electrical Circuit
Note. Refer to the electrical diagrams for the following checks. When performing a voltage test, apply the probe of a grounded 12-volt test lamp to each pin of the electrical connector until the lamp lights up; this confirms the presence of voltage on the contact. If the following checks do not solve the problem, have the system diagnosed by the dealer's service department or another properly equipped service station.
1. If the windshield wipers are running slowly, make sure the battery is in good condition and properly charged (see chapter 5). If the battery is in good condition, remove the wiper motor (see below) and activate the wiper arms manually. Check the linkage and its hinges for binding. Lubricate or repair as necessary. Reinstall the wiper motor. If the wipers are still running slowly, check the relevant electrical circuit for loose or corroded connections, especially the connection at the «mass». If all connections are good, replace the motor.
2. If the wipers do not work when turned on, check the fuse in the fuse box located in the passenger compartment on the driver's side. If the fuse is OK, install a jumper wire between the wiper motor ground terminal and «weight» and recheck. If the motor is now running, repair the electrical ground circuit. If the motor still does not run, move the wiper switch to the high speed position (HI) and check for voltage in the motor.
Note. Remove the hood panel to gain access to the wiper motor electrical connector (see chapter 11).
3. If there is voltage in the electrical connector, remove the electric motor and test it outside the vehicle using the fused connecting wires connected to the battery. If the motor is now running, check the linkage for binding (see item 1). If the electric motor is still not working, lure it in. If there is no voltage to the motor, check for voltage at the wiper control relay. If there is voltage at the wiper control relay and no voltage at the wiper motor, check the switch. If the switch is OK, the wiper control relay may be faulty. For relay testing information, see paragraph 5.
4. If the wipe interval function does not work, check the integrity of all wiring between the switch and the wiper control module.
5. If the wipers stop in the position they were in when the switch was turned off (cannot return to their original position), check for voltage on the reset function supply wire at the wiper motor electrical connector when the wiper switch is off and the ignition is on. If there is no voltage, check for an open circuit between the wiper motor and the fuse panel.
Replacement
Windshield wiper motor
Lexus models
6. Turn away nuts of levers of a screen wiper and note position of levers concerning their shafts (pic. 13.6, a, b). Remove both wiper arms.
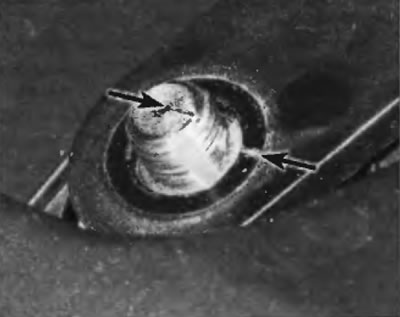
Pic. 13.6, a. On a Lexus model, the left wiper arm is a conventional single arm secured with a nut. Unscrew the nut and mark the position of the lever relative to the shaft
Pic. 13.6, b. On the Lexus model, right (on the passenger side) The wiper arm consists of two arms and nuts. Loosen both nuts..
Pic. 13.6, c....and mark the position of the levers relative to the shafts
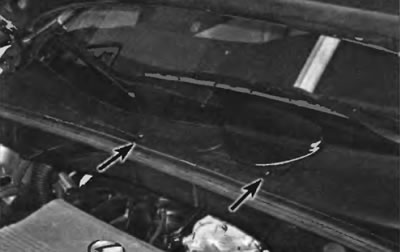
7. Remove the plastic hood panel (see chapter 11).
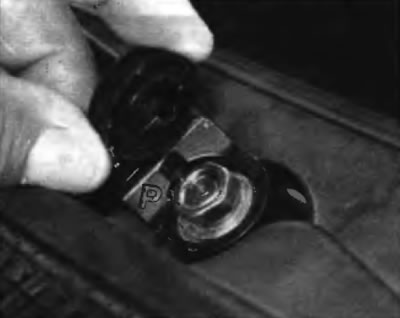
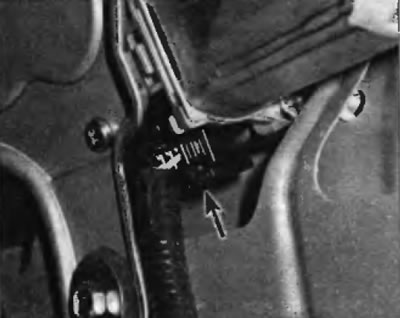
8. Disconnect the electrical connector of the wiper motor (pic. 13.8).
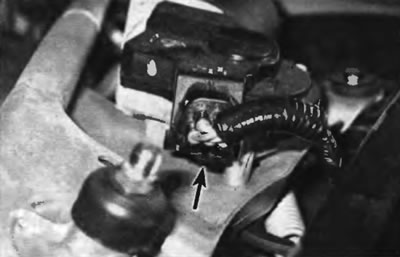
Pic. 13.8. To disconnect the electrical connector of the windshield wiper motor, press the locking element (Lexus models)
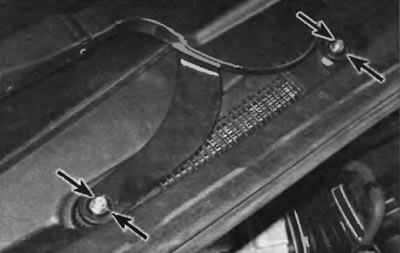
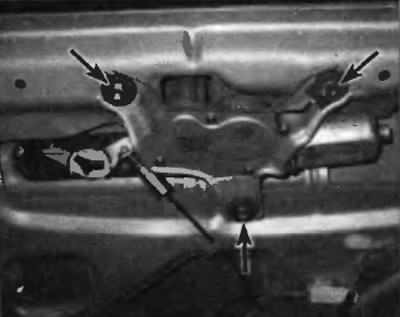
9. Turn out corresponding bolts and remove the electric motor of a cleaner of a windscreen in gathering with the lever mechanism (pic. 13.9).
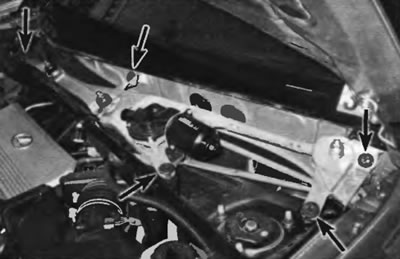
Pic. 13.9. To disconnect the windshield wiper motor assembly with linkage, remove the five bolts (Lexus models)
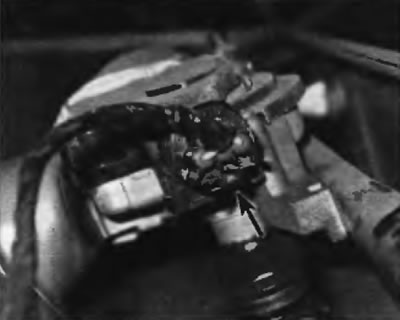
10. Pry with a screwdriver and carefully remove the connecting rod from the pivot pin on the motor crank arm.
11. Turn away a nut of fastening of a crank lever to an electric motor shaft.
12. Mark the position of the lever relative to the motor shaft and remove the lever.
13. Turn out three bolts and remove the electric motor from a basic arm.
14. Installation is performed in the reverse order of removal.
Toyota models
15. Remove caps from nuts of fastening of levers of a screen wiper (pic. 13.5), and then loosen these nuts.
Pic. 13.15. Remove the cap from the nut on each wiper arm and remove the nut (Toyota models)
16. Mark the position of each wiper arm relative to its shaft, and then remove the arms (pic. 13.6, a).
17. Remove the plastic hood panel (see chapter 11).
18. Disconnect the electrical connector of the wiper motor (pic. 13.18).
Ryas. 13.18. To disconnect the electrical connector of the electric motor, remove the wipers on the blocking ledge and disconnect the connector
19. Turn out the corresponding bolts and remove the electric motor of a cleaner of a windscreen in gathering with the lever mechanism (pic. 13.19).
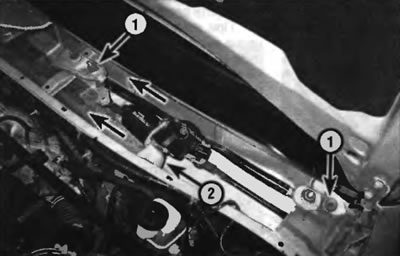
Pic. 13.19. To disconnect the wiper motor assembly with the linkage, unscrew the two bolts (1), and then move the assembly to the right (towards the passenger side), to unhook the rubber support from the semi-circular bracket (2), located in the center in the area in front of the windshield
20. Pry with a screwdriver and remove the connecting rod from the hinge on the crank arm of the wiper motor (pic. 13.20).
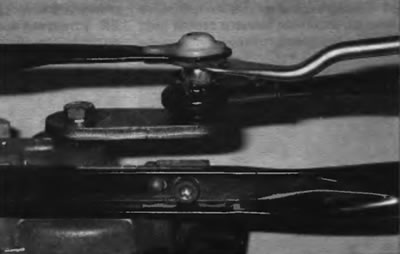
Pic. 13.20. Using a trim remover, separate the connecting rod from the pivot on the crank arm
21. Loosen the nut on the crank arm (pic. 13.21), mark the position of this lever relative to the motor shaft and remove the lever from the shaft.
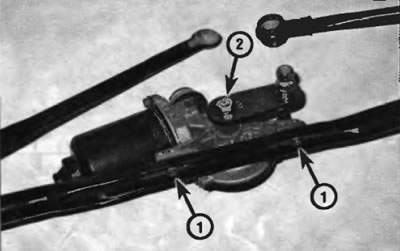
Pic. 13.21. To disconnect the wiper motor from the linkage, unscrew the two bolts (1). If you are replacing the motor, loosen the crank arm mounting nut (2).
22. Turn out bolts of fastening of the electric motor of a screen wiper and separate the electric motor from the lever mechanism.
23. Installation is carried out in the reverse order of removal.
Rear wiper motor
24. Remove the cap from the rear window wiper arm nut (pic. 13.24) and unscrew the nut.
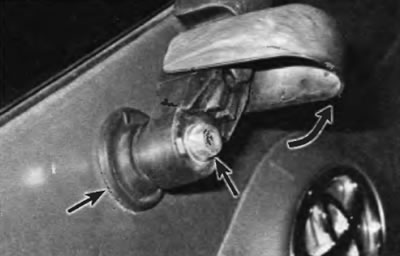
Pic. 13.24. To shine the rear wiper arm, remove the cap from the nut, remove the nut, mark the position of the wiper arm relative to the motor shaft, and then remove the arm and sealing sleeve
25. Mark position of the lever of a cleaner of back glass concerning an electric motor shaft, and then remove the lever.
26. Remove the trim panel from the tailgate (see chapter 11).
27. Disconnect the electrical connector of the cleaner motor (pic. 13.27).
Pic. 13.27. Disconnect the electrical connector for the rear window wiper motors
28. Turn out bolts of fastening of the electric motor of a cleaner (pic. 13.28) and remove the motor.
Pic. 13.28. To disconnect the rear window wiper motor from the tailgate, remove the three bolts
29. Installation is carried out in the reverse order of removal.