



Contents: Removal ↓ Installation ↓
Removal
1. Disconnect the battery from ground.
2. Remove the fluid level dipstick.
3. Disconnect the throttle cable by loosening the adjusting nuts, pulling the cable out of the bracket and unhooking it from the rod. Disconnect the cable latches.
4. Remove the middle section.
5. On 4WD vehicles, remove the transfer case lever by removing the retaining ring.
6. Raise the car.
7. Remove the lower shields that prevent the gearbox from being removed.
8. Drain the transmission fluid and replace the pan.
9. Loosen the bracket bolts and remove the fluid level indicator pipe.
10. Disconnect the axle shafts (see subsection 7.8).
11. Remove the front exhaust pipe.
12. Loosen the knurled union nut and remove the speedometer cable. Do not allow the felt gasket and washers to become loose.
13. Disconnect all connectors from the transmission (speed sensor, lock solenoid, lock switch, etc.).
14. Disconnect the rod from the lever on the transmission.
15. Disconnect the transmission pipes leading to the cooler.
16. Remove the starter and move the wires to the side.
17. On vehicles with 5VZ-FE engine, remove the stabilizer bar crossmember.
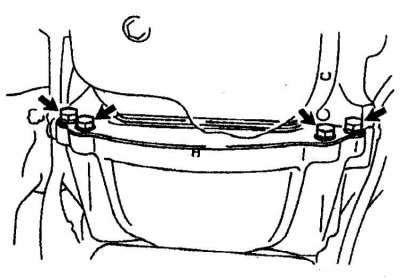
18. Remove the torque converter cover.
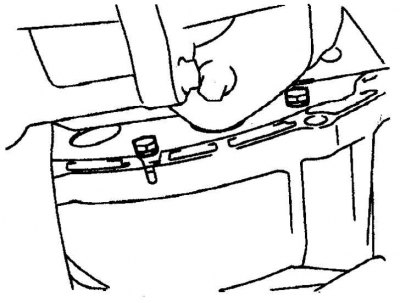
19. Mark the position of the torque converter on the drive disk, unscrew 6 bolts one by one, for which turn the crankshaft clockwise.
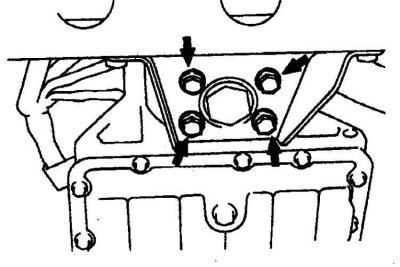 | 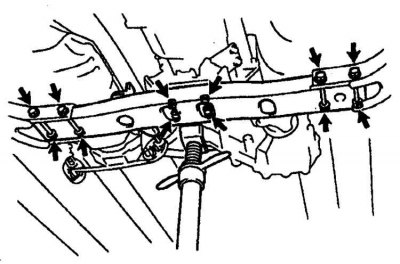 |
20. Place a jack under the crankcase (a special cart is desirable). Loosen the bolts securing the crankcase tail to the crossmember (photo on the left). Remove the bolts, lift the transmission and remove the crossmember (photo on the right).
21. Place a jack under the engine and remove the transmission-to-engine mounting bolts.
22. Slide the transmission back and off the dowel pins. Secure the torque converter to the transmission.
23. On 4WD vehicles, remove the transfer case.
Installation
1. Make sure the torque converter hub is engaged with the pump.
2. Place the transmission on the dolly and carefully lift it, keeping it level. Attach the fluid cooler lines.
3. Turn the torque converter and align the marks made before removal.
4. Carefully position the transmission toward the engine and place it on the dowel pins.
5. Install the transmission mounting bolts and tighten to the specified torque.
6. Tighten the torque converter mounting bolts.
7. Install the crossbar and tighten the bolts and nuts.
8. Lower the crankcase tailpiece, aligning it with the holes in the crossmember, tighten the bolts and nuts.
9. Then assembly is carried out in reverse order (see Fig. Automatic transmission (type A340) of all-wheel drive vehicles).