



Lamps for external lighting devices
Front direction indicators/parking lights and side lights
Note: The front turn signal/parking light and side light bulbs are located in the headlight housing.
1. Remove the headlight housing (see paragraph 16).
2. Remove the front turn signal/parking light and side light bulb socket from the headlight housing (Fig. 19.2).
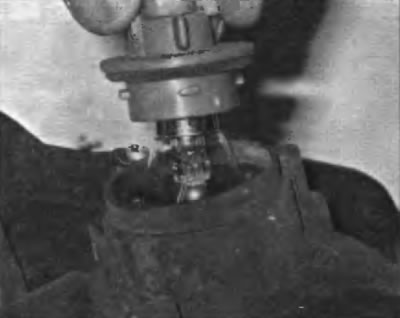
Fig. 19.2. To remove the front turn signal/parking light and side light bulb socket, turn it counterclockwise and pull it out of the headlight housing
3. Remove the lamp from the socket (Fig. 19.3).
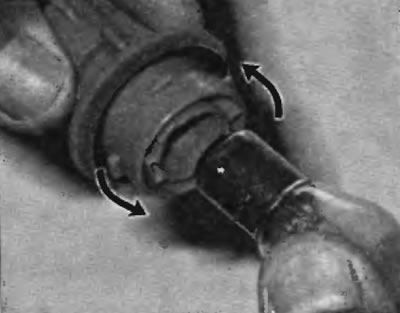
Fig. 19.3. To remove the front turn signal/parking light and side light bulb, turn it counterclockwise and pull it out
4. Installation is performed in the reverse order of removal.
Fog light bulbs
5. Raise the front of the vehicle and place secure supports underneath it.
6. Disconnect the electrical connector at the fog light bulb socket.
7. Turn the fog light bulb socket counterclockwise and pull it out of the fog light housing.
8. Installation is performed in the reverse order of removal.
Center High Brake Light
Notes: The center high-mounted brake light is located on the top edge of the tailgate.
9. Open the tailgate and remove the trim panel from the upper inner edge of the tailgate between the two hinges (Fig. 19.9).
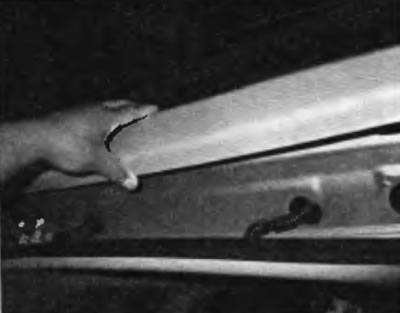
Fig. 19.9 Remove the trim panel from the upper inside edge of the tailgate to gain access to the center high-mounted brake light bulb. Simply pull the trim panel out to release it
10. Disconnect the electrical connector of the center high stop lamp socket (fig. 19.10).
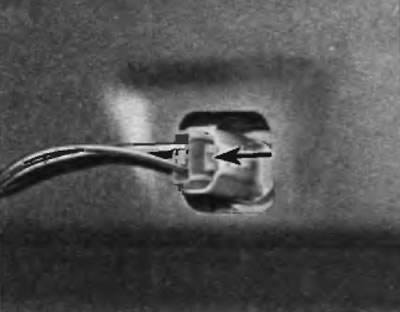
Fig. 19.10. To disconnect the electrical connector, press the locking tab on the center high brake light bulb and disconnect the connector
11. Remove the bulb holder from the brake light housing (fig. 19.11).
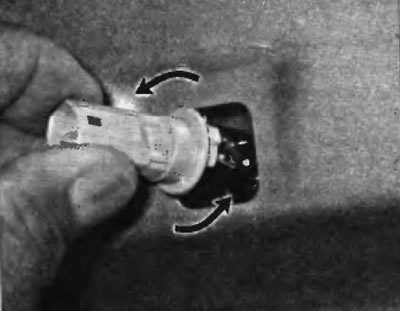
Fig. 19.11. To remove the center high brake light bulb socket, turn it counterclockwise and pull it out
12. Remove the center high brake light bulb from its socket (fig. 19.12).
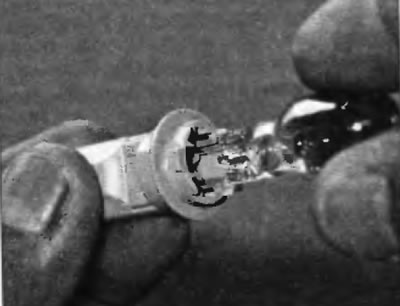
Fig. 19.12. To remove the center high brake light bulb from its socket, simply pull it out
13. Installation is performed in the reverse order of removal.
Brake/tail light, turn signal and reversing light bulbs
View the original source on the website [ToyotaMan.ru]
14. Open the tailgate. Remove the access panel for the brake/tail light, turn signal, brake light and reversing light (fig. 19.14).
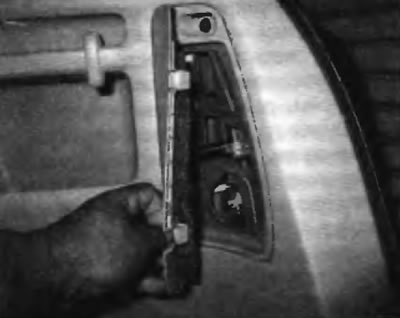
Fig. 19.14. To access the rear brake light, turn signal and reversing light locks, open the small panel
15. Find the lamp you want to replace (fig. 19.15).
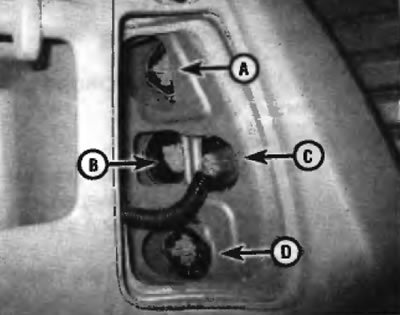
Fig. 19.15. Typical arrangement of lamps and taillight: A, C — brake light/taillight lamp, B — rear turn signal lamp, D — reversing lamps
16. Remove the bulb holder from the rear light housing (fig. 19.16).
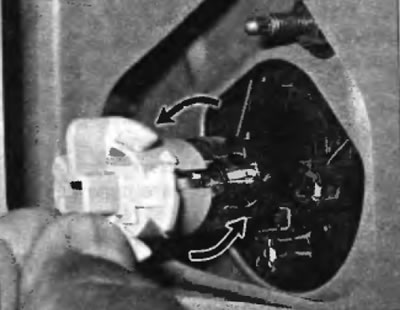
Fig. 19.16. To remove the tail light bulb, turn it counterclockwise and pull it out of the tail light housing
17. Remove the lamp from the socket (Fig. 19.17).
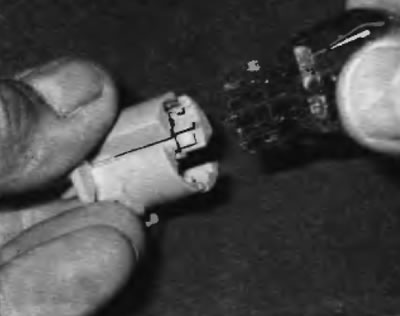
Fig. 19.17. To remove the rear light bulb from the socket, simply pull it out. After installing the bulb, wipe it
18. Installation is performed in the reverse order of removal.
License plate lights
19. Remove the screws securing the license plate light housing (fig. 19.19) and remove the flashlight housing.
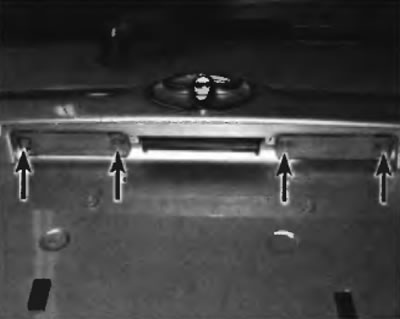
Fig. 19.19. To remove the housing of any of the license plate lights, unscrew the two screws on the diffuser
20. Remove the lamp from the housing (fig. 19.20).
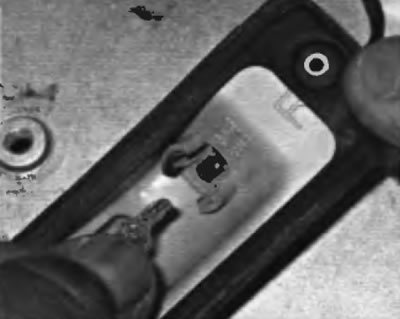
Fig. 19.20. To remove the bulb from the license plate light housing, simply pull it out
21. Installation is performed in the reverse order of removal.
Interior light lamps
Reading lamps and ceiling lamps
Note: The accompanying photographs for this section show reading lamps, but the same steps apply to the ceiling light as well.
22. Remove the diffuser from the reading lamp housing (fig. 19.22).
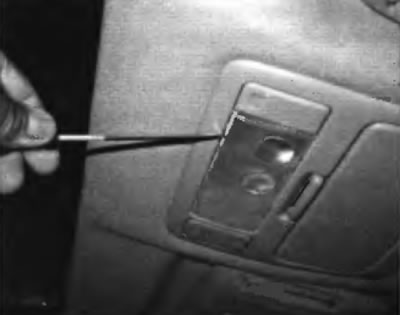
Fig. 19.22. Using a small screwdriver, carefully pry and remove the diffuser from the reading lamp (the same procedure applies to the flange)
23. Remove the lamp from the terminals (fig. 19.23).
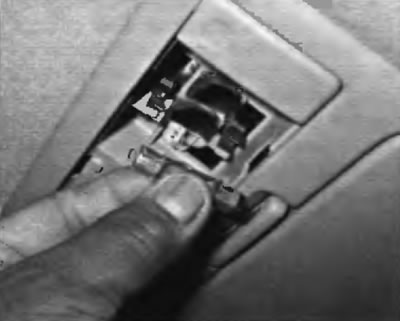
Fig. 19.23. To remove the reading lamp from the housing, grasp it firmly and pull it out of the clamps. If necessary, pry the lamp only by the metal ends, but do touch the glass
24. Installation is performed in the reverse order of removal.