
2. Small breaks in the heating element can be repaired without removing the rear window.
Examination
3. Switch on the ignition and turn the ignition of the heated rear window to the on position. Take a voltmeter, attach its positive probe to the positive terminal of the heated rear window grid, and the negative probe to the ground terminal. If there is no battery voltage reading, check the fuse, heated rear window switch, and related wiring. If voltage is present, but the glass heating grid does not heat up completely or partially, perform the following checks.
4. When measuring voltage during the following two tests, wrap aluminum foil around the tip of the positive probe of the voltmeter and press the foil against the heating element with your finger (pic. 14.4). Attach the negative probe to the heating grid ground terminal.
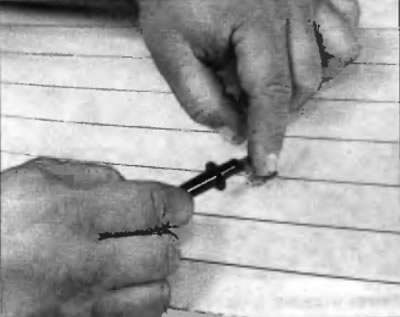
Pic. 14.4. Wrap the positive probe of the voltmeter with aluminum foil and press the foil against the wire with your finger
5. Check the voltage at the center of each heating element (pic. 14.5). If the voltage is 5 or 6 V, the element is good (there is no break). If the voltage is zero, the element has an open between the center and the positive end. If the voltage is 10-12V, the element has an open between the center of the element and the ground side. Check each heating element.
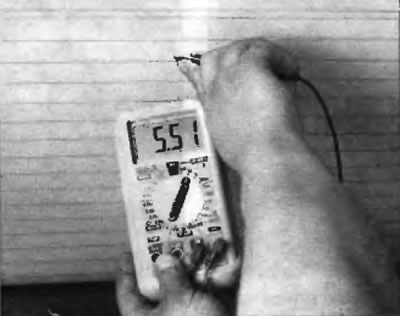
Pic. 14.5. To determine if either heating element is broken, check the voltage at the center of each element
6. Connect the negative wire to a good ground point on the body. The indication should remain the same. If not, the ground is faulty.
7. To find an open, apply the negative probe of a voltmeter to the ground terminal of the heating grid. Place the positive lead of a voltmeter wrapped in foil over the positive end of the heating element and slide it towards the negative end. The point at which the voltmeter reading deviates from a few volts to zero is the point at which the heating element is damaged (pic. 14.7).

Pic. 14.7. Move the positive wire of the voltmeter wrapped in foil from the positive to the negative end of the heating element. The point at which the voltmeter reading changes abruptly is the point that the element is degenerate
Repair
8. Repair the gap in the heating element using a repair kit specifically recommended for this purpose, available from many auto parts stores. This kit includes a plastic, electrically conductive epoxy resin.
9. Turn off the system and allow the glass to cool for a few minutes before repairing the break.
10. Lightly polish the element area «wire wool», and then wipe it thoroughly with alcohol.
11. Cover the area to be repaired with masking tape.
12. Thoroughly mix the epoxy following the instructions included with the repair kit.
13. Apply epoxy to the incision area in masking tape, overlapping the damaged area approximately 18mm on either side of the break point (pic. 14.13).
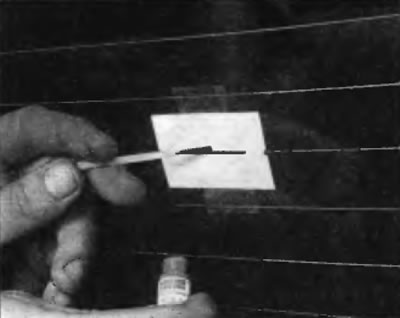
Pic. 14.13. To use a Heated Glass Repair Kit, apply painter's tape to the inside of the glass at the damaged area, then apply a special electrically conductive material with a brush
14. Wait approximately 24 hours for the epoxy to cure before removing masking tape and using the system.