



Checking the fuel system

Caution! Fuel is extremely flammable, so take special precautions when working on any part of the fuel system. Do not smoke or use open flames or portable electric lighting devices that are not equipped with protective screens. Do not work in a garage that uses gas-powered equipment, such as a water heater or clothes dryer. Since fuel is carcinogenic, wear protective gloves when working to avoid contact with the fuel on your hands. If fuel comes into contact with your skin, wash it off immediately with soap and water. Any fuel spilled on the floor must be wiped up immediately. Do not store contaminated rags left over from working with fuel in areas where ignition is possible. The fuel system maintains constant pressure. If you are going to disconnect any part of the fuel system, you must first relieve the pressure. When performing any work on the fuel system, wear safety glasses or a mask and keep a fire extinguisher handy.
1. If you smell gasoline while driving or after the car has been in the sun for some time, the fuel system should be checked immediately.
2. Remove the gas cap and inspect it for damage and rust. Check the condition of the gasket. If it shows signs of rust or is damaged, replace it (see Figure 16.2).
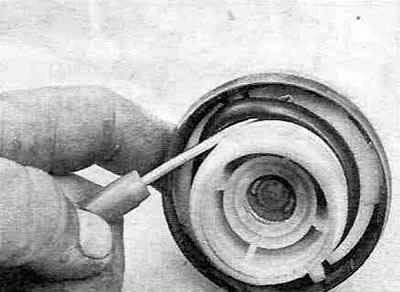
Figure 16.2. Using a small screwdriver, carefully pry up the old seal, being careful not to damage the cover.
3. Check for cracks in the fuel lines connecting the fuel tank to the injection system. Check the tightness of the flare nuts on the fuel line connections and, on pre-2000 models, the tightness of the banjo bolt in the fuel filter nipple connection.
4. To inspect the fuel lines and tank, it is best to place the car on a lift. If a lift is not available, set the parking brake, raise the front of the vehicle with a jack and place safety stands.
5. Inspect the gas tank and filler neck; there should be no cracks, holes, etc. The rubber filler neck may leak due to decomposition of the rubber or wear (see Figure 16.5), for example, from overtightened or loose clamps.
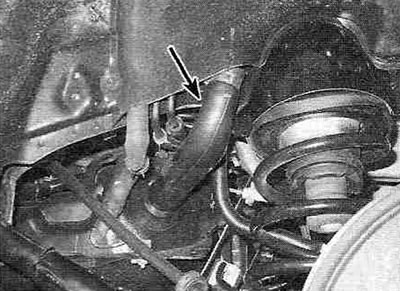
Figure 16.5. Check the rubber gas tank filler neck for cracks and make sure the clamps are tight.
A car owner can fix these problems on his own.
Warning! Do not attempt to repair the gas tank under any circumstances (except for replacing its rubber components).
6. Check all rubber hoses and metal pipes for loose connections, fasteners, damage, pinching, etc.