



Rear differential (4WD models)
Removal
1. Raise the rear of the vehicle with a jack and install secure safety supports. Chock the front wheels of the car to prevent it from rolling off the supports. Release the handbrake and move the gearshift lever to neutral.
2. Drain the oil from the differential (see chapter 1A or 1B).
3. Disconnect the drive shafts from the differential output shaft flanges (see paragraph 9). Tie the drive shafts with wire or rope to avoid damaging the outer CV joints and their boots.
4. Mark the relative positions on the flanges of the drive shaft and the differential pinion shaft (see Figure 11.9), then, after unscrewing the mounting bolts, separate the flanges (see paragraph 11). Tie the cardan shaft with a piece of wire (it must not be allowed to exert its weight on the suspension bearing).
5. Support the differential housing with a jack. Remove the two bracket mounting bolts at the rear of the differential.
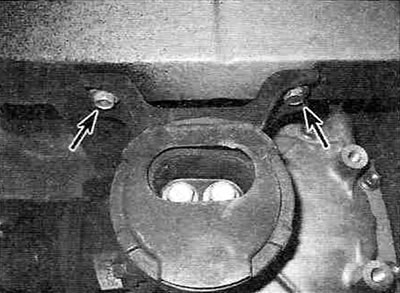
Figure 14.5. Rear differential bracket mounting bolts.
6. Remove the two front differential mounting bolts (see Figure 14.6).
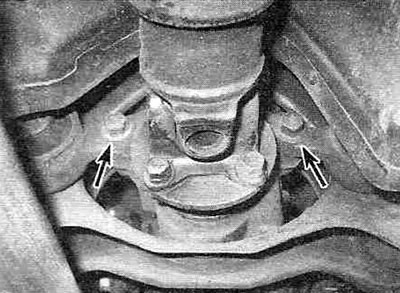
Figure 14.6. Front differential mounting bolts.
Slowly lower the jack and remove the differential from underneath the vehicle.
Installation
7. The differential is installed in the reverse order of its removal. Tighten all differential mounting bolts to the specified torques Specifications of this chapter. Fill the differential housing with the prescribed type of oil (see chapter 1A or 1B).