



Checking and replacing spark plugs

Note: Replacement intervals are described in the Maintenance Schedule section.
1. To replace spark plugs, you need a spark plug head (with a rubber insert to prevent damage to the porcelain insulator of the spark plug and to prevent it from falling out when removed) with extension cord and gimbal and ratchet handle ("ratchet") (see Figure 25.1).
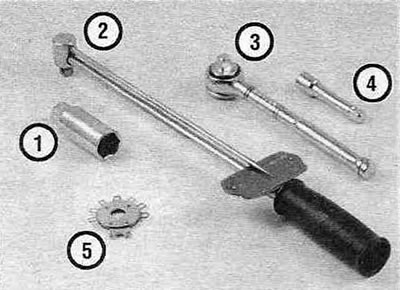
Figure 25.1. Tools needed to replace spark plugs:
1 - Spark plug head - it must have a special rubber insert inside to avoid damaging the porcelain insulator of the spark plug.
2 - Torque wrench - although not required, it can be used to ensure the integrity of the threads.
3 — Ratchet crank (ratchet) - a standard tool.
4 - Extension - Depending on the model and equipment, different universal joint extensions may be required.
5 - A set of spark plug feeler gauges - for measuring the interelectrode gap, available in different modifications.
You will also need a set of feeler gauges and a torque wrench, as otherwise you can damage the threads in the aluminum head.
2. When replacing spark plugs, purchase new ones in advance that are suitable specifically for your engine, check and adjust the gap in them. Information can be found in Specifications at the beginning of this chapter and in the operating instructions supplied with the vehicle.
3. Check the new spark plugs for defects. Spark plugs with chips or cracks must not be installed.
4. Check the interelectrode gap on new spark plugs by inserting a round feeler gauge of the appropriate thickness between the electrodes (see Figure 25.4,a).
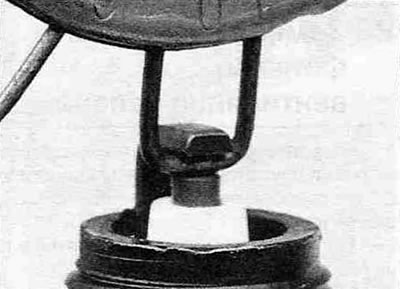
Figure 25.4,a. Spark plug manufacturers recommend using a round feeler gauge to measure the gap.
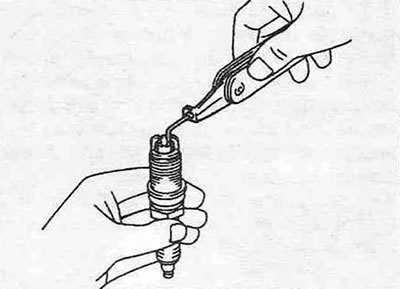
Figure 25.4,b. Spark plugs on models produced from 1998 to 2000 have two side electrodes. The gap must be checked between each side and central electrode.
If the gap size differs from the norm, use a special key to slightly bend the curved part of the side electrode (see figure 25.4,c).
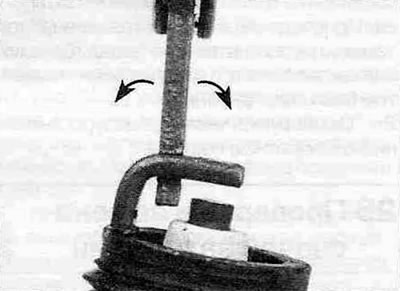
Figure 25.4, c. To adjust the gap, use a special key, bending the electrode in the directions indicated by the arrows, carefully so as not to damage the porcelain insulator of the central electrode.
Warning. Models produced since 2001 use spark plugs with iridium-coated electrodes. Do not attempt to adjust the gap on used iridium spark plugs.
5. If the side electrode is not positioned exactly above the central one, align it by slightly bending it in the horizontal plane.
Warning. If it is necessary to adjust the gap, bend only the side electrode without touching the insulator skirt.
Removal
6. To avoid mixing up the high-voltage wires, the spark plugs should be replaced one at a time. On pre-2000 models, remove the spark plug wire from one spark plug. Pull only on the rubber tip, using gentle twisting movements, and never on the wire itself (see Figure 25.6).
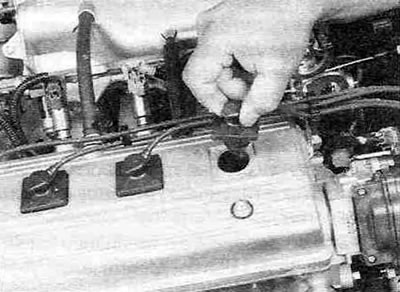
Figure 25.6. When removing high-voltage wires on models produced before 2000, hold only the rubber tip and perform a rotary-translational motion.
On models produced since 2001, remove the ignition coils (see chapter 5).
7. Use a jet of compressed air from a compressor to clean the area around the spark plug to prevent dirt from getting into the cylinder. You can also use a hand pump.
8. Remove the spark plug (see Figure 25.8).
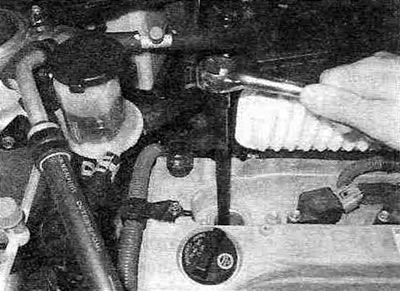
Figure 25.8. To remove the spark plug, use a spark plug socket with an extension and a ratchet.
Installation
9. Before installation, lightly lubricate the threaded part of the spark plug with a non-stick compound (see Figure 25.9,a).
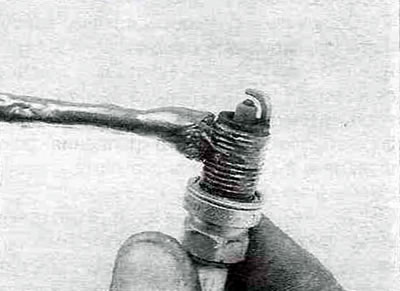
Figure 25.9,a. Apply a thin layer of non-stick compound to the threaded part.
(The publication is taken from the website ToyotaMAN.ru)
Quite often, when installing spark plugs, they become distorted. To make this operation easier, place a piece of hose on the end of the hose (see Figure 25.9,b).
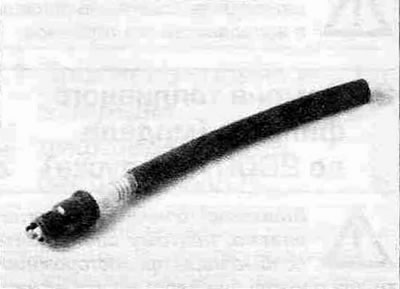
Figure 25.9, b. When installing: a piece of hose of a suitable diameter saves time and prevents damage to the threads.
The flexible hose will act as a swivel wrench. If the spark plug does not enter the thread, the hose will come off and the thread will not be damaged. Tighten the spark plug to the torque specified in Specifications.
10. Connect the high-voltage wire to the spark plug and, carefully twisting the cap, put it on until it stops. On models produced since 2001, install an ignition coil.
11. Repeat the above procedure with the remaining candles. Replace the spark plugs one at a time to avoid mixing up the high-voltage wires.