



Replacing the fuel filter (models produced before 2000)

Caution! Fuel is extremely flammable, so take special precautions when working on any part of the fuel system. Do not smoke or use open flames or portable electric lighting devices that are not equipped with protective screens. Do not work in a garage that uses gas-powered equipment, such as a water heater or clothes dryer. Since fuel is carcinogenic, wear protective gloves to avoid contact with the fuel on your hands, and if it does come into contact with your skin, wash it off immediately with soap and water. Any fuel spilled on the floor must be wiped up immediately. Do not store fuel-contaminated rags in areas where ignition is possible. The fuel system is under constant pressure - if you are going to disconnect any part of it, you must first relieve the pressure. When working on the fuel system, wear safety glasses or a mask and keep a fire extinguisher handy.
Note: On models produced since 2001, the fuel filter is combined into one module with the fuel pump, which is located in the fuel tank; for these models, there are no prescribed fuel filter replacement intervals as part of routine vehicle maintenance.
1. Relieve pressure in the fuel system (see chapter 4.1). Disconnect the negative (ground) terminal from the battery.
2. The fuel filter is mounted on the left strut mount panel below the air filter housing and fuse/relay box (see figure 24.4).
3. Remove the air filter and fuse/relay box.
4. Hold the filter housing with an open-end wrench and loosen the banjo bolt at the top of the housing, then use a spanner to loosen the cone nut at the bottom of the housing (see figure 24.4).
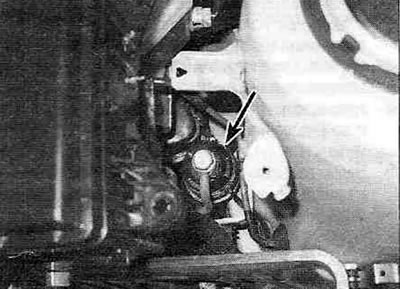
Figure 24.4. Fuel filter installed on the left strut mount panel - pre-2000 models.
5. Unscrew both bracket mounting bolts and remove the filter together with the bracket from the engine compartment.
6. Note that the inlet and outlet fittings are clearly marked on the corresponding ends of the filter and the filter is installed with the flange side facing down. When installing a new filter, make sure the outlet is on top and the inlet is on the bottom.
7. Replace the filter bottom fitting nut and tighten it securely. When connecting the upper fuel line, replace the banjo bolt sealing washers and tighten it to the specified torque (see Specifications).
8. Perform the rest of the procedure in reverse order.