



Replacing the transmission fluid and filter in an automatic transmission

Note: Some filters are fine-mesh screens that can be simply washed in solvent instead of being replaced.
1. In an automatic transmission, the transmission fluid and filter should be replaced regularly, and the magnetic trap should be cleaned of metal filings.
2. Before starting work, stock up on the appropriate transmission fluid (see section "Liquids and lubricants").
3. You will also need: safety supports to lift the car, wrenches, a basin to drain the used fluid, newspapers and a clean rag.
4. The fluid should be drained when the engine is warm, since sediment is removed much better with hot fluid.
Caution! Hot liquid can cause burns—wear protective gloves.
5. After the vehicle has driven the required distance to warm up the fluid in the automatic transmission, lift it with a jack and place it on safety supports to access the drain plugs of the automatic transmission and differential.
6. Place all necessary tools and supplies under the vehicle, being careful not to touch hot exhaust system components.
7. Place a basin under the automatic transmission drain plug and unscrew it using a hex key (see Figure 30.7,a).
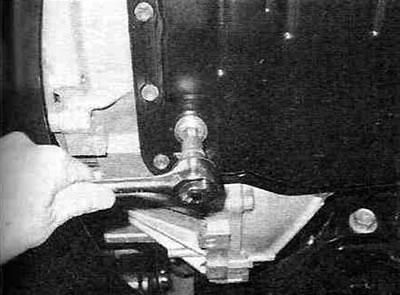
Figure 30.7,a. Unscrew the drain plug on the automatic transmission housing using a hex key.
Be careful - the liquid comes out in a fairly strong stream. After the liquid has drained, screw the plug back into place. On models without all-wheel drive (2WD) produced since 2001, there is also a plug in the transmission differential housing. Unscrew this plug and drain the liquid (see Figure 30.7,b).
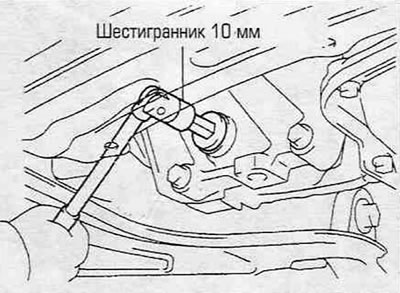
Figure 30.7,b. On models without all-wheel drive (2WD) produced since 2001, the automatic transmission differential also has a drain plug.
Replace the gasket and tighten the plug. Tighten the plugs to the specified torque (see Specifications).
8. Unscrew all the pan mounting bolts on the rear edge, then loosen the bolts on the front edge and, using a screwdriver, carefully pry up the rear edge (the remaining bolts will prevent the pallet from falling off), loosen the pan and drain the remaining liquid. After the liquid has drained, remove the remaining bolts and remove the pan.
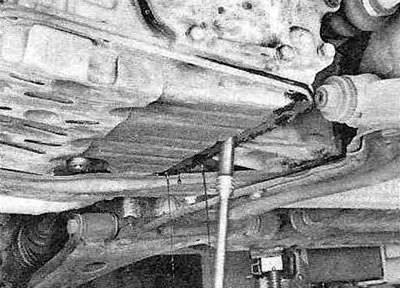
Figure 30.8,a. After loosening the bolts on the front edge of the automatic transmission pan, unscrew the bolts on the rear edge...
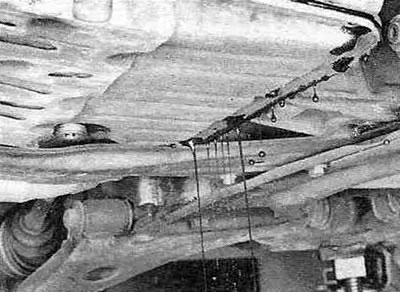
Figure 30.8, b....then, carefully pressing the rear edge with a screwdriver, drain the remaining liquid.
9. Loosen the filter mounting bolts and detach the latch (on some models) and remove the filter from the automatic transmission (see Figure 30.9).
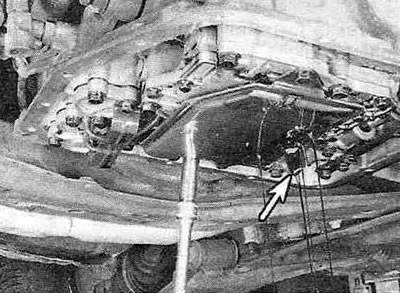
Figure 30.9. Loosen the mounting bolts and remove the filter (be careful, there may be liquid residue).
[The original can be found on this resource: www.toyotaman.ru]
When removing the filter, try not to spill it on yourself - there is still liquid left in it.
10. Install a new one (or washed old) filter, secure the latch (if any) and tighten the mounting bolts. Tighten the bolts to the torque specified in Specifications.
11. Remove all traces of the old gasket from the oil pan and the automatic transmission housing. Remove all magnets and wipe them with a clean, lint-free cloth. Rinse the tray with clean solvent and dry with compressed air. Place the magnets in their places.
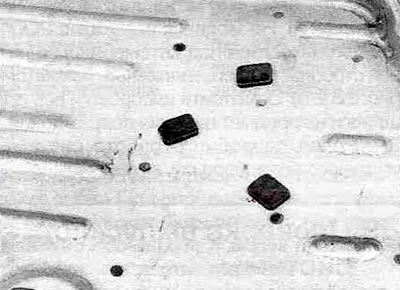
Figure 30.11. Remove all magnets and wash them and the transmission pan in clean solvent before installing them on the vehicle.
12. Installing a new gasket (or by applying a 3mm wide bead of sealant to the mounting surfaces), place the tray back in place and tighten the mounting bolts. Tighten the bolts to the specified torque in a diagonal sequence. The final tightening torque for the bolts should be achieved on the third or fourth pass.
13. Lower the vehicle.
14. Without starting the engine, pour new fluid directly through the dipstick tube using a funnel. Add liquid gradually, in small portions, constantly checking the level with the dipstick (see "Weekly checks"). Wait a while for the liquid to drain into the tray.
15. Start the engine and let it idle for a minute, then move the selector lever through all the modes, finally setting it to position P. Apply the handbrake.
16. While the engine is idling, check the fluid level. Add fluid up to the Cool (Cold) mark.