



Generator
Removal
1. Disconnect the cable from the negative battery terminal.
2. Remove the alternator drive belt (see chapter 1A or 1B).
3. Disconnect the wiring connectors from the generator (see figure 12.3,a,b).
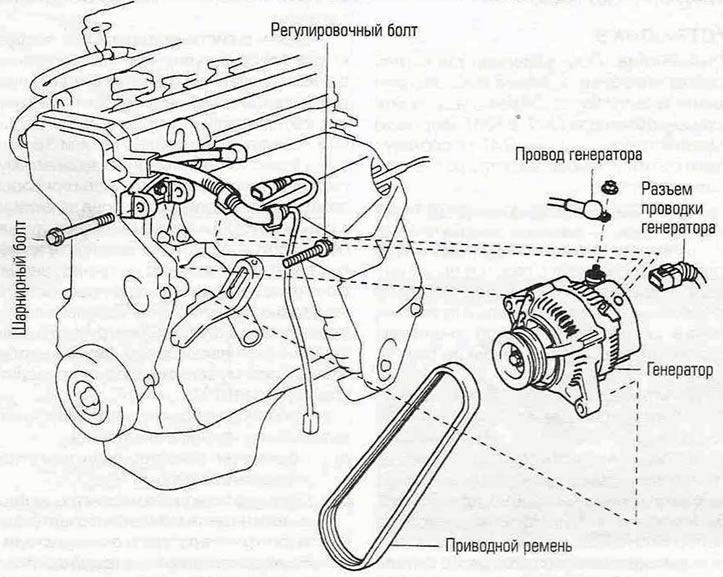
Figure 12.3,a. Generator and its mounting parts – models produced before 2000.
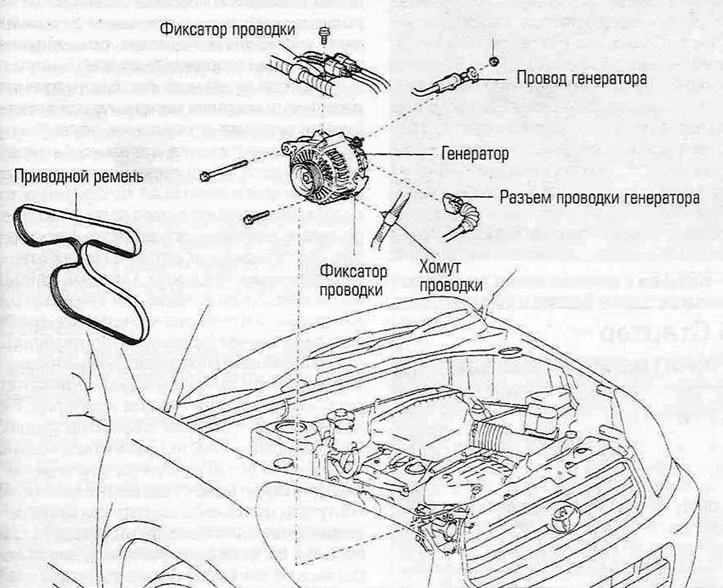
Figure 12.3,b. Generator and its installation parts - models produced since 2001.
(The original is this website: «TOYOTAMAN»)
4. For models with gasoline engines before 2000 and all models with diesel engines, loosen the adjusting and pivot bolts.
5. For models produced since 2001, unscrew the mounting bolts (see Figure 12.5).
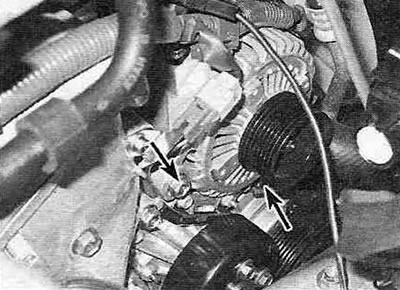
Figure 12.5. Location of generator mounting bolts - models produced since 2001.
6. Remove the generator from the bracket.
7. When replacing the generator, take the old generator with you for comparison. Make sure the new/refurbished one is identical to the old one. Check the terminals - they should match the number, size and location of the terminals on the old generator. Also compare the technical data of both generators (they can be stamped on the generator body or placed on a label or nameplate attached to the generator body) — the data must be the same.
8. Some new/rebuilt generators do not have pulleys installed. In this case, you should move the pulley from the old to the new/refurbished generator. When purchasing a generator, check the dealer's obligations regarding this item - some dealers do this operation free of charge.
Installation
9. The generator is installed in the reverse order of removal.
10. Check the generator charging voltage to ensure it is working properly (see paragraph 11).