
Removing
1. Disconnect the ground wire from the battery (see paragraphs 1 and 3).
2. Remove the alternator drive belt (see chapter 1).
Models with a four-cylinder engine
3. Disunite electric sockets on the generator.
4. Turn out two bolts of fastening of the generator (pic. 10.4) and remove the generator.
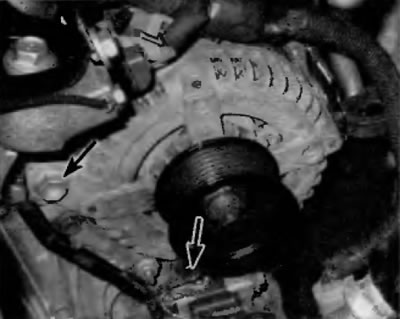
Pic. 10.4. To disconnect the alternator from the four-cylinder engine, remove the bolts shown
Models with VG engine
5. Disconnect the electrical connectors on the generator (pic. 10.5).
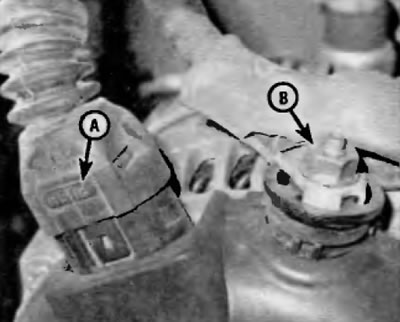
Pic. 10.5. To disconnect the electrical connector on the alternator on a model with a VG engine, press the locking tab (A) in the area shown and disconnect the electrical connector. To disconnect the battery wire from the B+ terminal, pull the insulator and unscrew the nut (IN)
6. Loosen the alternator pivot and clamp bolts and then loosen the adjusting bolt (pic. 10.6).
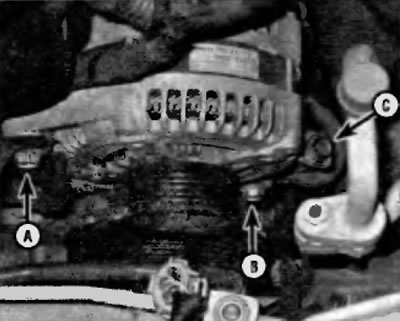
Pic. 10.6. Mounting the generator on the V6 engine
A - Hinge bolt
B - Clamping bolt
C - Adjusting bolt
7. Turn out clamping and hinge bolts and remove the generator.
Installation
8. If you are replacing a generator, please bring «old». Make sure the new/rebuilt generator is identical to the old one. Look at the terminals; they should be the same numbering, size, and location as the terminals on the old generator. Finally, check the labeling; it is stamped on the body or on a plate attached to the body. Make sure both generators have the same part number.
9. If the replacement generator does not have a pulley, you may need to convert the pulley from the old generator to the replacement. When buying a new or remanufactured alternator, ask the store about relocating the pulley. Some stores offer this service for free.
10. Installation is carried out in the reverse order of removal. After installing the generator, adjust the tension of the drive belt (see chapter 1), and then check the charging voltage to make sure the alternator is working properly (see paragraph 9).