
Generator mounting details
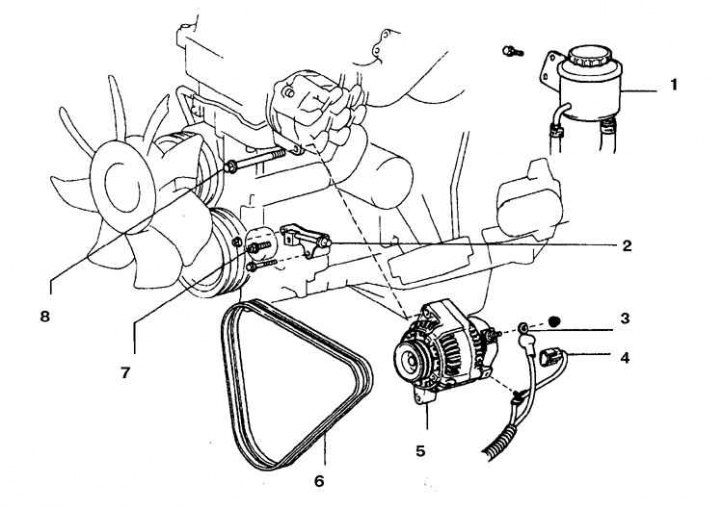
1. Power steering reservoir; 2. Adjustment bracket; 3. Wire; 4. connector; 5. Generator; 6. Belt; 7. Locking bolt; 8. Axis
Removal and installation
1. Lower engine and connect to clutch housing.
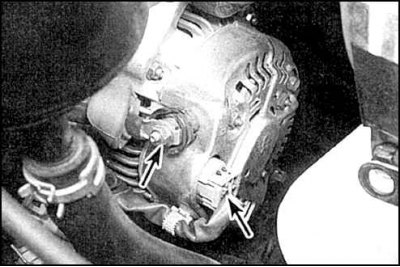
2. Disconnect the connectors from the generator (shown by arrows).
3. Loosen the alternator bolts (see fig. Generator mounting details).
4. Turn away and get adjusting and coupling bolts from an adjusting arm of the generator.
5. Remove generator and bracket.
6. When purchasing a new unit, take the old generator with you. Make sure the new alternator is exactly the same as the one being replaced. Pay attention to the conclusions - their number, dimensions and relative position should be the same as on the replaced unit. Finally, check the labeling. The marking must be either stamped on the body or printed on a label and affixed to the body. Make sure the numbers on the new and replacement units match.
7. Many new generators do not have pulleys, so you will have to move the pulley from the unit you are replacing. When purchasing a new alternator, consult for pulley installation.
8. Installation is carried out in the reverse order. Adjust belt tension and check charge voltage.