
Company Honda Company Ford Company Skoda Company Kia Company Mazda Company Mercedes Company Renault
English Русский
Български
Беларускі
Український
Српски
Hrvatski
Română
Polski
Slovenský
Magyar
Bookmark Articles Sitemap Contacts
ToyotaMan.ru


Camry Corolla Corona Carina Land Cruiser Highlander 4Runner RAV4 Others
4Runner N120 (1989-1995)

Rear Window Defogger — Checking and Repairing [Toyota 4Runner N120]

  • Main
  • 4Runner
  • N120 (1989-1995)
  • Electrical equipment
  • Equipment and devices
  • Rear Window Defogger — Checking and Repairing
0
Contents: Examination ↓ Repair ↓
The heater consists of thin wires sintered with the glass surface.

Minor damage to wires can be repaired independently.

Examination


1. Turn on the ignition and heater. Connect a voltmeter between the heater terminals. If there is no voltage, check the fuse, switch and wires.
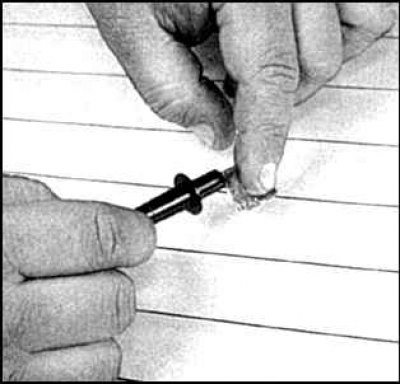


2. Place a folded strip of aluminum foil over the voltmeter probe and press it with your finger against the heater filament in the center.
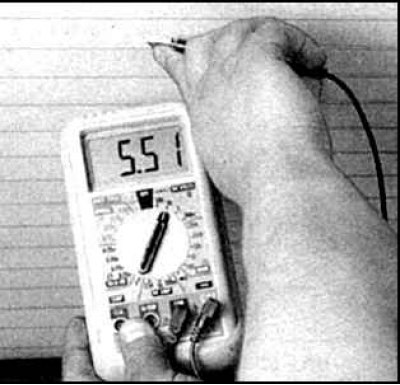


3. If the voltage is 6V, then the thread is OK, if the voltage is 12V, then the thread is broken (the break occurs between the center of the thread and the mass). If the voltage is 0 V, then the thread is broken between the center and the power terminal of the heater.


4. If the threads are OK, connect the (-) terminal of the heater to ground. If the voltmeter readings change, the ground connection is unsatisfactory.
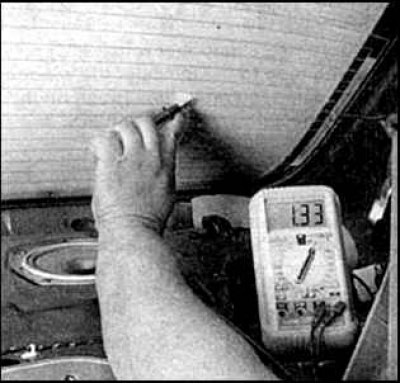


5. The location of the break in the thread can be determined by moving the aluminum contact on the voltmeter probe along the thread from the () terminal to the (-) terminal of the heater. Connect the voltmeter to the (-) terminal. At the location of the break, the voltmeter reading should drop sharply.

Repair


1. You can splice a broken heater thread using conductive epoxy compound Dupont N 4817 or equivalent.

2. Turn off the heater.

3. Using a steel wool pad, carefully polish the damaged area and wipe with alcohol.

4. Apply a mask of adhesive tape to the damaged area.

5. Prepare the resin according to the instructions.
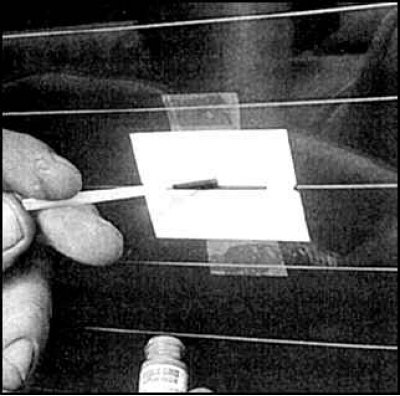


6. Apply the composition to the gap in the mask, spreading it approximately 18 mm in both directions.

7. After 24 hours, remove the mask.
This article is available at: russian, bulgarian, belarusian, ukrainian, serbian, croatian, romanian, polish, slovak, hungarian
The article material has been checked: Gribkov Vladimir
Share information:
◀ Previous
4Runner N120: Equipment and devices
Next ▶

Rear window defroster switch
Rear Windshield Wiper — Checking and Replacing
Front Windshield Wiper — Checking and Replacing
Windscreen wiper motor — check
Radio Antenna — Removal and Installation
Instrument cluster — removal and installation
Sound signal — check and replacement
Electric mirrors — check
Cruise control — description and check
Electric window lifter
Similar articles on other Toyota models

➥ Rear Window Defogger — Checking and Repairing Toyota Camry XV20 (1996-2001)
➥ Rear Window Defogger — Checking and Repairing Toyota Cruiser 60/80 (1980-1997, petrol)
➥ Rear Window Defogger System — Checking and Repairing Toyota Highlander 1 (2000-2007, petrol)
➥ Checking and repairing rear window defroster wires Toyota Carina T190 (1992-1996)
➥ Checking and repairing the rear window defroster Toyota RAV 4 XA10 (1994-2000)
➥ Checking the rear window heating Toyota Corolla E80 (1983-1990)
Link in different formats to this article
Comments and feedback from visitors
No comments yet


Add two numbers 25 + 39


4Runner N120 (1989-1995) 
  • General information
  • User manual
  • Maintenance
  • Power unit
  • 4-cylinder engines
  • 6-cylinder engines
  • Engine overhaul
  • Cooling and heating
  • Fuel system
  • Transmission
  • Mechanical gearbox
  • Automatic gearbox
  • Transfer case
  • Clutch
  • Transmission line
  • Chassis, running gear
  • Brake system
  • Car suspension
  • Steering
  • Body and interior
  • Exterior (external elements)
  • Interior (internal elements)
  • Doors, locks and windows
  • Electrical equipment
  • Equipment and devices
  • Ignition system
  • Power devices
  • Electrical circuits
ToyotaMan.ru © 2018–2026 • Mobile version • Interesting about Toyota • Administration • Sitemap: EN BG BY UA RS HR RO PL SK HU • Search system • Bookmark
Camry Vista-V40 • Camry XV10 • Camry XV20 • Camry XV30 • Corolla Verso-AR10 • Corolla E80 • Corona T190 • Carina T170 • Carina T190 • Land Cruiser J70 (diesel) • Land Cruiser J60 (petrol) • Land Cruiser J100 • Highlander XU20 (petrol) • 4Runner N120 • RAV4 XA10 • RAV4 XA20 • Duet M100 • Dyna Y50 •
We require cookies to enable some interactive features. Is that ok with you?