
Ordinary Antenna Dream
1. Unscrew the antenna mast from the base (pic. 12.1).
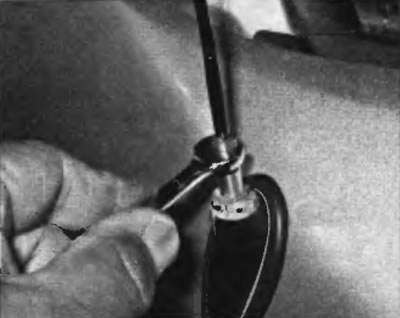
Pic. 12.1. To remove the antenna mast from its base, simply unscrew it
Antenna base
2. Remove the antenna mast (pic. 12.1).
3. Working inside the vehicle, remove the right A-pillar trim panel (pic. 12.3) and right footwell panel (Refer to Chapter 11 for information on removing these trim panels).
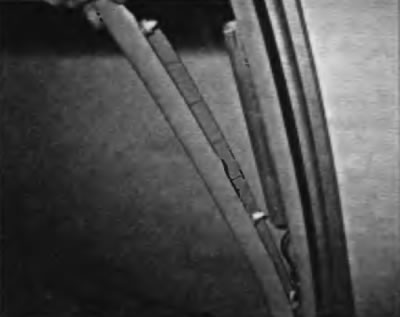
Pic. 12.3. Using a trim remover or a faded screwdriver, pry and remove the right A-pillar trim panel (if you are going to use a screwdriver, wrap the whisk with tape to protect the plastic trim)
4. Disconnect the electrical connector that connects the cable coming from the base of the antenna to the cable that goes through the baffle (pic. 12.4).

Pic. 12.4. This electrical connector connects the cable from the base of the antenna to the antenna cable that runs through the baffle. To disconnect the connector, disconnect it from the support bracket (1), cut the tape (2), wrapped around it, then press the blocking tab (3) and disconnect the connector. Then pull the antenna base cable out of the clip (4)
5. Remove the castle nut from the top of the antenna base (pic. 12.5).
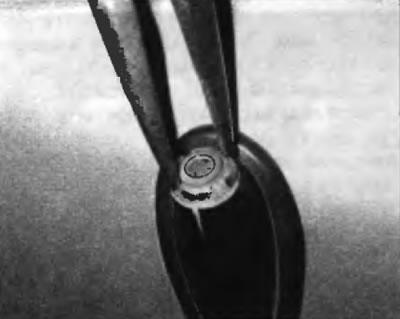
Pic. 12.5. To detach the antenna base from the wing, unscrew the root nut. Special wrenches are provided for this purpose, which can be purchased at an auto parts store, but you can use a pair of pliers with long, narrow jaws
6. Release nuts of fastening of the right forward wheel. Raise the front of the car and place secure supports under it. Remove the wheel.
Attention! If the vehicle is equipped with electronically controlled air suspension, turn off the suspension height control switch before raising the vehicle.
7. Remove the right wheel arch locker (see chapter 11).
8. Locate the bottom of the antenna base (pic. 12.8). Gently pull the antenna base cable through the grommet.
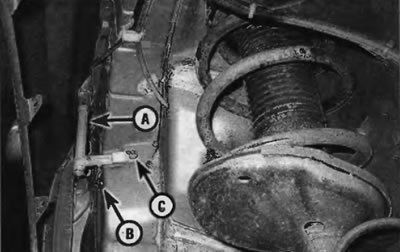
Pic. 12.8. To remove the antenna base (A) pull the antenna cable through the grommet (IN) and unscrew the sensor bracket nut (WITH). When installing the antenna base assembly, be sure to secure the drive «masses» on the nut
9. While lighting yourself with a flashlight, insert the antenna base cable through the grommet and feed upwards through the right corner of the vehicle interior, between the edge of the front panel and the A-pillar (pic. 12.9).
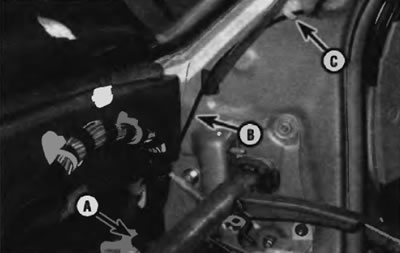
Pic. 12.9. While illuminating yourself with a flashlight, insert the antenna base cable through the grommet (A), feed it up between the bulkhead valve and the A-pillar (IN), and then through the clamp on the front pillar (WITH) (front panel removed for clarity)
10. Installation is carried out in the reverse order of removal.
Antenna cable between antenna and radio
11. Remove the bezel assembly (see chapter 11).
12. Examine the wiring of the antenna cable. Sketch if necessary.
13. Release the antenna cable from the clip on the back of the front panel.
14. Installation is performed in the reverse order of removal. Make sure that the cable is routed correctly and that all clamps are installed.
Mesh Antenna
15. Some of the vehicles covered in this manual are equipped with a wire mesh antenna attached to the rear window glass. If your car is equipped with such an antenna and you are having problems with its operation, you can repair the antenna grid using the same technology that is used to repair the rear window heating grid (see paragraph 14).