



Checking and replacing the positive crankcase ventilation valve and its hose

1. The positive crankcase ventilation valve is located on the valve cover. On models produced before 2000, it is installed in a rubber bushing on the valve cover (see Figure 34.1,a).
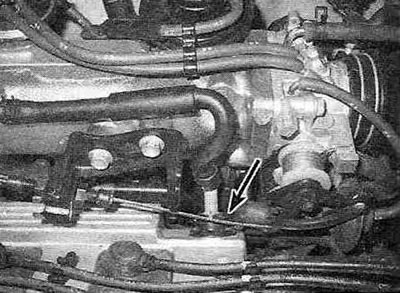
Figure 34.1,a. On models produced before 2000, the valve is installed in a rubber bushing on the valve cover.
On models produced since 2001, the valve is screwed into the left side of the valve cover (see Figure 34.1,b) (the location of the valve cover itself may vary on different models).
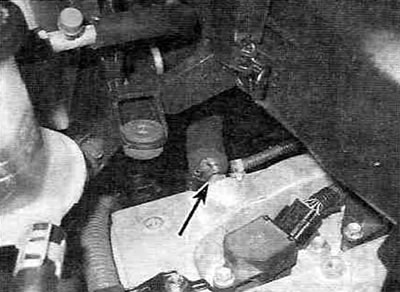
Figure 34.1, b. On models produced since 2001, the positive crankcase ventilation valve is screwed into the valve cover.
2. Remove the valve from the valve cover. On pre-2000 models, firmly grasp the valve with your hand and pull it out of the bushing. On 2001 and later models, disconnect the hose, unscrew the valve from the cap, then reconnect the hose to the valve.
3. After warming up the engine to normal operating temperature, let it idle. Place your finger firmly over the hole at the end of the valve. Lack of vacuum in the valve (you will feel it with your finger) indicates that the valve or hose is clogged or damaged and needs to be replaced.
4. Turn off the engine. Disconnect the hose from the valve. Place a small piece of clean hose onto the valve outlet and blow out the valve from the valve cover side (from the cylinder head) - air must pass freely. If air does not flow in this direction, replace the valve (see figure 34.4).
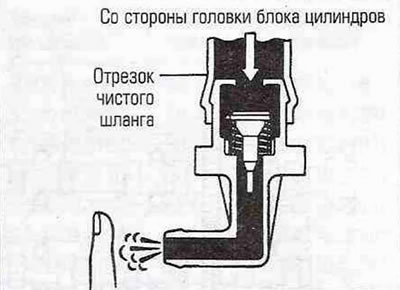
Figure 34.4. Place a short piece of clean hose on the outlet on the cylinder head side and blow out the valve.
The original can be read on the website (TOYOTAMAN.ru)
Then blow through the valve from the intake manifold side - you should feel resistance.
5. When purchasing a new valve, make sure that it is designed specifically for your engine type. Compare the old and new valves - they should be the same.
Warning. There is no point in flushing the valve - this will not lead to a positive result.