



Checking, maintaining and charging the battery

Caution: When checking and servicing the battery, it is necessary to take safety precautions. Hydrogen, which is always present in power sources, is extremely flammable, so do not smoke or use open flames or sparks in the room where you are working with the battery. Battery electrolyte is a sulfuric acid solution that can cause severe burns if it comes into contact with your skin or eyes, as well as destroy paintwork and ruin your clothing. When disconnecting battery cables, always disconnect the negative terminal cable first, and when reconnecting, always connect the negative terminal cable last.
1. To ensure your car's engine starts quickly and reliably, your battery needs to be serviced regularly. Before you begin, prepare the necessary tools and materials (see Figure 8.1).
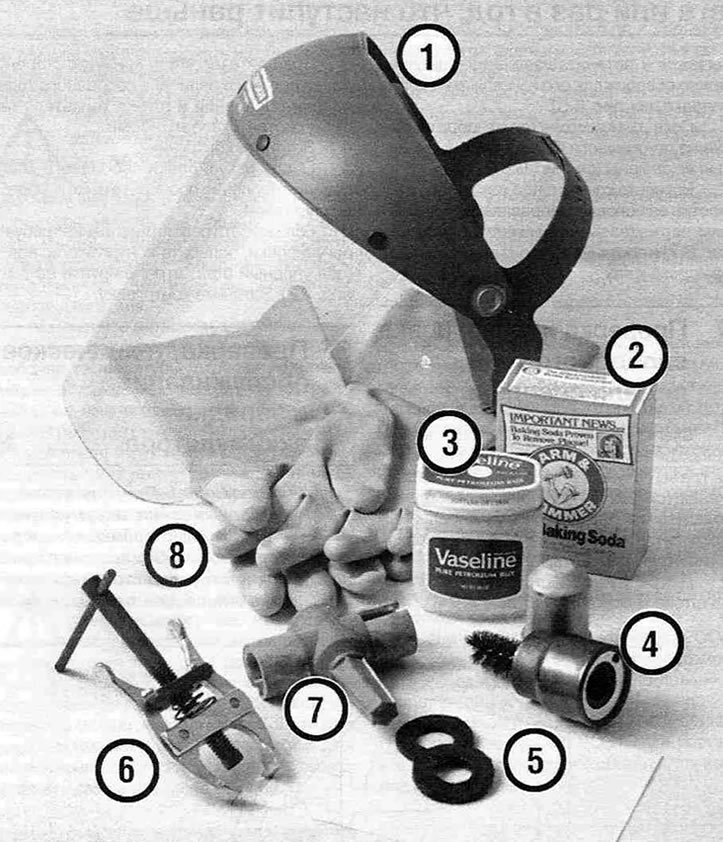
Figure 8.1. Tools and materials required for battery maintenance:
1 - Face mask - When brushing away corrosion, acid particles can easily get into your eyes.
2 - Baking soda - a solution of baking soda can be used to neutralize corrosion.
3 - Vaseline - Lubricating the battery terminals with Vaseline will help prevent corrosion.
4 - Wire brush - will help remove any remaining corrosion from the battery terminals and posts.
5 - Special felt washers - by placing them on the battery terminals under the clamps, you can prevent corrosion for a long time.
6 - Terminal puller - sometimes it can be very difficult to remove terminals from terminals, even if the threaded connections are loose. With this tool, the terminals can be removed easily and without damage.
7 - Terminal/Pin Cleaner - This tool looks slightly different from the one described in paragraph. 4, but performs the same functions.
8 - Rubber gloves are another item that will ensure safety when servicing the battery. Remember that there is acid inside the battery.
2. When servicing the battery, pay attention to the following points: the engine must be turned off and all auxiliary equipment must be disconnected. The wire from the negative battery terminal must be disconnected.
Note: On models produced since 2001, the battery can be accessed by removing the grille panel under the windshield.
3. The battery should be charged in a well-ventilated area.
4. The electrolyte contains poisonous and corrosive sulfuric acid. Avoid contact with eyes, skin or clothing. Never taste sulfuric acid. When working with the battery, use a protective mask. Do not allow children to be near the battery.
5. Inspect the battery from the outside. If the positive terminal has a protective rubber cap, make sure it is intact. The cap must completely cover the terminal with the terminal. Check the battery for corrosion on individual parts, the reliability of threaded connections, cracks on the case and cover, and the tightness of the wire tips on the terminals. Also check the condition of the wires coming from the battery for cracks in the insulation and exposed areas (see Figure 8.5).
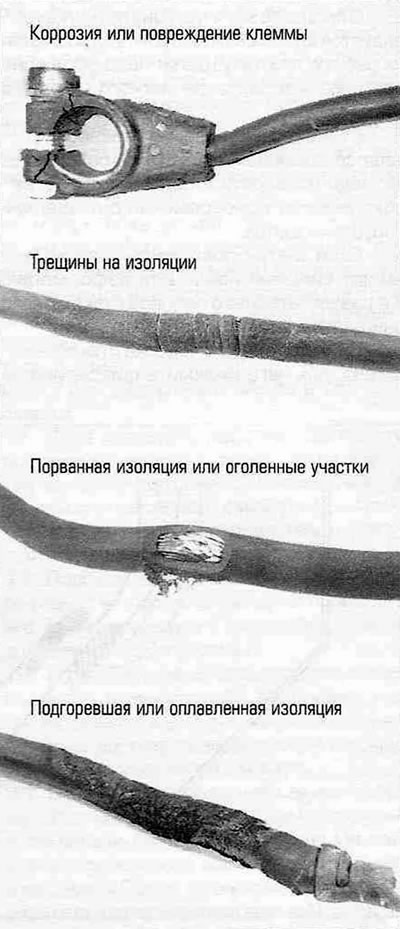
Figure 8.5. Common battery cable problems.
6. If there is corrosion, which appears as white, loose deposits (see Figure 8.6,a) it became obvious, especially around the terminals, that the battery needed to be removed from the car for cleaning.
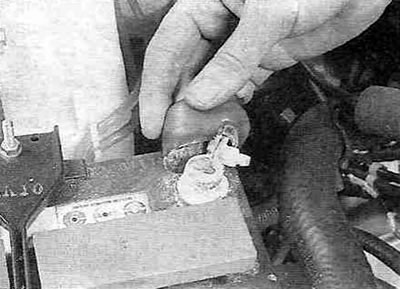
Figure 8.6,a. Corrosion on the battery terminals appears as a light, fluffy powder.
Using a wrench, loosen the bolts on the terminals and disconnect them from the battery, disconnecting the negative (-) wire first (see Figure 8.6,b).
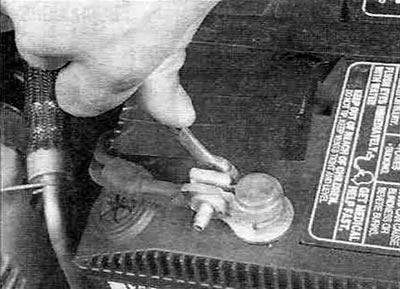
Figure 8.6,b. Disconnecting the wire from the battery using a wrench. If corrosion has eaten away the edges of the bolt and nut, a special tool will be required. Always disconnect the ground (-) cable first and connect it last.
Remove the nut from the battery clamp mounting bolt and, moving the clamp, remove the battery from the engine compartment.
7. Clean the terminals thoroughly with a wire brush or a special tool (see Figure 8.1), and then rinse in a warm soda solution (see figure 8.7,a,b).
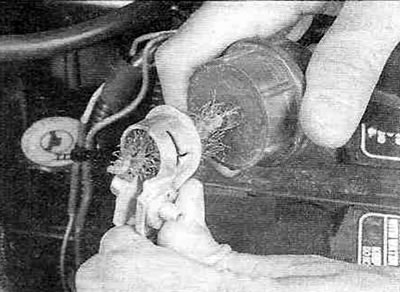
Figure 8.7,a. All corrosion must be removed from the terminals, and the inner surface must be brought to a shine. But don't remove too much material: you will disrupt the tight fit of the terminal on the pin.
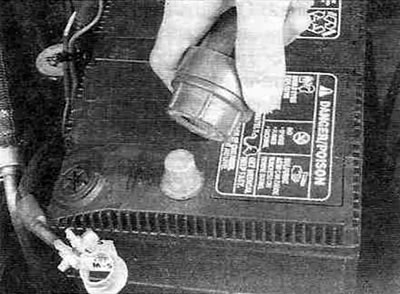
Figure 8.7,b. Regardless of what tool you used to clean the battery terminals, the result should be a clean, shiny surface.
Using the same solution, wash the terminals and the top panel of the battery, being careful not to let the solution get inside the battery. If the battery terminals are heavily corroded, clean them with a special tool (see Figure 8.7,b) When cleaning battery components, wear a protective mask and rubber gloves to protect your eyes and hands. Also put on old clothes - sulfuric acid, even diluted, can burn holes if it gets on clothes. Rinse all cleaned areas thoroughly with water.
8. Check the condition of the battery shelf and mount (bolt and nut) pressure plate (see figure 8.8).
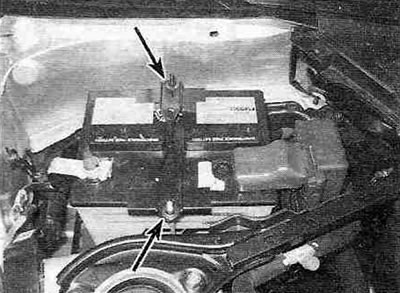
Figure 8.8. Securely fasten the battery with the clamping bar, but do not overtighten the mounting nuts, as this may crack the battery case.
When installing the battery, make sure there are no objects left on the shelf. The pressure plate should fit snugly against the top panel of the battery, but do not overtighten the mounting nut as this may cause cracks in the battery case.
9. For more information on removing and installing the battery, please refer to chapter 5. For information on how to jump start the engine from a booster battery, see the beginning of the manual.
Cleaning
10. Traces of corrosion on battery fastening elements, in the battery box and the surrounding area must be cleaned with a soda solution and then thoroughly rinsed with water.
11. All metal parts that have rust should first be coated with a zinc-based primer and then painted.
Charger
Caution! Charging a battery produces hydrogen gas, which is highly flammable and explosive. Do not smoke or use open flames near a battery that is being charged or has just been charged. When charging, wear a protective mask when near the battery. Always unplug the charger before connecting or disconnecting the battery.
12. If the battery is so discharged that it cannot start the engine, it is best to restore its charge with a small current. This method provides a more gentle and careful charging process and guarantees a long battery life, although it does take longer. This method is also good for recharging the battery in cases where the car is used on frequent short trips, and especially in winter, when the battery operates under more severe operating conditions.
13. Miniature chargers rated for 1-2 amps (sometimes called "trickle chargers") are very practical. They are safe, provide a gentle charging process, and are also inexpensive. For faster charging, you can use a more powerful charger, but it's highly recommended that the charging current not exceed 0.1 times the battery's capacity. Fast charging with high current for 1-2 hours will put a heavy strain on the battery and will significantly reduce its service life. Such charging is recommended only in extreme cases.
14. The average battery charging cycle time should be specified in the charger's operating instructions. As a general rule, the charging cycle using low-power chargers should be between 12 and 16 hours.