



- a) Use a knife to level the layer of glue remaining on the body, be careful not to damage the paintwork of the body.
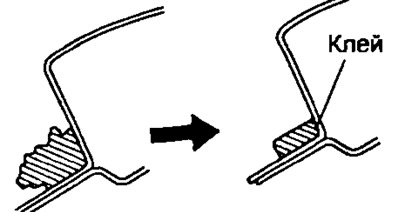
- b) Clean the cut surface with a piece of cloth soaked in solvent.
2. Clean the windshield.
- a) Using a scraper, remove any glue remaining on the glass.
- b) Clean the glass with solvent.
3. Install the glass.
- a) Position the glass as shown in the figure.
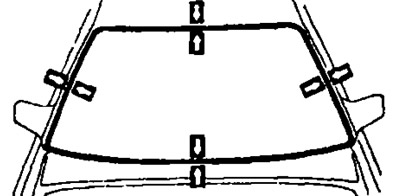
- 6) Make sure that the glass contact surface is absolutely flat and does not touch the lower brackets.
- c) Apply alignment marks to the glass and body.
- d) Remove the glass.
4. Clean the glass contact areas measuring 15-30 mm along the entire edge.
5. Installing the seal.
- a) Stick double-sided adhesive tape to the glass, leaving 7 mm from the edge.
- b) Place the seal on the adhesive tape as shown in the figure.
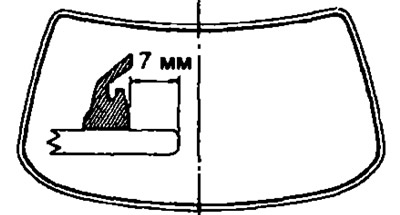
Caution: Do not touch the cleaned glass surface.
6. Cover the contact surface of the body with primer "M", applying it with a brush.
Attention:
- the drying time of the primer is at least 3 minutes.
- do not apply primer to the adhesive.
- open primer cannot be reused.
See the source on the internet resource toyotaman.ru
7. Using a brush or spatula, coat the edge and contact surface of the glass with primer "G".
Note: the primer needs to dry for at least 3 minutes.
8. Mix the glue.
Attention:
- make sure that the glass installation is completed within the adhesive's usable time.
- the glue must be mixed in 5 minutes or less.
- a) Clean the glass plate and spatula thoroughly with solvent.
- b) Mix 500g of base agent and 75g of hardener thoroughly on a glass plate with a spatula.
9. Using a syringe, apply adhesive to all glass contact surfaces along the seal as shown in the figure.
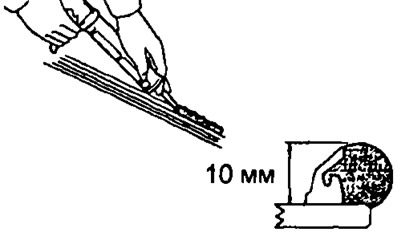
10. Install the glass.
Note: Make sure the seal is installed correctly.
- a) Position the glass according to the alignment marks and gently press it along the rim.
- b) Apply glue to the edge of the glass with a spatula.
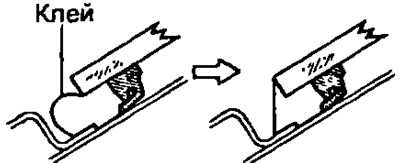
- c) Press the glass firmly so that it is held by the glue.
- d) Remove excess glue.
11. Check and eliminate leaks in the connection.
- a) After the curing time has elapsed, check the connection for leaks.
- b) Seal any leaks with automotive glass sealant.
12. Apply adhesive and install the windshield molding
13. Install the following parts:
- a) Hood ventilation grille.
- b) Windscreen wiper arms. Tightening torque 22 Nm.
- v) (CORONA, CALDINA) Hood. Tightening torque 13 Nm.
- d) Front pillar pads.
- d) A pen.
- e) Sun visors and holders.
- g) Interior mirror.