



Mounting the receiver on early production vehicles
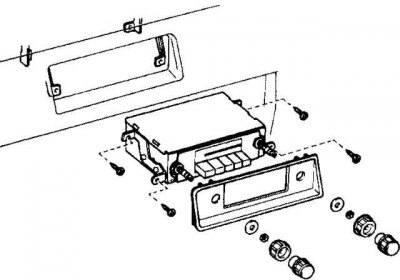
Mounting the receiver on late production vehicles
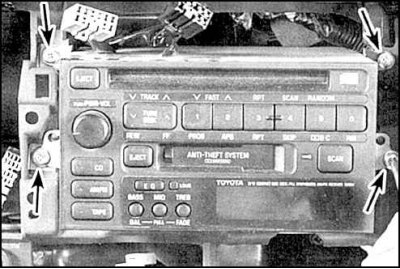
The mounting screws are indicated by arrows.
Antenna plug and receiver connector (on all cars)
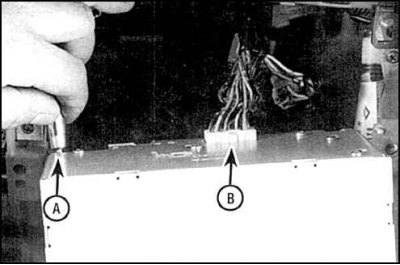
A. Antenna Plug
B. Receiver connector
Removal and installation
1. Disconnect the battery from ground.
Receiver
2. On early production vehicles, remove the receiver control handles. Then use a long socket wrench to loosen the resistor roller nuts and remove the washers. Remove the receiver trim.
3. On later production vehicles, remove the instrument panel trim.
4. Loosen the screws and pull the receiver towards you, disconnect the antenna plug and wires. Remove the receiver.
5. Install the receiver in reverse order.
Speaker built into the dashboard (early production cars)
6. Remove the receiver.
7. Remove the storage box.
8. Unscrew the mounting screws through the resulting openings, disconnect the connector and remove the speaker.
Door-mounted speaker (on late production cars)
9. Remove the door trim panel.
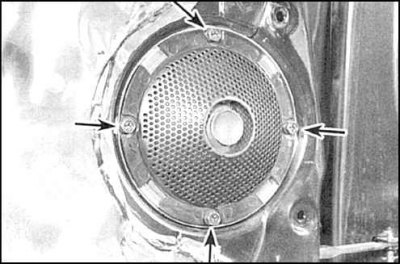
10. Loosen the mounting screws (indicated by arrows), disconnect the connector and remove the speaker.
11. Installation is carried out in reverse order.
[The information was taken from a web portal: Toyotaman.ru]