
The following wear parts are required:
- Fuel injected engine: two copper gaskets.
- Filter for the respective engine. When buying a filter, keep in mind the year of manufacture and model of the car.
Diesel
Draining sediment from the fuel filter and replacing it
An appropriate container is required to collect the drained sludge.
Attention: If diesel fuel gets on rubber parts, they must be wiped off immediately. Diesel fuel degrades rubber over time.
Draining
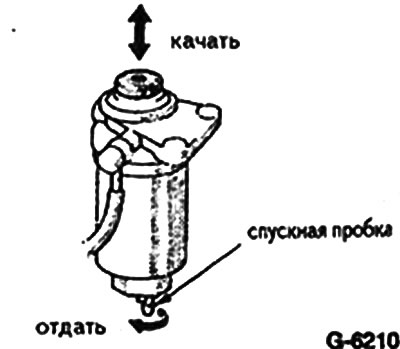
Place a container under the drain plug.
Unscrew the drain plug 2-2.5 turns.
Pump with a hand pump until only clean fuel comes out of the filter.
Close the drain plug by hand.
Filter change
Drain all liquid from the filter as described in section «Sludge drain».
Disconnect the plug connection of the water sensor, if present.
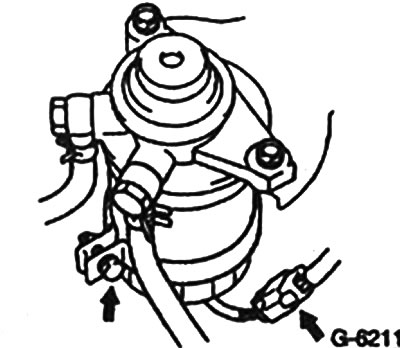
Loosen filter clamp bolt (arrow in fig. G-6211).
Disconnect the filter from the holder using a special key and remove the filter.
Rearrange the water presence sensor, if any, to a new filter.
Fill the new filter with fuel to the brim, moisten the gasket with fuel and close.
Release air from the fuel system.
After a test drive, check the fuel system for leaks.
Bleeding air from the fuel system
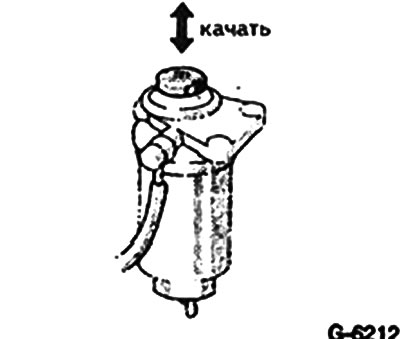
Pump the filter with a hand pump until resistance is felt.
Warm up the engine and start it.
If the engine does not start, repeat the bleeding procedure.
Visually check the fuel system for leaks. Especially around the filter connection.
Carbureted engine
The fuel filter is located in the engine compartment in the fuel supply line.
Removing
Caution: Do not use open flame. There is a risk of fire!
Disconnect ground cable (-) from the battery.
Attention: This will erase the entries in the memory of the on-board computer. In particular, fault records and radio code. Before disconnecting the battery, read the contents of the section «Removing and installing the battery».**
Clamp the hoses with clamps to prevent fuel leakage.
Disconnect the hoses from the filter.
Installation
Put the hoses on the new filter and secure them with clamps. The arrow on the filter housing indicates the direction of fuel flow.
Remove hose clamps.
Connect ground cable (-) with rechargeable battery.
Set the time to an hour, if any, and enter the radio code.
After a test drive, check the fuel system for leaks.
Fuel injected engines
Removing
Caution: Do not use open flame. There is a risk of fire!
Disconnect ground cable (-) from the battery.
Attention: This will erase the entries in the memory of the on-board computer. In particular, fault records and radio code. Before disconnecting the battery, read the contents of the section «Removing and installing the battery».
Place a container under the filter to collect fuel.
Unscrew the bottom hose fitting and slowly remove it. Close the pipeline with a plug.
Drain fuel into a container.
Unscrew the upper fitting and remove the fuel line with two gaskets.
Installation
Install the fuel filter in place and secure.
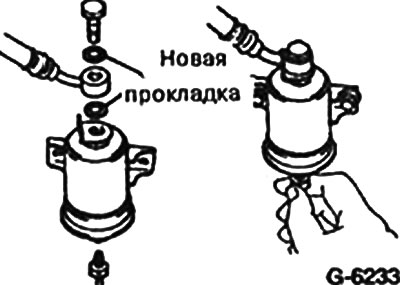
Install the upper screw with two new gaskets and tighten it to 30 Nm.
Remove the plug from the lower pipeline and connect it to the filter.
Tighten the bottom pipe with 30 Nm.
Connect ground cable (-) with rechargeable battery.
Set the time on the clock, if any. Enter the code into the radio.
After a test drive, check the tightness of the fuel line connections.