
Attention! Gasoline is highly flammable. Therefore, when working on any part of the fuel system, take extra precautions. See warning in paragraph 2.
Fuel lines
1. Relieve fuel pressure before servicing fuel lines or fittings (see paragraph 2) and disconnect the ground wire from the battery (see paragraph 1 of chapter 5).
2. The fuel line goes from the fuel tank to the engine compartment. It is attached to the bottom with plastic holders. Inspect these holders and fuel lines each time you work under the vehicle.
3. Inspect the fuel line for leaks, kinks and dents. If any signs of damage are found, replace the fuel line immediately. Make sure the metal fuel lines do not touch the sump or any other items underneath the vehicle. There must be a gap of at least 6 mm around metal fuel lines to avoid unwanted contact.
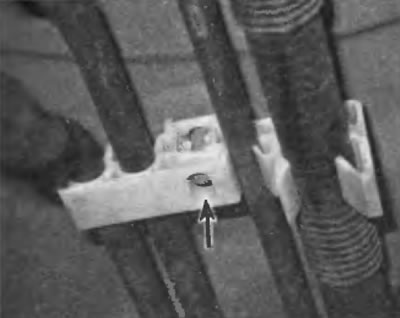
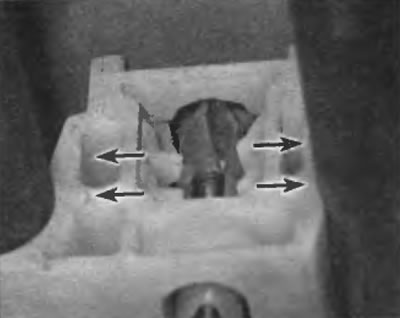
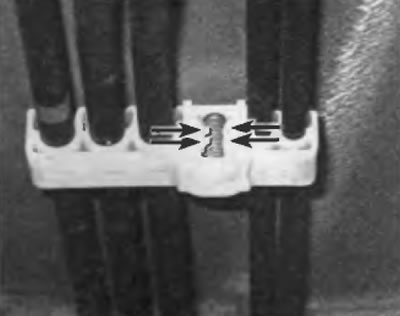
4. The fuel lines are fixed to the bottom of the car with plastic holders. Some of these holders are bolted to the underside of the vehicle (pic. 4.4, a). To detach such a holder, simply unscrew the bolt. However, most holders are mounted on threaded studs welded to the bottom (pic. 4.4, b). The holder of this type is fixed on the stud with locking teeth that cover the threaded section of the stud. To detach any of the holders, insert the tip of a large Phillips screwdriver up into the oval hole in the holder to move the teeth away from the threaded section of the stud (pic. 4.4, in). In holders of the third type (pic. 4.4, g) a welded stud is used, and the fixation is carried out according to the same principle as above, but such a holder is much more difficult to remove because it does not have an oval hole through which a screwdriver can be inserted. Instead, you'll need to use a pair of flathead screwdrivers to pry the locking teeth away from the threads on the stud. It is virtually impossible to remove any of these holders without breaking them. So don't touch them unless you really need to.

Pic. 4.4, a. Some fuel/vapour line holders are bolted to the underside of the vehicle. To detach any of these holders, simply unscrew the bolt
Pic. 4.4b. To release holders that are mounted on a threaded stud welded to the pallet, insert a screwdriver into the oval hole on the underside of the holder...
Pic. 4.4, c....to move the locking teeth of the holder away from the stud threads and release the holder
Pic. 4.4, d. Holders without an oval hole can be removed using a pair of small standard screwdrivers
5. To install a new fuel line holder:
- A) Insert the fuel lines and vapor lines into their respective slots in the holder.
- b) Align the holder with the threaded rod.
- V) Push the holder onto the threaded stud until it is completely fixed on the bottom of the vehicle.
6. If you are replacing a damaged metal fuel line, lure the damaged line with the factory metal fuel line or use an equivalent grade steel line that meets the manufacturer's specifications. An uncertified pipeline, when high fuel pressure is created in it, may fail. Do not use copper or aluminum piping to replace steel piping. These materials may not withstand vehicle vibration during normal operation.
7. Some fuel lines use a union type «banjo» with hollow bolts and sealing washers. Both sealing washers should be replaced each time the fuel line is disconnected.
Fuel hoses
Attention! Use non-replacement only original hoses or equivalent. Non-certified hoses may fail if pressurized.
8. Never lay the flexible fuel hose closer than 100 mm from the exhaust system components or closer than 250 mm from the catalytic converter. Rubber hoses must not touch the frame elements. A clearance of at least 6 mm must be provided around each hose to avoid rubbing against the frame.
Nylon fuel lines
9. Some fuel lines are made from nylon and use quick couplers to connect to the fuel pump, metal fuel lines and fuel rail. Nylon fuel lines and quick couplers cannot be serviced separately. If any part of any of these fuel lines or fittings is damaged, the entire assembly should be lubed. Don't try to repair them.
10. Before attempting to disconnect the quick coupler, read the following descriptions of the disconnection and connection procedure in their entirety.
Quick Couplings
Push Button Quick Couplings
Note. This type of quick coupler connects the fuel supply line to the pressure pulsation damper on the fuel rail on V6 models.
11. Some push-button quick couplers are protected by a plastic cover (pic. 4.11), which surrounds the coupling on three sides. To remove the cover, simply pull on it.

Pic. 4.11. To remove the protective cover from the quick coupling, simply press its side
12. To disconnect the push button quick coupler, press the two buttons on both sides of the fitting and pull the fitting off the fuel line (pic. 4.12).
Ryas. 4.12. Press the two buttons on opposite sides of the fitting and pull the fitting away from the end of the fuel line
13. Inspect the condition of the O-ring inside the coupling (pic. 4.13). If it's damaged, lure it.
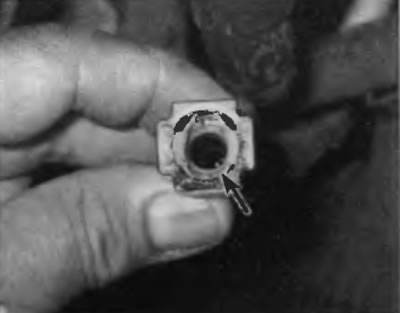
Pic. 4.13. Inspect the O-ring inside the quick coupler. If it is damaged, replace it
14. Installation is performed in the reverse order of removal. To dock this coupling, put it on the fuel line until both clamps are fixed with a characteristic click.
15. Before installing the plastic cover on the clutch, connect the ground wire to the battery, start the engine and check for leaks.
Clamp Type Quick Couplings
Note. This type of quick coupler connects the fuel supply line from the fuel tank to the fuel supply line that goes to the fuel rail.
16. To release the clip, press the non-locking tab and turn the clip clockwise to disengage the clutch (pic. 4.16. a, b).
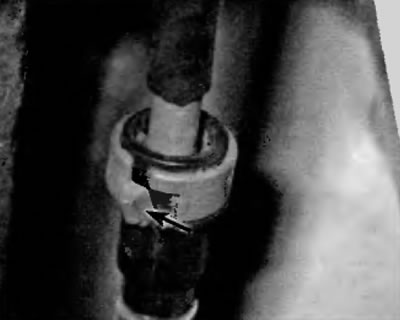
Pic. 4.16, a. To disengage the quick coupler, press the locking lug shown to release the clamp...
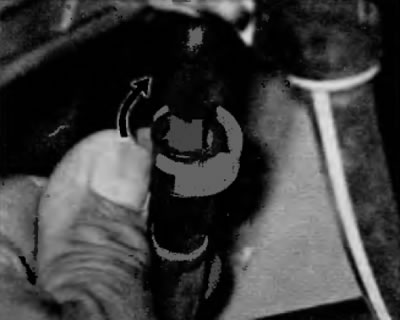
Pic. 4.16b....then turn the clamp clockwise to disengage the clutch
17. Pull the two sections of the coupling in opposite directions.
18. Installation is carried out in the reverse order of removal. Make sure the bead on the fuel line snaps into the socket.
19. To ensure that the coupler is secure, pull both sides of the coupler apart.
20. Connect the ground wire to the battery, start the engine and check for leaks.
Couplings on metal fuel lines
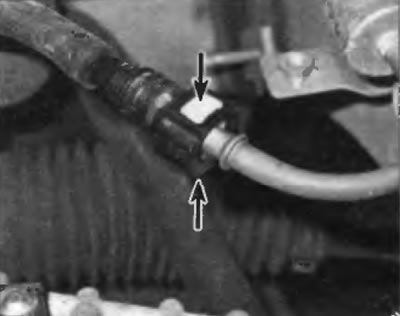
21. On models with a four-cylinder engine, a metal coupling is used to connect the fuel supply line to the fuel pressure pulsation damper on the fuel rail. Disconnecting such a clutch will require a special tool, which can be purchased at many auto parts stores.
22. To disconnect a coupler on a metal fuel line, insert the special tool into the female section of the coupler, push it into the coupler until the four latches are fully released, and then pull the two sections of the coupler in opposite directions (pic. 4.22).
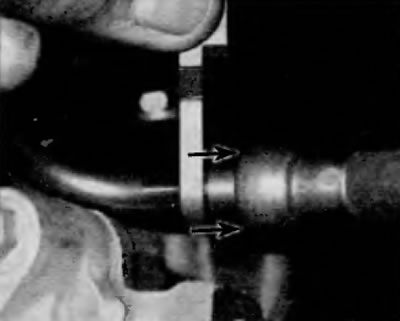
Pic. 4.22. Insert the special tool into the female section of the coupling, push it into the coupling until the four latches are fully released
23. To join the metal sleeve, squeeze the two sections of the sleeve together until they lock into place.
24. Pull both sides of the coupler apart to check that the coupler is secure.
25. Connect the ground wire to the battery, start the engine and check for leaks.