
Attention! Gasoline is highly flammable. Therefore, additional precautions must be taken when working on any part of the fuel system. See warning in paragraph 2.
1. Relieve pressure in the fuel system (see paragraph 2). Remove the fuel filler cap to relieve pressure in the fuel tank.
2. Disconnect the ground wire from the battery (see paragraph 1 of chapter 5).
3. Remove the fuel pump in the block with the fuel gauge sensor from the fuel tank (see paragraph 5).
4. If the tank is full or nearly full, pump the fuel into a suitable container using suitable equipment. Tank drain kits are available at most auto parts stores.
Attention! Do not suck fuel with your mouth!
5. Raise the vehicle and place secure supports under it.
6. Remove the central part of the exhaust system (starting with the rear catalytic converter and ending with the exhaust pipe behind the muffler - see paragraph 16).
7. On all-wheel drive models, remove the propeller shaft (see chapter 8).
8. Remove fuel tank guards (pic. 7.8, a, b).
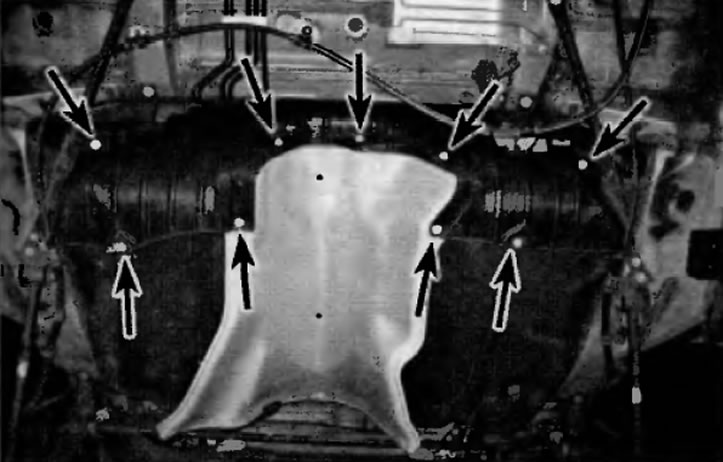
Pic. 7.8, a. To detach the left and right guards from the fuel tank on models with two wheel drive, the fasteners shown are usually removed
Pic. 7.8b. To detach the protective screen from the fuel tank on all-wheel drive models, remove the sprinklers shown (standard design)
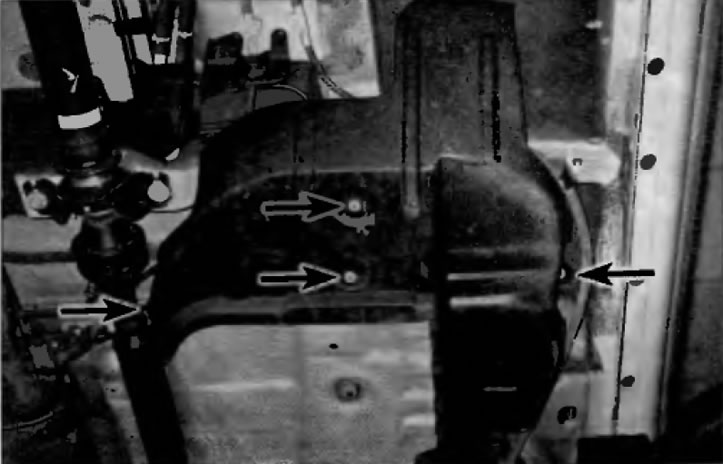
9. Remove the fuel tank heat shield (pic. 7.9).
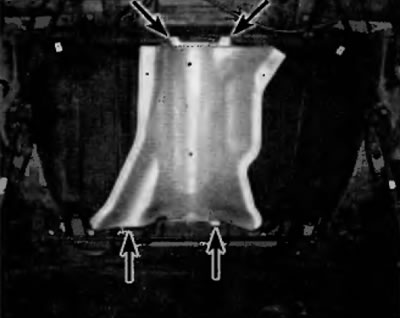
Pic. 7.9, a. To detach the heat shield from the fuel tank on models with two-wheel drive, the fasteners shown must be removed (standard design)
Pic. 7.9b. To detach the fuel tank heat shield on 4WD models, remove the fasteners shown (standard design)
10. Disconnect the fuel filler hose and the two smaller hoses next to it (pic. 7.10).
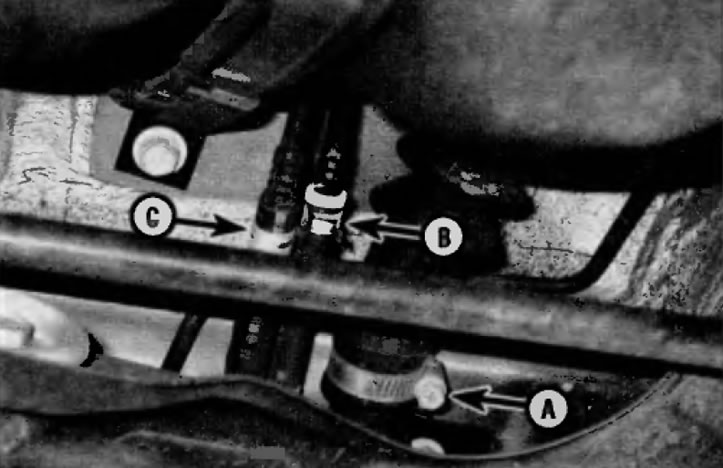
Ryas. 7.10. Loosen screw type clamp (A) and disconnect the filler hose from the filler pipe of the fuel tank, and then release the two spring-type clamps (B and C) and disconnect the two evaporative emission system hoses
11. Place a secure support under the fuel tank.
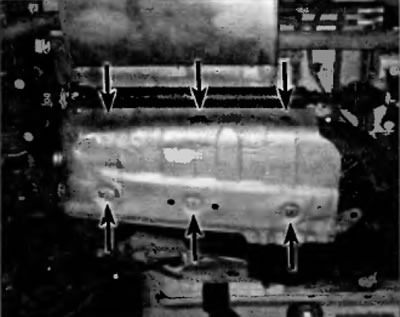
12. Turn out bolts of fixing collars of a fuel tank (pic. 7.12).
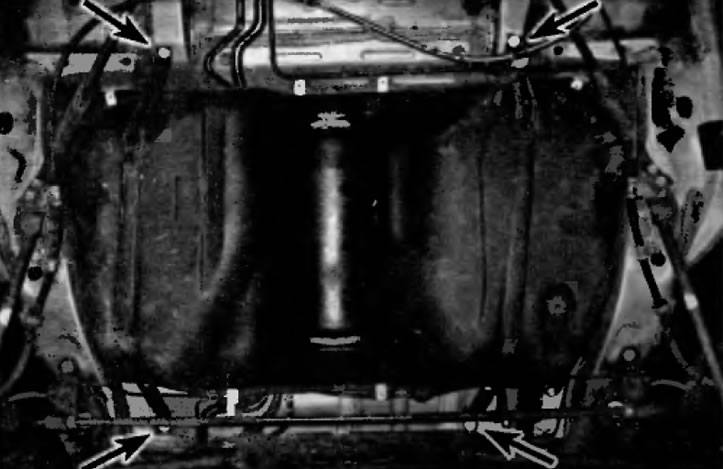
Pic. 7.12. To disconnect the fuel tank from the vehicle, align the four bolts of the fuel tank clamp (2 wheel drive model shown, 4 wheel drive model similar)
13. Gently lower the tank approximately 15 cm and make sure that all electrical wiring, fuel lines and fuel vapor recovery system hoses are disconnected.
14. Gently lower the fuel tank.
15. Installation is performed in the reverse order of removal. Tighten the fuel tank clamp bolts securely.