
Attention! Gasoline is highly flammable. Therefore, take precautions when working on any part of the fuel system. See warning in paragraph 2.
Application. The removal technology while the bathroom is here is from a typical pump used on 1999-2003 models. The pump used on 2004 and later models is slightly different.
1. Remove the back seat (see chapter 11).
2. Remove the cover of the technological hole in the floor to access the fuel pump in the block with the fuel gauge sensor (pic. 5.2).
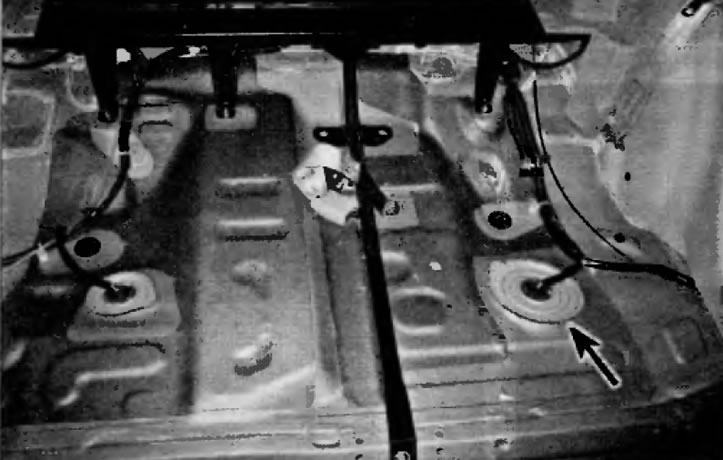
Pic. 5.2. To remove the cover from the technological hole in the floor, carefully pry it with a screwdriver
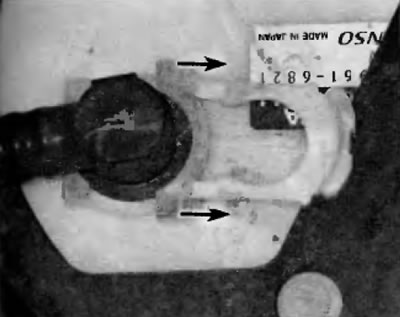
3. Disunite an electric socket of the fuel pump. To disconnect the electrical connector of the fuel pump in the block with the fuel gauge sensor, press the non-locking tab (since it is quite tight, you can use pliers with long jaws) and pull the connector (pic. 5.3).

Pic. 5.3. To disconnect the fuel pump electrical connector at the fuel gauge sensor assembly, press the locking tab not shown and pull the connector
4. Relieve the pressure in the fuel system (see paragraph 2) and remove the fuel tank cap.
5. Disconnect the ground wire from the battery (see paragraph 1 of chapter 5).
6. Disconnect the fuel supply line from the top of the fuel pump (pic. 5.6).
Pic. 5.6, a. To disconnect the fuel supply line fitting from the fuel pump outlet, remove this clip...
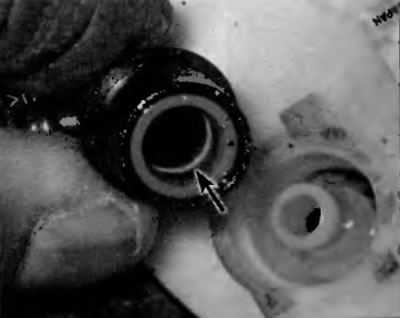
Pic. 5.6, 6....then wind the fitting straight up. Before mating the coupling, inspect the O-ring inside the coupling. If the ring is damaged, replace it
7. Turn out bolts (pic. 5.7) from the fuel pump support flange in the block with the fuel gauge sensor.
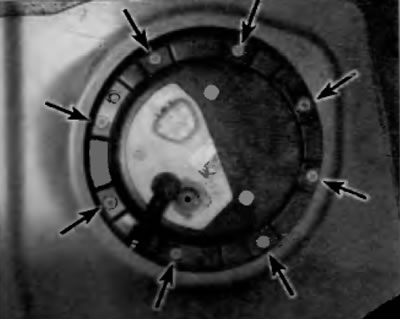
Pic. 5.7. To disconnect the fuel canopy support flange in the block with the fuel gauge sensor from the fuel tank, remove these bolts
8. Carefully remove the fuel pump in the block with the sensor from the fuel tank (pic. 5.8, a, b).
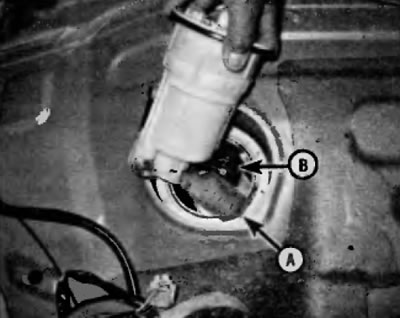
Pic. 5.8, a. Tilt the fuel pump in the block with the sensor, so as not to damage the strainer and fuel inlet (A) and sensor float (IN), carefully remove the pump in the block with the sensor from the fuel tank...
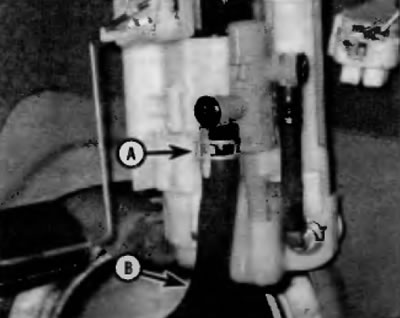
Pic. 5.8b....release and slide back the spring clamp (A) and disconnect the hose (8) from the bottom of the pump
9. Inspect the fuel pump inlet strainer for contamination. If it is dirty, try cleaning the filter screen with solvent and an old toothbrush. If the strainer is too dirty to be cleaned from the pump removal base, remove it from the pump (see paragraph 6) and try to clear again. If it fails, replace it.
10. Installation is carried out in the reverse order of removal.