
Attention! Gasoline is highly flammable. Therefore, additional precautions should be taken when working on any part of the fuel system. See warning in paragraph 2.
General Checks
1. Make sure there is enough fuel in the fuel tank.
2. Make sure the fuel pump is actually working. To do this, correct the assistant to turn on the ignition. You should hear a short crackling noise lasting approximately two seconds when the pump is turned on and the system pressure is connected.
Note. It is easy to listen to the operation of the fuel pump through the filler neck of the fuel tank.
If the fuel pump does not make a sound, check the EFI fuse and open circuit (C/OPN) or relay ER (and the fuse and relay are located in the engine compartment fuse and relay box) (pic. 3.2). If the fuse and relay are good, check the wiring harness to the fuel pump. If voltage is present at the fuel pump electrical connector for a couple of seconds when the ignition is turned on, the fuel pump is faulty. If there is no voltage, the PCM may be faulty. Have the vehicle checked by the dealer's maintenance department.
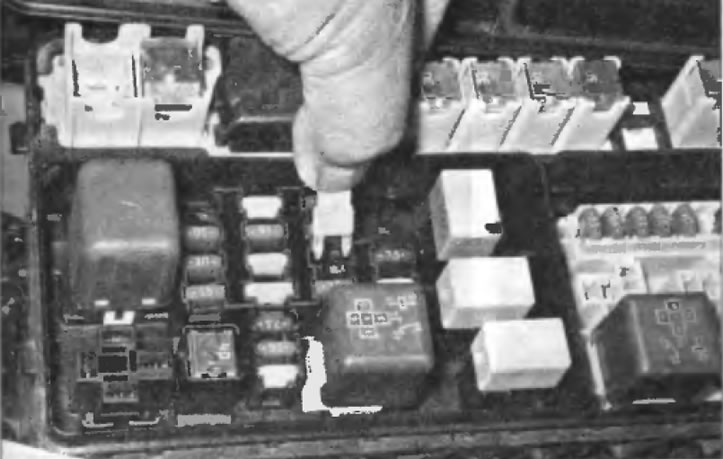
Pic. 3.2. EFI Fuse Location (2001 Highlander shown; for the location of the EFI fuse on a specific vehicle, look at the back of the fuse/relay box cover)
Fuel pump pressure test
3. Relieve pressure in the fuel system (see paragraph 2).
Models with a four-cylinder engine
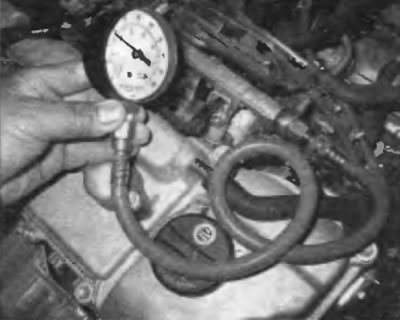
4. To check fuel pressure, you will need a liquid fuel pressure gauge rated to measure fuel pressure within the range specified in the Specifications at the beginning of this chapter, and a tee fitting that matches the inside diameter of the fuel hoses. Suitable oil pressure gauge included (pic. 3.4) can be purchased at many auto parts stores.
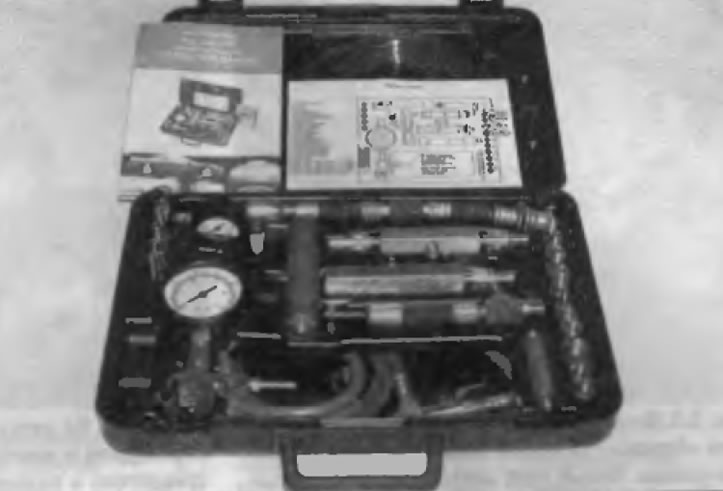
Pic. 3.4. This fuel pressure test kit, along with a liquid fuel gauge, contains all the necessary fittings and adapters needed to test fuel systems on most vehicles
5. Disconnect the fuel supply line from the fuel rail (If you are unfamiliar with the operation of the quick coupling, refer to paragraph 4), and then install a fuel pressure test kit between the fuel supply line and the fuel rail (pic. 3.5). Tighten the hose clamps securely.
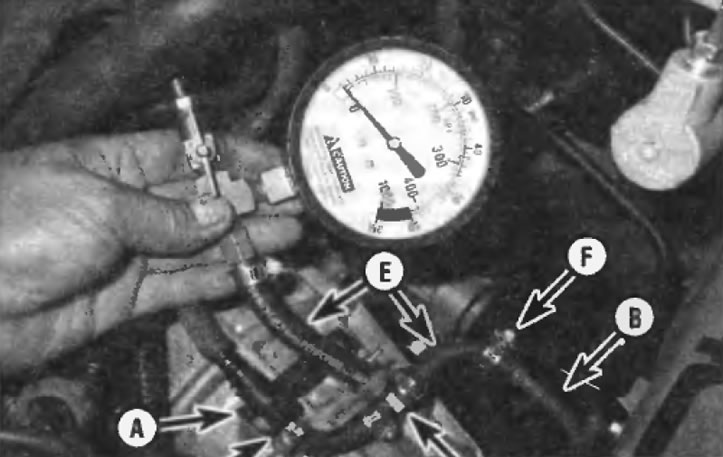
Pic. 3.5. On four-cylinder models, connect a pressure gauge to the fuel system between the fuel supply line and the fuel rail using a tee, a few short pieces of fuel hose, and a few clamps
A - Fuel rail quick fitting
B - Fuel supply line
C - Use a short piece of fuel supply line to connect (sold at many auto parts stores)
D - Tee
E - Use short lengths of fuel hose to connect an oil pressure gauge to the tee and a tee to the fuel supply line and quick fitting
F - Secure everything with clamps
Models with V6 engine
6. You will need a liquid fuel gauge to check fuel pressure. rated to measure fuel pressure within the range specified in the Specifications at the beginning of this chapter, a fuel pressure test hose and an adapter with the same diameter and thread pitch as the type «banjo» (hollow), which fixes the transverse pipeline located. Between two fuel rails (pic. 3.6).

Pic. 3.6. To check fuel pressure on V6 models, you will need a liquid fuel gauge, hose, and an adapter that threads into the same hole on the end of the front fuel rail as the union bolt type «banjo» (hollow), which secures the final pipeline between two fuel rails
7. Remove the engine cover (in the presence of) (see «Intake manifold - removal and installation» in chapter 2B).
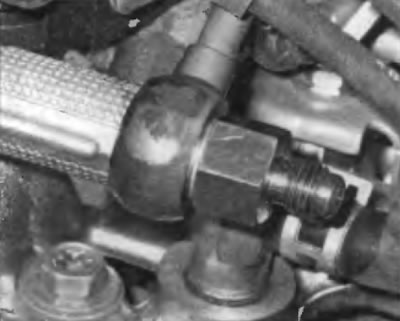
8. To connect the pressure gauge to the V6 engine, unscrew the bolt of the nipple connection type «banjo» (hollow) from the left end of the front fuel rail. The hollow bolt secures the cross piping to the left end of the front fuel rail and must remain on the fuel rail when performing this test (pic. 3.8).
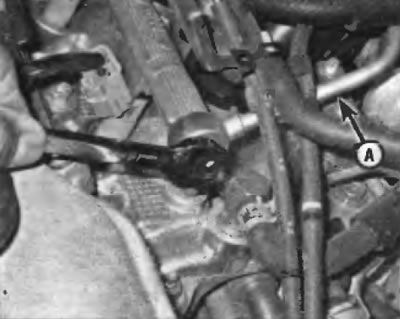
Pic. 3.8. Turn out a bolt of union connection of type «banjo» from the left end of the front fuel rail. Hollow bolt secures cross pipe (A) on the front fuel rail
9. Using two identical sealing washers on both sides of the type fitting «banjo», screw the adapter into the fuel rail instead of the hollow bolt, then connect the fuel pressure test hose to the adapter (pic. 3.9, a, b).
Pic. 3.9, a. On a V6 engine, screw the adapter into the front fuel rail (make sure there are sealing washers on both sides of type fittings «banjo»)
Pic. 3.9, b...then connect the fuel pressure test hose to the adapter
All models
10. Turn off all accessories and turn on the ignition. The fuel pump must operate for approximately two seconds to pressurize the system. Note the pressure gauge reading. After stopping the pump, the pressure must be maintained at a constant level. After five minutes, it must not fall below the minimum value specified in Specifications at the beginning of this chapter.
11. Start the engine and allow it to idle at normal operating temperature. The pressure must remain unchanged. If all pressure readings correspond to the values specified in Specifications at the beginning of this chapter, the system is working correctly.
12. If the fuel pressure is not correct, check the following points:
- A) If the pressure is higher than prescribed, replace the fuel pressure regulator (see paragraph 6).
- b) If the pressure is lower than prescribed, inspect the fuel line from the fuel tank to the fuel rail for kinks or pinches that are causing a reduction in capacity
- V) If the fuel lines are in good condition, inspect the fuel filter. Remove the fuel pump in the block with the fuel gauge sensor (see paragraph 5) and check the condition of the fuel filter (see paragraph 6)
- G) If the pressure is still low, it is most likely that the fuel pressure regulator or fuel pump is faulty. In this case, it is recommended to replace both the fuel pressure regulator and the fuel pump (see paragraphs 5 and 6).
- d) Another possible cause of low fuel pressure is the presence of a leak through the fuel injectors, but this usually causes a DTC to be generated and the Check engine light to turn on (check engine) (because the air-fuel mixture in this case would be too rich).
13. After completing the check, relieve the fuel pressure (see paragraph 2) and remove the gauge.
14. Connect the fuel supply line to the fuel rail (four-cylinder models) or cross pipe to front fuel rail (V6 models).
15. Start the engine and check for leaks.