
Removing
Remove the wheel drive shaft.
Clamp the drive shaft in a vise through wooden blocks.
Check the radial play of the CV joint, which indicates wear on the hinge parts. Check for smooth running over the full range of motion for each CV joint. If the protective boot has been torn, remove the CV joint, disassemble, clean and inspect it for damage due to loss of lubrication and possible contamination by foreign particles.
Use a small screwdriver to release the clamps, loosen the protective boot clamps and slide them along the shaft.
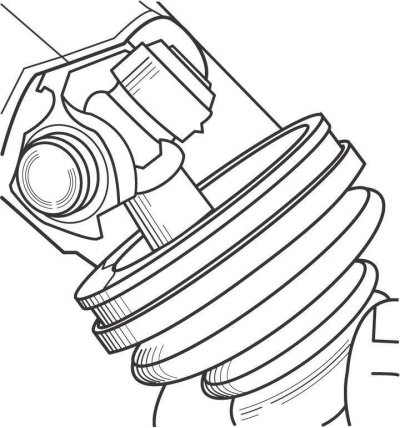
Pic. 10.5. Removing the protective cover from the inner CV joint type «tripoid»
Use a screwdriver blade to pry and slide the outer edge of the boot off the inner CV joint. If the protective cover is torn, cut it off. Remove the inner edge of the boot and slide it off the SHRUS type «tripoid» (pic. 10.5). The tripoid is a three-arm hinge, on each arm of which a hardened steel roller is fixed.
Mark the mutual position of the drive shaft and the tripoid with paint or a marker.
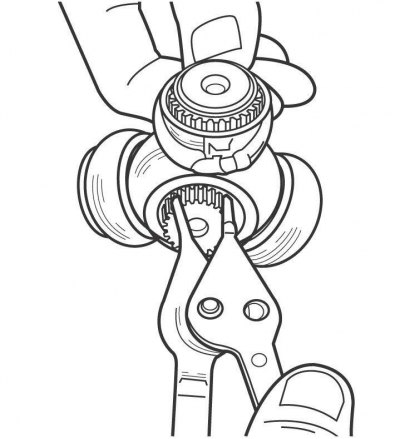
Pic. 10.6. Removing the snap ring that secures the tripoid to the shaft
Using a special tool, remove the snap ring that secures the tripod to the shaft (pic. 10.6).
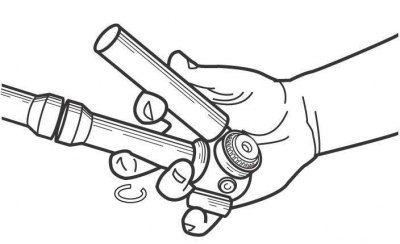
Pic. 10.7. Using a hammer and brass drift to remove the tripod from the drive shaft
Using a hammer through a brass drift, knock the tripoid off the drive shaft, being careful not to damage the shaft splines and tripoid rollers (pic. 10.7).
If work is being done on the right drive shaft, mark the location of the balancer and remove it. You may need to use a press to remove the balancer.
Examination
Clean all parts of the CV joint until the old grease is completely removed. Inspect the running surfaces of the tripod rollers for cracks, pitting, gouging, or other signs of wear.
If the inner CV joint is worn out, replace it.
If the outer CV joint is worn, it must be replaced along with the wheel drive shaft.
Installation
Wrap the splines of the inner end of the drive shaft with adhesive tape to avoid damaging the protective cover on the sharp edges of the shaft splines.
Slide the collar and protective cover over the drive shaft.
Install the tripoid on the splines of the drive shaft and secure it with a retaining ring. Lubricate the tripod and the inner surface of the hinge housing. Insert the hinge into the body and fill it with the rest of the grease.
Put a protective cover on the hinge, at the same time check that the seats of the cover are installed in the grooves intended for them.
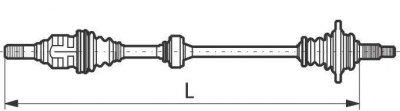
Pic. 10.8. Place of measuring the length of the drive shaft
Measure the length of the drive shaft, which must match the length given in the technical data (pic. 10.8).
Fasten the protective cover with clamps, having previously lifted the inner edge of the cover with a screwdriver to equalize the air pressure under the cover.
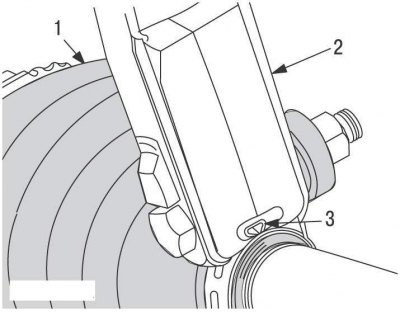
Pic. 10.9. Using a special tool for fastening the clamp: 1 - protective cover; 2 - special tool; 3 - clamp clamp
A special tool is required to secure the clamps (pic. 10.9). Place the jaws of the tool on the corners of the clamp clamp and tighten the jaws with the screw in this position.
Install the drive shaft to the vehicle.