



Caution! Wear safety glasses when bleeding the system. If liquid gets into your eye, rinse immediately with water and seek medical attention.
Note: Bleeding is necessary to remove all air from the system, which gets in whenever a tube, hose or cylinder is disconnected.
1. If air has entered the system due to an insufficient level in the reserve tank, disconnection of the tubes from the master brake cylinder or the ABS actuator, the entire system will have to be bled.
2. If the brake line was disconnected on only one wheel, then it is enough to bleed the caliper or wheel cylinder of that wheel.
3. If the brake line was disconnected between the master cylinder and any of the brake mechanisms, the entire system must be bled. Also, if the fluid level in the master cylinder reserve tank has dropped very low (or the tank has even dried out), or after replacing the master cylinder, the master brake cylinder must be bled as described in paragraph. 17 paragraph 8, and then bleed the rest of the hydraulic brake system.
4. Turn off the ignition and press the brake pedal several times to remove the vacuum from the brake booster.
5. Remove the cap of the reserve tank and fill it with brake fluid. Replace the cover.
Note: While bleeding, monitor the fluid level, gradually adding more fluid to the reservoir to prevent air bubbles from entering the master cylinder.
6. Invite an assistant, prepare fresh brake fluid, a transparent container partially filled with fluid, a piece of transparent hose that fits onto the bleed nipple, and an open-end wrench to unscrew it.
7. Start with the right rear wheel. After slightly loosening the nipple, tighten it so that it can be easily unscrewed.
8. After placing the key on the fitting, place the hose on it. Immerse the other end of the hose in a prepared container with liquid (see Figure 10.8).
The material is reprinted from an online resource: www.ToyotaMAN.ru
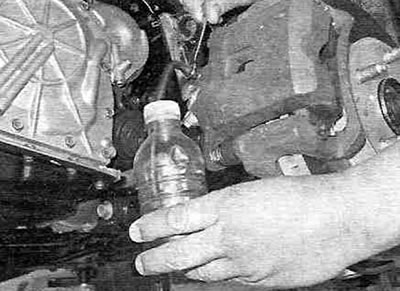
Figure 10.8. When bleeding the brakes, connect the hose to the bleed nipple of the caliper or wheel cylinder and then immerse it in a container with brake fluid - air bubbles can be seen in the container or transparent hose. All air must be removed before you can move on to the next wheel.
9. Ask an assistant to gently press the brake pedal and hold it firmly in this position.
10. Open the nipple just enough to release the air. Watch for bubbles coming out of the hose. After a couple of seconds, tighten the nipple and ask your assistant to smoothly release the pedal.
11. Repeat steps 9 and 10 until the bubbles stop coming out, then tighten the nipple. In the same order, perform the above procedure sequentially with all wheels. Regularly monitor the fluid level in the reserve tank.
12. Never do not pour old fluid into the tank. Brake fluid is extremely hygroscopic. Moisture from the air, when it gets into the liquid, lowers its boiling point, which can lead to brake failure.
13. After bleeding the system, pour the fluid into the master brake cylinder reservoir.
14. Check the operation of the brakes. With each press of the brake pedal (the engine is not working) it should become increasingly harder if you keep the pedal pressed, but it should not go to the floor. If necessary, repeat the procedure.
Caution! Do not operate the vehicle if the brake pedal "sinks," if the ABS or BRAKE warning light on the instrument panel does not go out, and/or if there is even the slightest doubt about the effectiveness of the braking system.