
Hub, steering knuckle and upper support of the car "Toyota 4-Runner/ Hilux/ Surf"
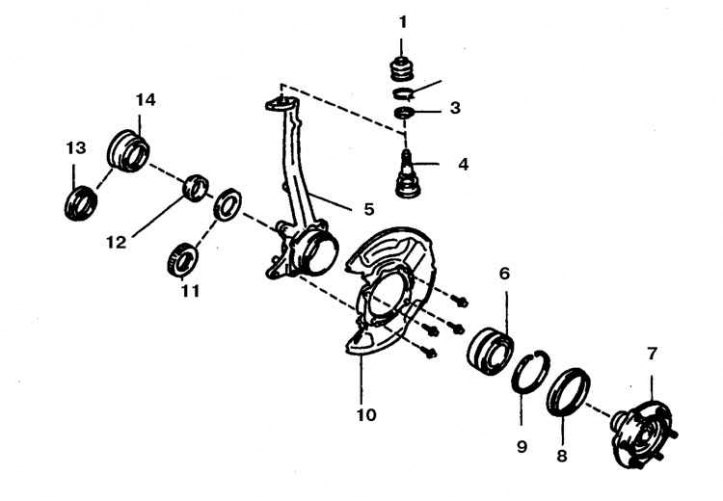
1. Case; 2. Collar; 3. Retaining ring; 4. Top support; 5. Fist; 6. Bearing; 7. Hub; 8. Oil seal; 9. Retaining ring; 10. Brake shield; 11. ABS system speed sensor; 12. Separating sleeve (for vehicles with ABS); 13. Oil seal (all-wheel drive vehicles); 14. Cap (rear wheel drive vehicles)
Lower vehicle support "Toyota 4-Runner/ Hilux/ Surf"

1. Bottom support; 2, 4. Cotter pin; 3. Tie rod; 5. Lower arm; 6. Fist
Checking the play in the lower ball joint
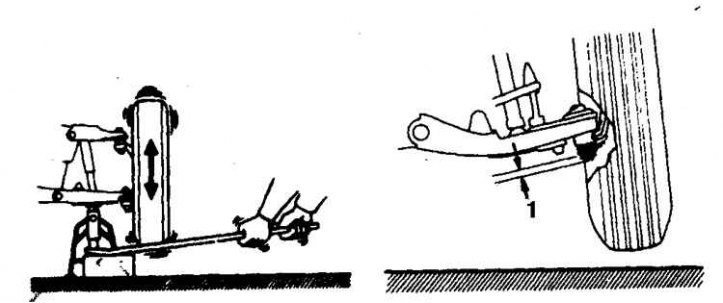
1. Not more than 2.3 mm
Examination
The condition of the ball joints should be checked each time the vehicle is lifted.
1. Raise the front of the car.
2. Clean the supports and check the condition of the seals.
3. Raise the vehicle by placing a jack under the lower control arm to relieve the support.
4. Shake the wheel with the mount while checking the play in the support (performed with an assistant). If the play is significant, then replace the support (see fig. Checking the play in the lower ball joint).
5. Rock the top support. Replace support if significant play is found.
6. The support should be checked each time the knuckle or supports are removed.
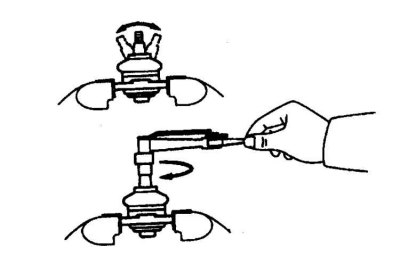
7. To check, try turning the support pin by hand.
8. If the finger turns by hand, replace the support.
9. The manufacturer recommends a more accurate method.
10. Swing the support pin away from you and towards you 5 times, then tighten the nut.
11. A torque wrench with a scale of several Nm. check the moment of resistance to turning the finger.
12. Turn the finger with the key, making 1 turn in 2-4 seconds. On the 5th revolution, check the torque reading and compare with the standard (see subsection 9.1).
13. If the moment differs from the norm, then replace the support.
Replacing the top support
1. Remove your fist.
2. Remove a collar, a cover and get a lock ring.
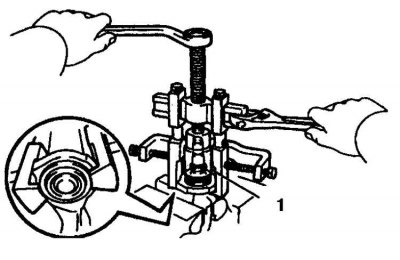
3. Press the support with a puller through the mandrel (1 - deep mandrel).
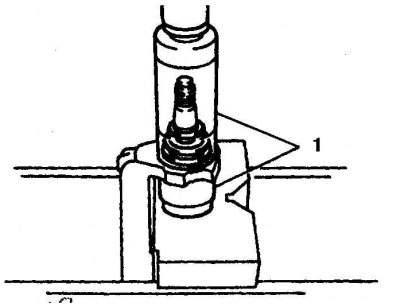
4. If the hinge itself is replaced, then press it in with a hydraulic press through 2 mandrels (1 - mandrel).
5. Further assembly is carried out in the reverse order.
6. Tighten all suspension mounts to the specified torque.
Replacing the bottom support
1. Disconnect the tie rod.
2. Disconnect the knuckle from the lower arm.
3. Turn away bolts and remove the bottom support.
4. Install a new support and tighten the bolts to the specified torque.
5. Further assembly is carried out in the reverse order.