
Headlights
Open the hood.
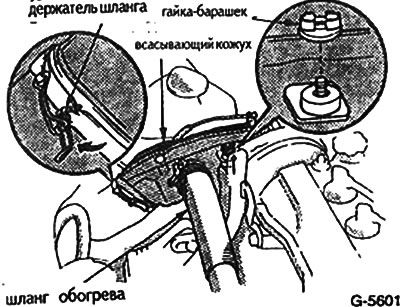
Only for vehicles with 105 hp engine: Loosen the wing nut of the intake port on the right headlight. Open the hose holder and pull the suction port upwards. In this case, it is necessary to remove the heating hose from the fitting of the exhaust manifold of the engine.
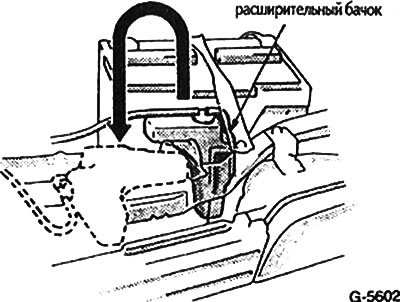
Only for vehicles from 5/87: Remove the coolant expansion tank on the left headlight upwards. Do not spill liquid while doing this. Do not place the reservoir on the engine or on the battery.
Disconnect the plug connection and remove the rubber cover.
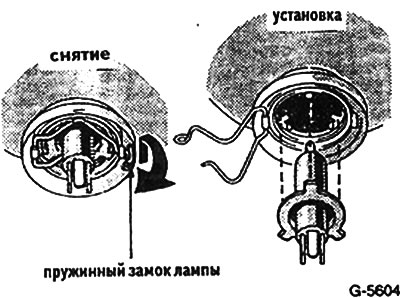
Open the spring lock of the lamp holder.
Remove the broken lamp.
Insert a new lamp so that the ears on its base fit into the corresponding grooves on the cartridge body.
Close the spring holder.
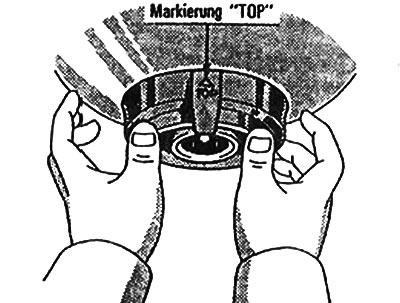
Install the rubber cover on the headlight. Inscription «TOR» on the lid should face up.
Connect the plug connection.
If the air filter hose and coolant expansion tank were removed, reinstall them.
Have the headlight adjustment checked by a specialist workshop.
Front parking light
Remove 1-3 screws (depending on the model) fixing the diffuser and remove the lamp.
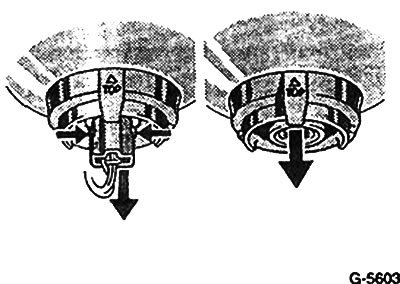
Unscrew the bulb socket to the left and remove it.
Remove the failed bulb from the socket. The lamp in the cartridge does not have a special mount.
Insert a new bulb and push it in slightly.
Insert the bulb with socket into the reflector and lock by turning to the right.
Side repeaters (All) and reversing lights of an all-wheel drive vehicle
Cars from 5/87 release: Remove, prying off the diffuser with a screwdriver. To protect the coating, place a gasket under the screwdriver. Unscrew the cartridge to the left side and remove the lamp. Install a new lamp and insert the cartridge into place. Install diffuser.
Vehicles up to 4/87 release: Unscrew the two fixing screws and remove the lens. Remove the lamp from the socket. Insert a new lamp. Fix the diffuser with screws.
Front direction indicators, fog lights
Loosen the diffuser mounting screws (For Liftback fog lamps from 5/87, remove the socket on the back of the headlight by turning it to the left).
Press the bulb lightly into the socket, turn it 90°to the left and remove it.
Insert a new bulb, press lightly and turn it to the right.
Install the diffuser and fix it with screws.
Rear lights
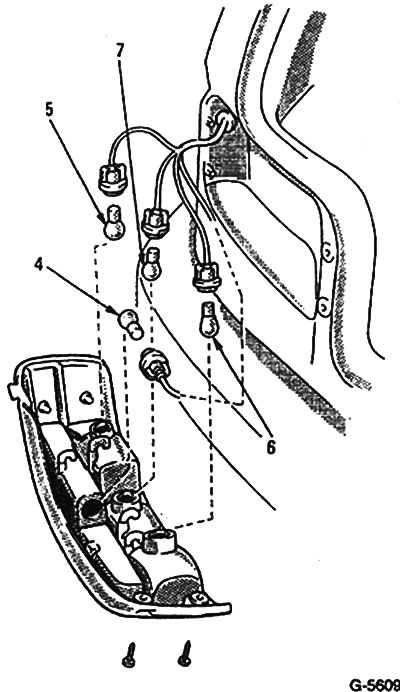
Compact model since 5/87
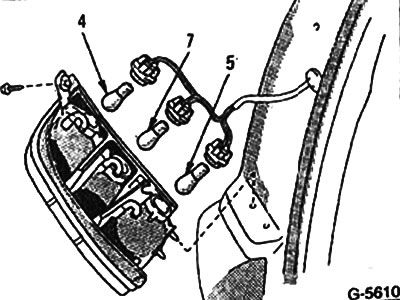
Combi model since 8/87
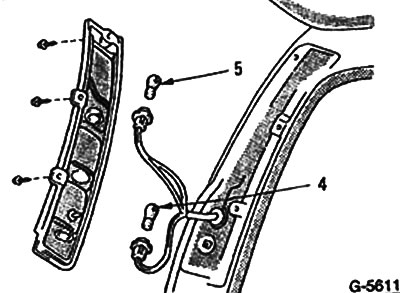
All-wheel drive model since 2/88 of release
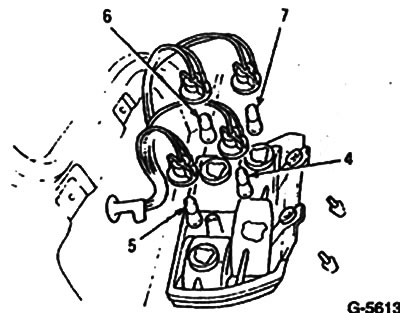
Compact model up to 4/87
Loosen the diffuser fixing screws and remove it.

Liftback model up to 4/87. Remove the cover in the luggage compartment.
Unscrew the cartridge from the rear wall to the left. Designations in the figures: 4 - turn signal, 5 - brake signal and rear light, 6 - fog light, 7 - reversing lamp.
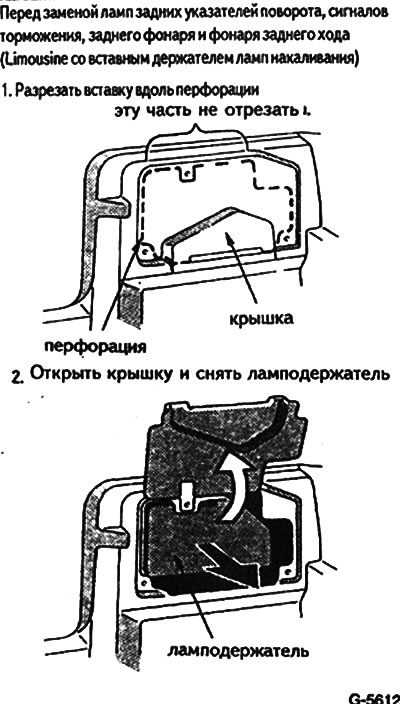
Only for Limousine since 5/87. When replacing the lamp for the first time, the cover must be cut along the perforation, see fig. G-5612.
Limousine and Liftback since 5/87. Remove the lamp holder from the rear wall of the lamp.
Slightly press the bulb into the holder, turn it 90°to the left and remove it.
Insert a new bulb, press lightly on it and turn to the right.
Collect the lantern.
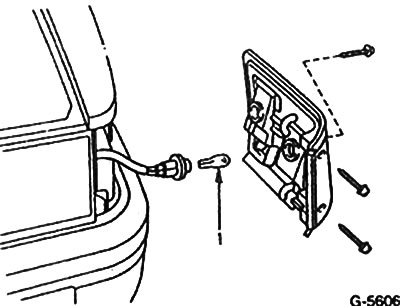
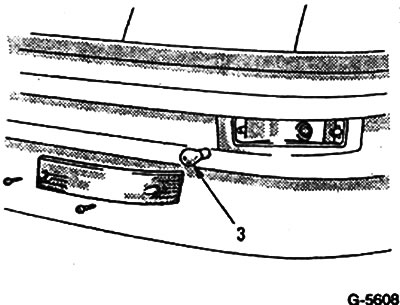
License plate light

Compact (All), Liftback from 5/87, Limousine up to 4/87 and Combi. Loosen the cover screws and remove the bulbs (8). Insert new lamps and replace the diffuser.
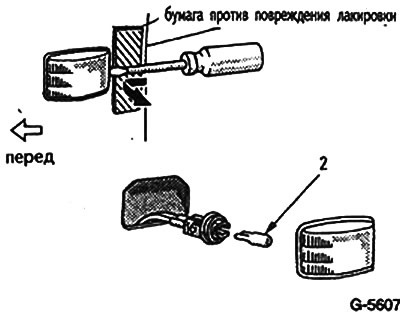
All wheel drive model. Install as described above, but additionally unscrew the cartridge.
All other models. Turn to the left to remove the cartridge from the rear wall of the lamp. Press the bulb lightly into the socket, turn it 90°to the left and remove it. Insert a new lamp. Slightly press on it and turn to the right. Fix cartridge. To get to the tailgate of the Liftback prior to 4/87, first remove the tailgate trim.