



Share information:
Clutch and drive shafts Corolla Verso 3 (AR10)

General information about the clutch
Fig. 3.1. Types of clutches installed on Corolla Verso vehicles The new Corolla Verso is equipped with a clutch with the following characteristics. A dry single-plate clutch is used. Clutch specifications correspond to...
Fig. 3.1. Types of clutches installed on Corolla Verso vehicles The new Corolla Verso is equipped with a clutch with the following characteristics. A dry single-plate clutch is used. Clutch specifications correspond to...

Clutch engagement sensor assembly, on-vehicle testing (C251/E358)
Checking the clutch engagement sensor Fig. 3.4. Clutch engagement sensor Make sure that the engine does not start when the clutch pedal is released. Make sure that the engine only starts when the clutch pedal is fully...
Checking the clutch engagement sensor Fig. 3.4. Clutch engagement sensor Make sure that the engine does not start when the clutch pedal is released. Make sure that the engine only starts when the clutch pedal is fully...

Replacing the clutch engagement sensor
Removal Disconnect the clutch engagement sensor connector. Fig. 3.6. Clutch engagement sensor mounting nut Loosen the nut and unscrew the clutch engagement sensor from the clutch pedal bracket (Fig. 3.6). Installation...
Removal Disconnect the clutch engagement sensor connector. Fig. 3.6. Clutch engagement sensor mounting nut Loosen the nut and unscrew the clutch engagement sensor from the clutch pedal bracket (Fig. 3.6). Installation...

Clutch pedal adjustment (C251 / E358)
Checking and adjusting the height of the clutch pedal Roll up the mat to reveal a sheet of sound-insulating bitumen mastic on the floor under the clutch pedal. Check the clutch pedal height. Height of the clutch pedal...
Checking and adjusting the height of the clutch pedal Roll up the mat to reveal a sheet of sound-insulating bitumen mastic on the floor under the clutch pedal. Check the clutch pedal height. Height of the clutch pedal...

Removal and installation the clutch pedal
Remove the instrument panel assembly. Disconnecting connectors Disconnect the clutch release sensor connector. On models with cruise control - disconnect the clutch pedal sensor connector. Remove the clutch spring....
Remove the instrument panel assembly. Disconnecting connectors Disconnect the clutch release sensor connector. On models with cruise control - disconnect the clutch pedal sensor connector. Remove the clutch spring....

Replacing the clutch master cylinder assembly (C251 / E358)
Fig. 3.22. Clutch master cylinder Remove the windshield wiper arm cover. Remove the left windshield wiper arm with blade assembly. Remove the right windshield wiper arm with blade assembly. Remove the seal from the...
Fig. 3.22. Clutch master cylinder Remove the windshield wiper arm cover. Remove the left windshield wiper arm with blade assembly. Remove the right windshield wiper arm with blade assembly. Remove the seal from the...
Disassembling the clutch slave cylinder assembly (C251 / E358)
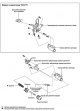
Fig. 3.25. Clutch slave cylinder components Remove the battery (models with 1CD-FTV engine). Remove air duct #1 (models with 1CD-FTV engine). Disconnecting the tube connecting the clutch slave cylinder to the hose...
Fig. 3.25. Clutch slave cylinder components Remove the battery (models with 1CD-FTV engine). Remove air duct #1 (models with 1CD-FTV engine). Disconnecting the tube connecting the clutch slave cylinder to the hose...

Replacing the Clutch Drive Assembly (C251A)
Fig. 3.30. Clutch drive assembly (C251 A) The clutch drive assembly (C251 A) is shown in Fig. 3.30. Disconnect the negative terminal from the battery post. Removal the clutch drive assembly Fig. 3.31. Clutch travel...
Fig. 3.30. Clutch drive assembly (C251 A) The clutch drive assembly (C251 A) is shown in Fig. 3.30. Disconnect the negative terminal from the battery post. Removal the clutch drive assembly Fig. 3.31. Clutch travel...

Replacing the clutch travel sensor (C251A)
Fig. 3.37. Location of the clutch travel sensor Disconnect the negative terminal from the battery post. Removal the clutch travel sensor Fig. 3.38. Clutch travel sensor connector Disconnect the clutch travel sensor...
Fig. 3.37. Location of the clutch travel sensor Disconnect the negative terminal from the battery post. Removal the clutch travel sensor Fig. 3.38. Clutch travel sensor connector Disconnect the clutch travel sensor...

Replacing the clutch drive hydraulic accumulator assembly (E358)
Fig. 3.41. Clutch drive hydraulic accumulator Remove the battery. Remove air duct #1. Removal Disconnect the wiring harness mounting bracket. Using the special tool SST, disconnect the 2 tubes connecting to the hoses....
Fig. 3.41. Clutch drive hydraulic accumulator Remove the battery. Remove air duct #1. Removal Disconnect the wiring harness mounting bracket. Using the special tool SST, disconnect the 2 tubes connecting to the hoses....

Disassembling, checking and assembling the clutch
Remove the manual transmission in the block with the main gear. Fig. 3.42. Clutch components Removal the clutch release fork Fig. 3.43. Removing the clutch release fork Remove the clutch release fork with the clutch...
Remove the manual transmission in the block with the main gear. Fig. 3.42. Clutch components Removal the clutch release fork Fig. 3.43. Removing the clutch release fork Remove the clutch release fork with the clutch...

Procedures for checking drive shafts on a vehicle
Fig. 3.94. Front drive shaft parts Checking the play of the front axle wheel bearings Fig. 3.95. Checking the play of the front axle wheel bearings Using a dial indicator, measure the play near the center of the wheel...
Fig. 3.94. Front drive shaft parts Checking the play of the front axle wheel bearings Fig. 3.95. Checking the play of the front axle wheel bearings Using a dial indicator, measure the play near the center of the wheel...

Disassembly and repair of the front wheel drive
Caution! Do not disassemble the outer hinge Disassembly Drain the automatic transmission fluid (automatic transmission). Drain the oil from the manual transmission in the block with the main gear (manual transmission)....
Caution! Do not disassemble the outer hinge Disassembly Drain the automatic transmission fluid (automatic transmission). Drain the oil from the manual transmission in the block with the main gear (manual transmission)....
This section is available on: russian, bulgarian, belarusian, ukrainian, serbian, croatian, romanian, polish, slovak, hungarian
Similar sections for other Toyota models
➥ Clutch and drive shafts Toyota RAV 4 XA20 (2000-2005)
➥ Clutch Toyota 4Runner N120 (1989-1995)
➥ Clutch Toyota Dyna Y50/Y60 (1984-1995)
➥ Clutch and cardan Toyota Camry Vista V40 (1994-1998)
➥ Clutch Toyota Corona T190 (1992-1997)
➥ Clutch Toyota Carina T170 (1988-1992)
Link in different formats to this article
TEXTHTMLBB Code
- General information
- User manual
- Start of movement
- Faults en route
- Maintenance
- Power unit
- Engine repair
- Lubrication system
- Cooling system
- Ignition system
- Supply system
- Fuel supply (carburetor)
- Fuel supply (injector)
- Diesel engine
- Exhaust system
- Transmission
- Clutch
- Manual gearbox
- Automatic gearbox
- Chassis, running gear
- Front suspension
- Rear suspension
- Steering
- Brake system
- Wheels and tires
- Body and interior
- Exterior (external elements)
- Interior (internal elements)
- Interior heating
- Electrical equipment
- Equipment and devices
- Power devices
- Lighting system
- Glass cleaners and washers
- General information
- User manual
- Power unit
- Petrol engines 1ZZ, 3ZZ
- Diesel engines 1СD-FTV
- Cooling system
- Lubrication system
- Fuel system
- Control system
- Exhaust system
- Transmission
- Clutch and drive shafts
- Mechanical gearbox
- Chassis, running gear
- Car suspension
- Steering
- Brake system
- Body and interior
- Exterior (external elements)
- Electrical equipment
- Power devices
- Electrical circuits